Audience: on-site check-in staff. Applies to: events using the Delekit check-in app.
Use the device's camera to scan the QR code on an attendee's e-ticket or badge and check them into a session. Each scan is checked with Delekit straight away, and saved on the device if the connection drops.
Before you start
- You're signed in to the app, and the event's sessions have downloaded.
- The device needs a rear camera. The app also needs NFC, even for QR scanning.
Scan a ticket
In the sessions list, select the session you're checking people into.
On the toolbar, select QR Scan.
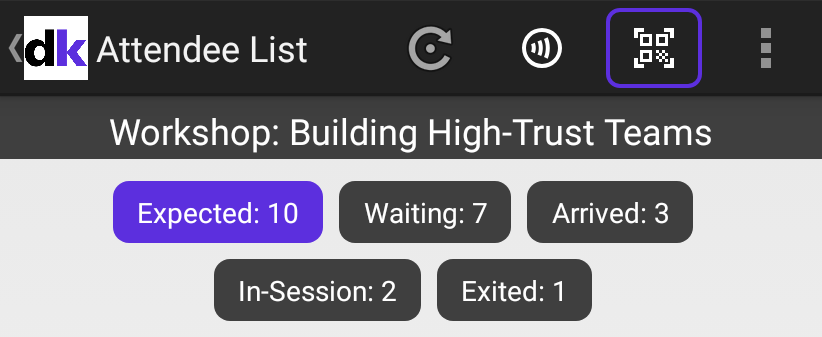
The first time, select Allow when Android asks to use the camera.
Hold the QR code in front of the camera. Scanning stops as soon as a code is read.
Check the result. Valid Scan means the attendee is checked in.
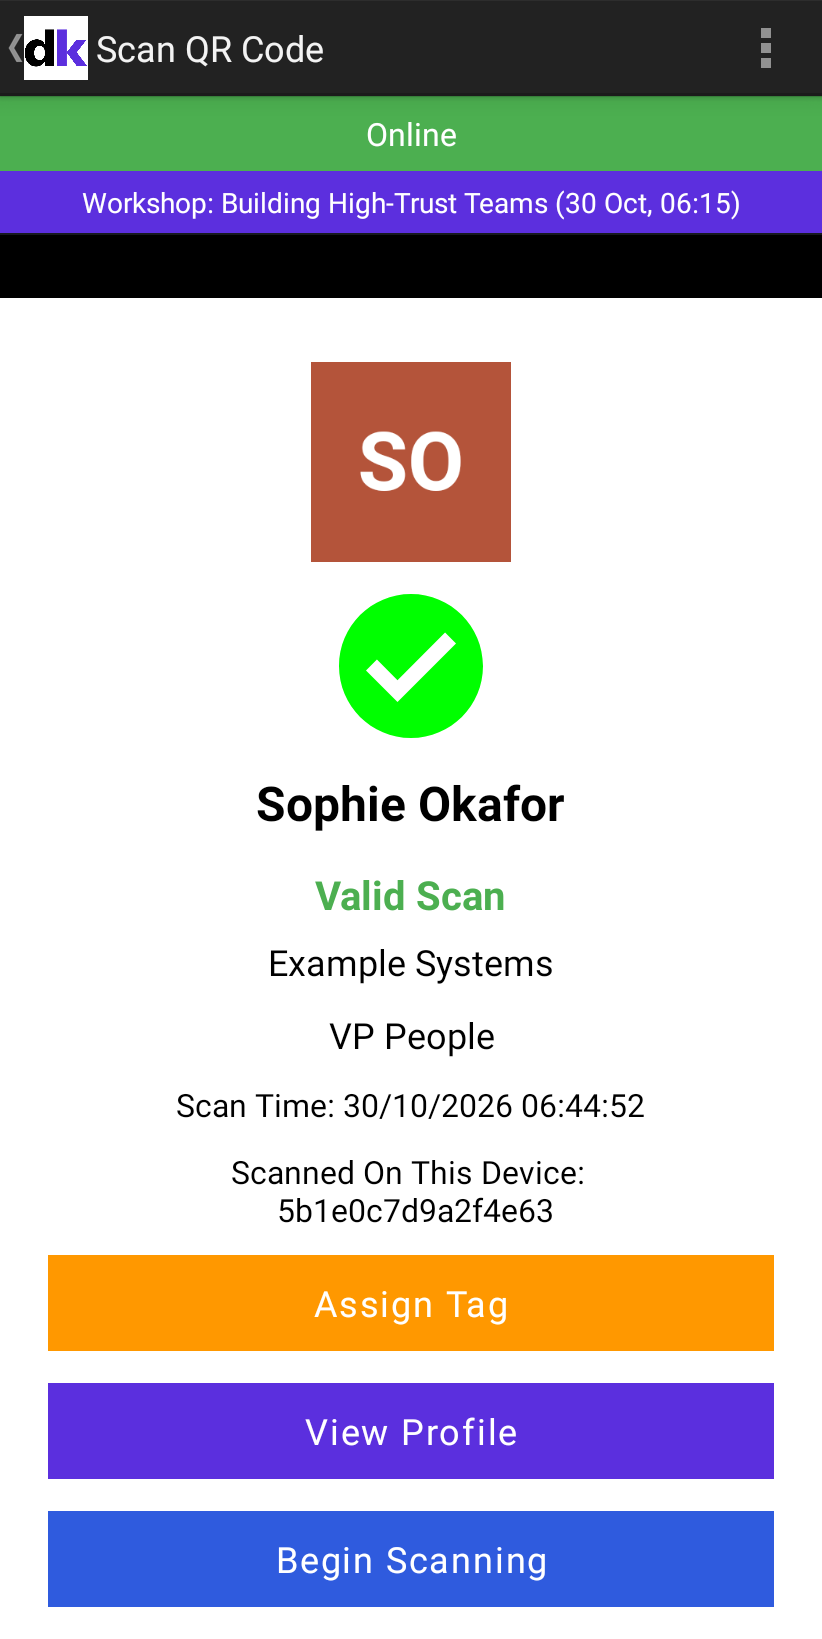
Select Begin Scanning to scan the next person.
What happens next
The attendee moves to In-Session on the session's attendee list.
Already Scanned shows the time of the first scan, and whether it was made on this device or another one.
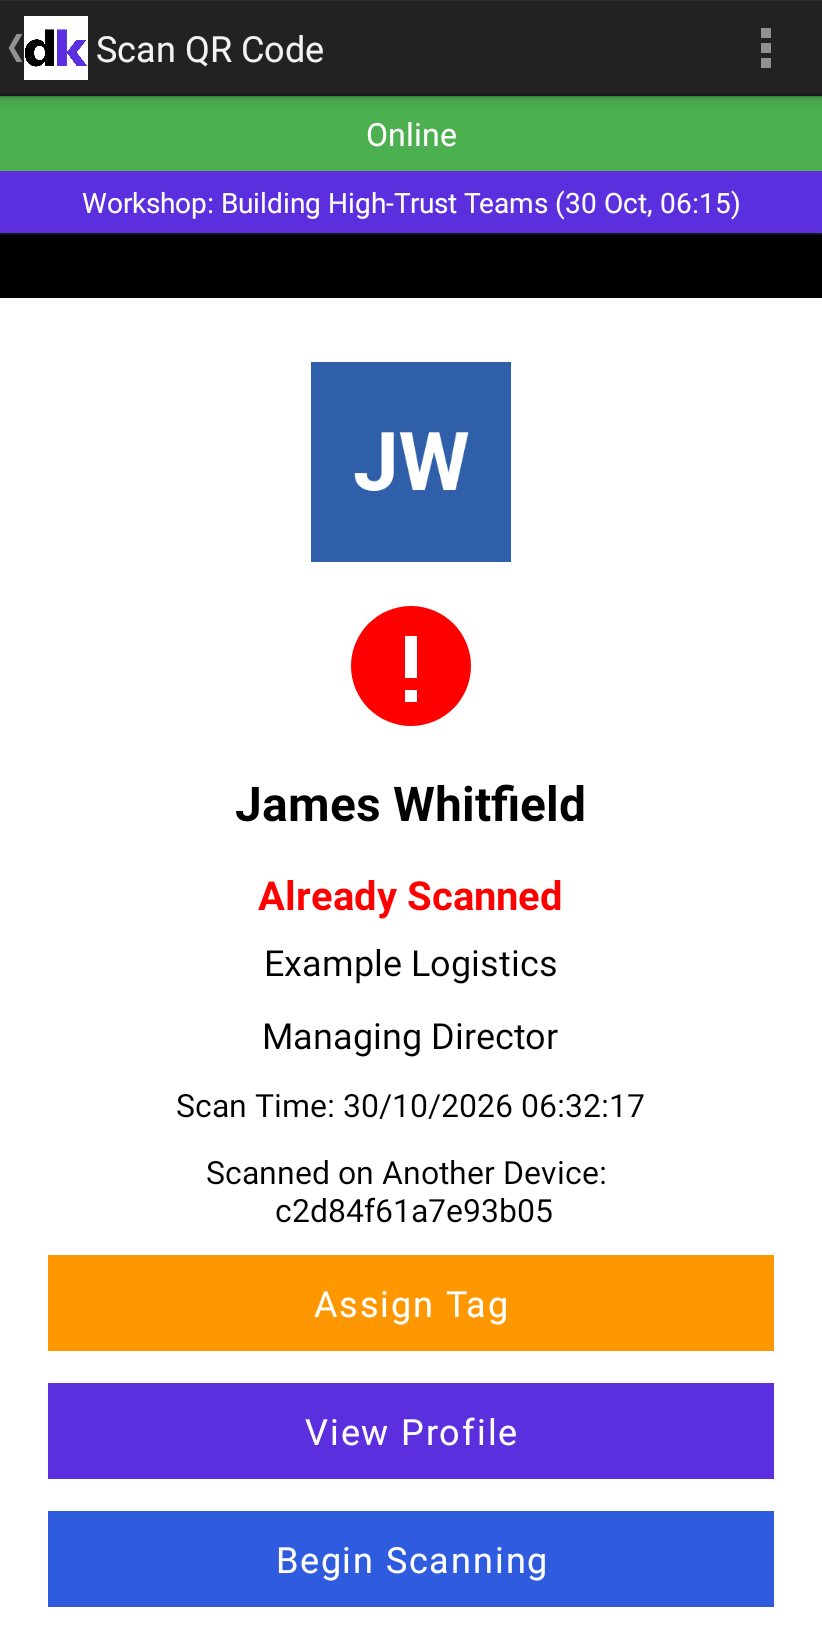
To see the attendee's details, select View Profile.
If something isn't right
- The code won't read in low light: in the menu, select Flash On.
- Ticket not found for someone wearing a wristband: giving someone a wristband replaces the ID in their e-ticket, so the old QR code stops working. Scan the wristband instead.
- Not yet synced — please sync and rescan: on the toolbar, select the refresh icon, wait for it to finish, then scan again.
- Offline shows on the scan screen: keep scanning. Scans are saved on the device and sent when it reconnects.
Related articles
- Check-in app scan messages
- Scan wristbands, badges and cards
- Let in someone who isn't booked on a session
Still stuck? Contact Delekit support.
Was this article helpful?
That’s Great!
Thank you for your feedback
Sorry! We couldn't be helpful
Thank you for your feedback
Feedback sent
We appreciate your effort and will try to fix the article