Audience: client administrators and event administrators. Applies to: plans that include the registration form builder. If the Website items show a padlock in the menu, they aren't in your plan.
Check your event website page by page, then publish it from Website › Settings so people can visit it and register. Publishing the first time puts every page, the header, the footer and the menu online together, and gives you the web address to share.
Before you start
- Build the pages you need first, including a home page: see Build a page with the page builder.
- Choose the web address before you publish. Under Domain, the Delekit slug is the part of the address made from your event's name. Changing it after you publish breaks links you've already shared. To use your own domain, see Use your own domain for your event site.
- Not ready to be found? Under SEO, turn on Discourage search engines until you announce the event.
Preview your pages
- In the menu, select Website, then Pages.
- Select Build on a page.
- Select Preview. The page opens in a new tab with its latest changes, as visitors will see it.
Publish the website
In the menu, select Website, then Settings.
Under Site and publishing, check the Status: Draft: not published yet. To see the site first, select Preview site: its home page opens in a new tab with the latest changes.
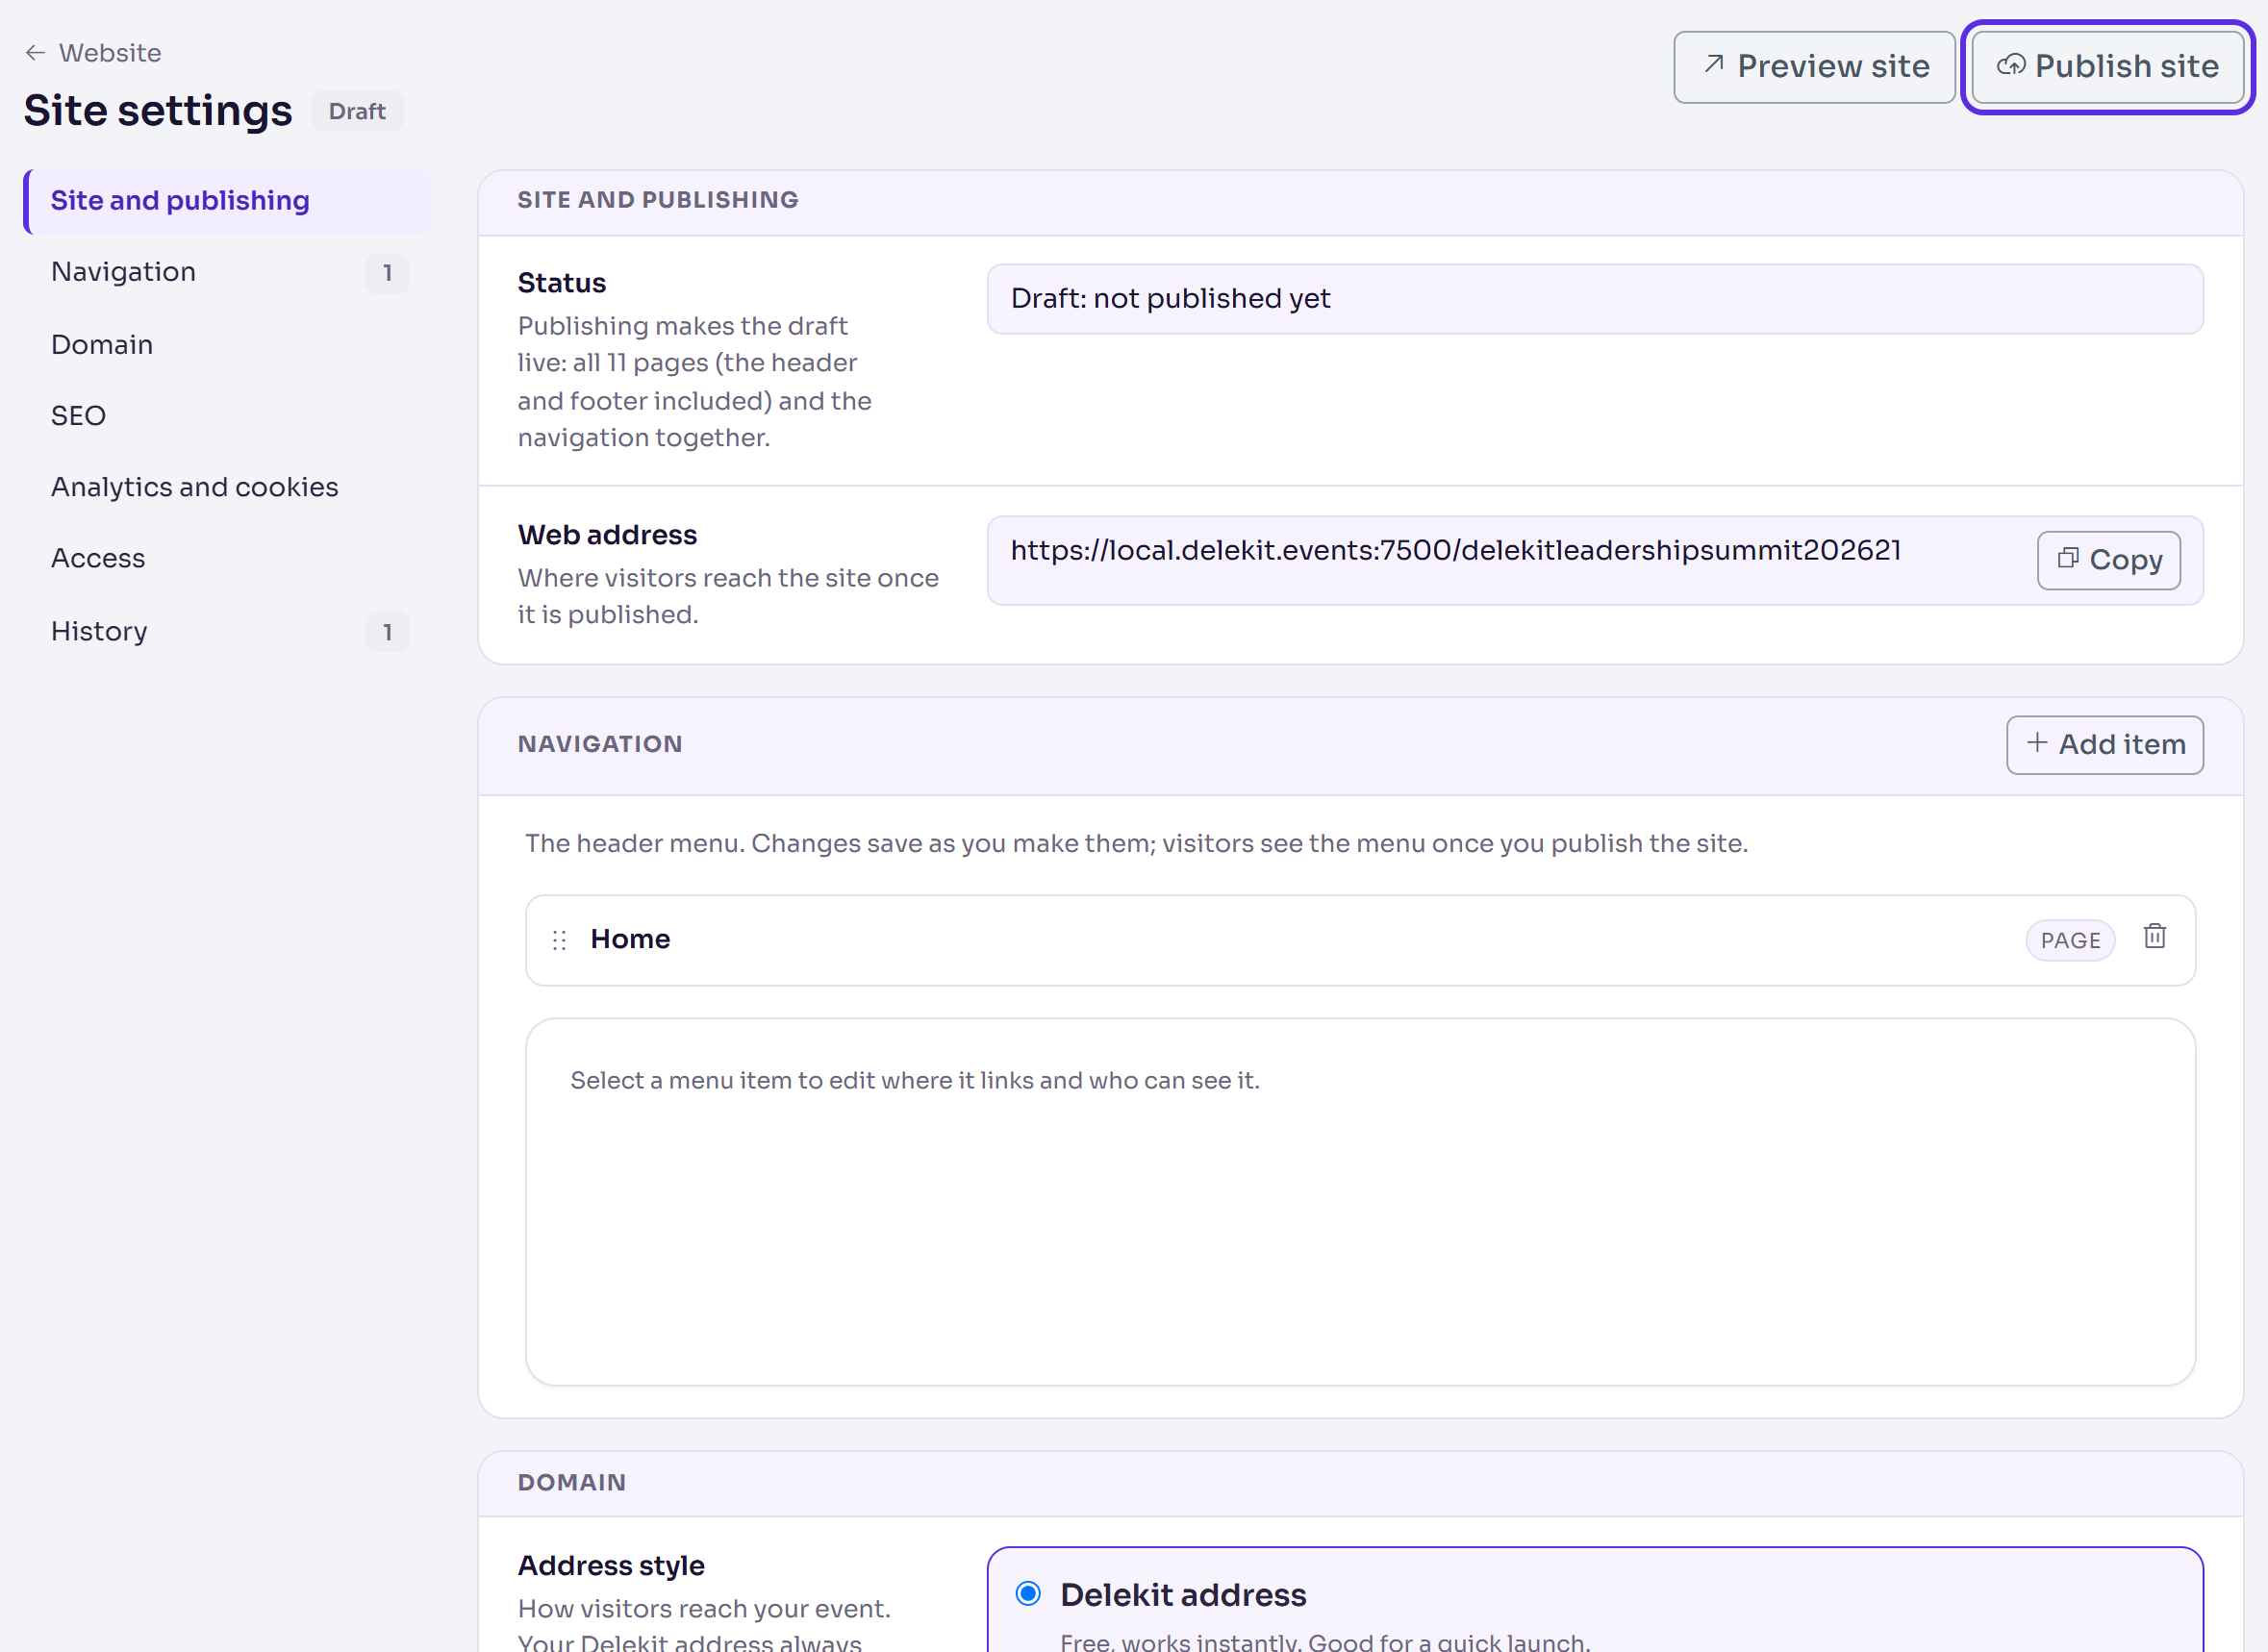
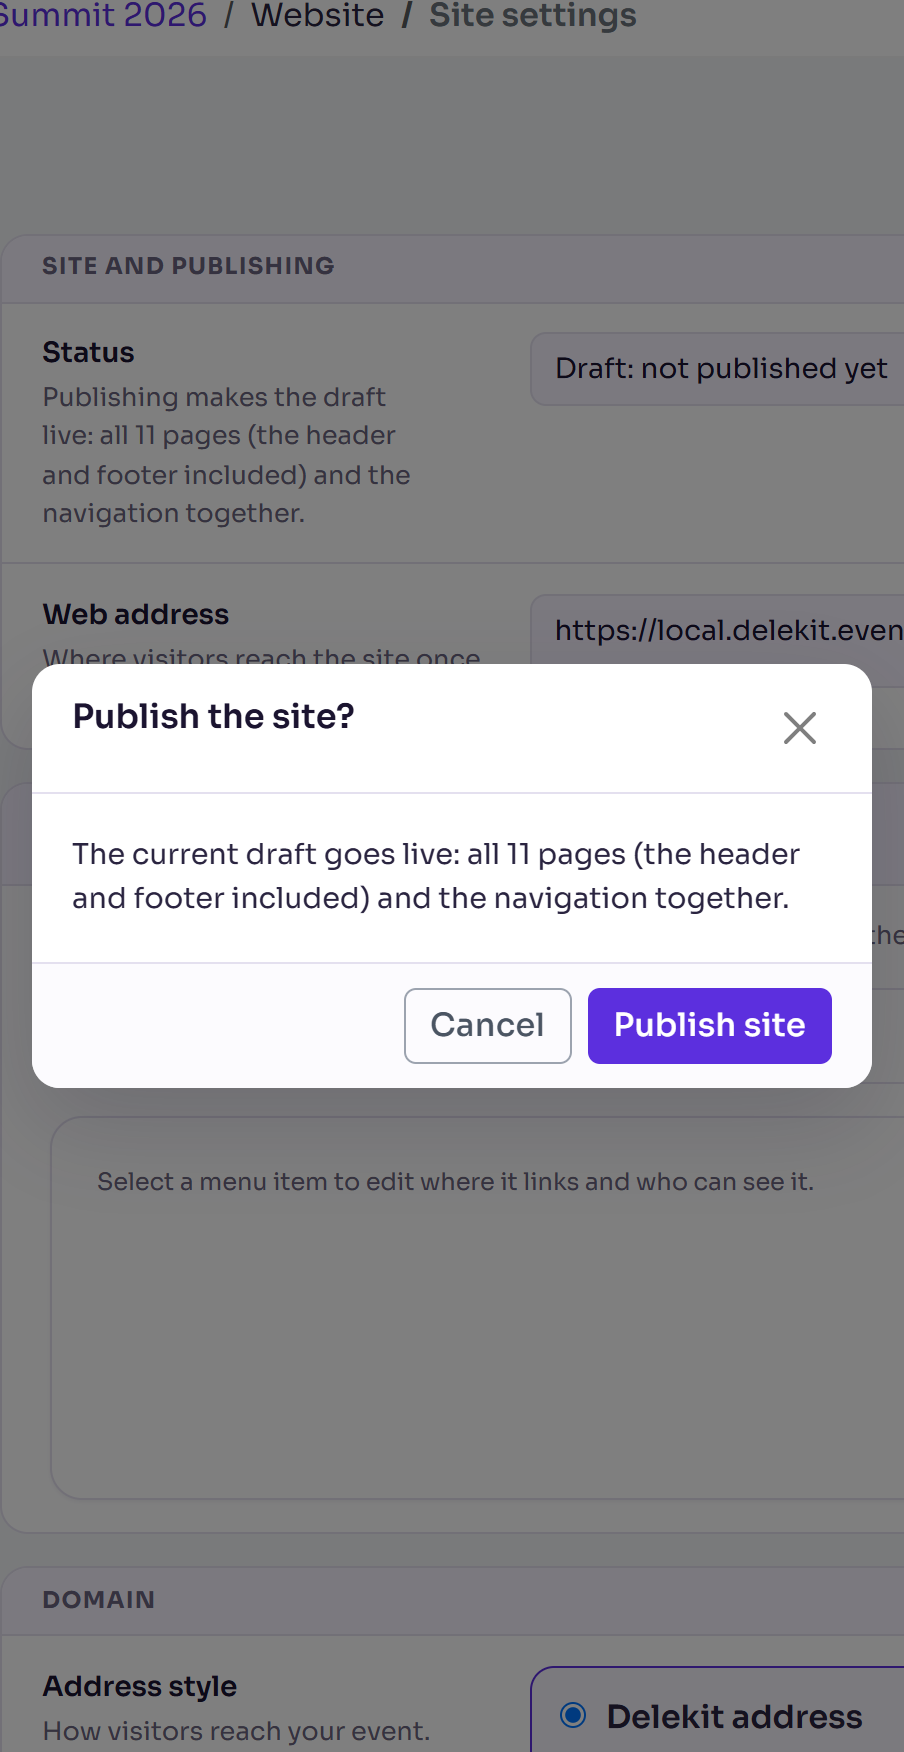
Select Publish site. The pop-up says how many pages go live: every page, including the header, the footer and the pages people see after registering.
Select Publish site again to confirm.
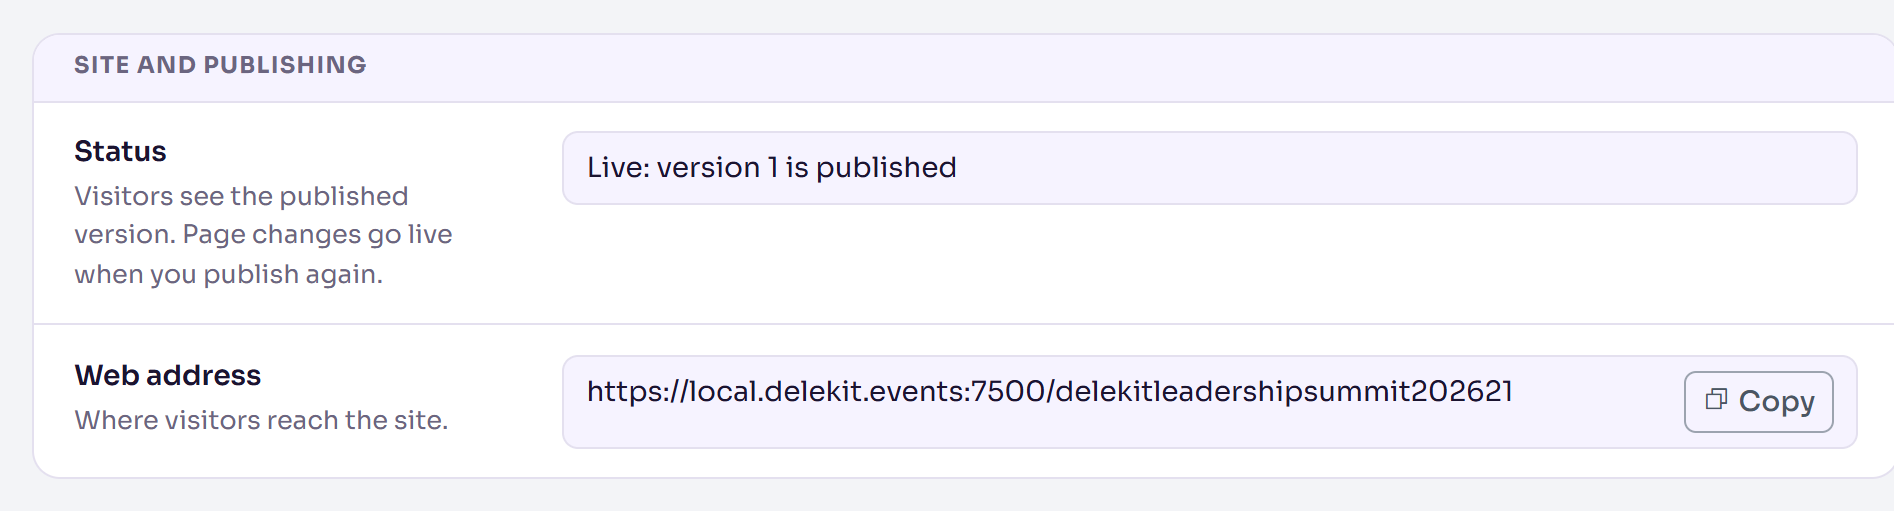
You'll see Site published. The badge changes to Live, and the Status says which version is published.
What happens next
- The Web address is where visitors reach the site. Select Copy to share it.
- Preview site now opens the live site in a new tab.
- Later changes to a page go live when you select Publish page in the page builder. To put every page's changes live at once, select More actions (⋯), then Publish site in the page builder.
- Theme changes go live when you publish the theme: see Brand your website with a theme.
- To take the site offline, select More actions (⋯), then Unpublish site, in Site settings. Links to it stop working until you publish again.
Check it works
Open the web address in a private browser window, where you aren't signed in. You should see your home page. In Website › Pages, each page's Status now says Published.
If something isn't right
- "Nothing was published. Fix these pages first: …" The message names the pages with a problem. Open each one in the page builder, fix it, then publish again. Nothing goes live until every page can.
- The web address shows the Register page, not your home page: the site has no page with Home page as its Page type. Add one, then publish it.
- A page is missing from the live site: it hasn't been published, or it was unpublished. Open it in the page builder and select Publish page.
Related articles
- Your event website: an overview
- Build a page with the page builder
- Make registration public, invite-only or password-protected
- Use your own domain for your event site
Still stuck? Contact Delekit support.
Was this article helpful?
That’s Great!
Thank you for your feedback
Sorry! We couldn't be helpful
Thank you for your feedback
Feedback sent
We appreciate your effort and will try to fix the article