Audience: client administrators and event administrators. Applies to: plans that include the registration form builder. If the Website items show a padlock in the menu, they aren't in your plan.
A theme sets how every page of your event website looks: its colours, fonts, logos, buttons and form fields. Change it in the theme builder, check the preview, then publish it. Until you publish, your changes are a draft that visitors don't see.
Before you start
- Have your brand colours as hex codes, such as
#5C2FDE, and your logo as an image file: one for light backgrounds and, if you have it, one for dark. - What goes in the header and footer (the menu, links and contact details) is built in the page builder, not the theme. See Edit the header, footer and navigation menu.
Set your colours, fonts and logo
In the menu, select Website, then Theme. The theme builder opens on Brand, with a preview of your site.
Enter your main colour as the Primary colour, or select its swatch to pick one. Then enter the Secondary colour.
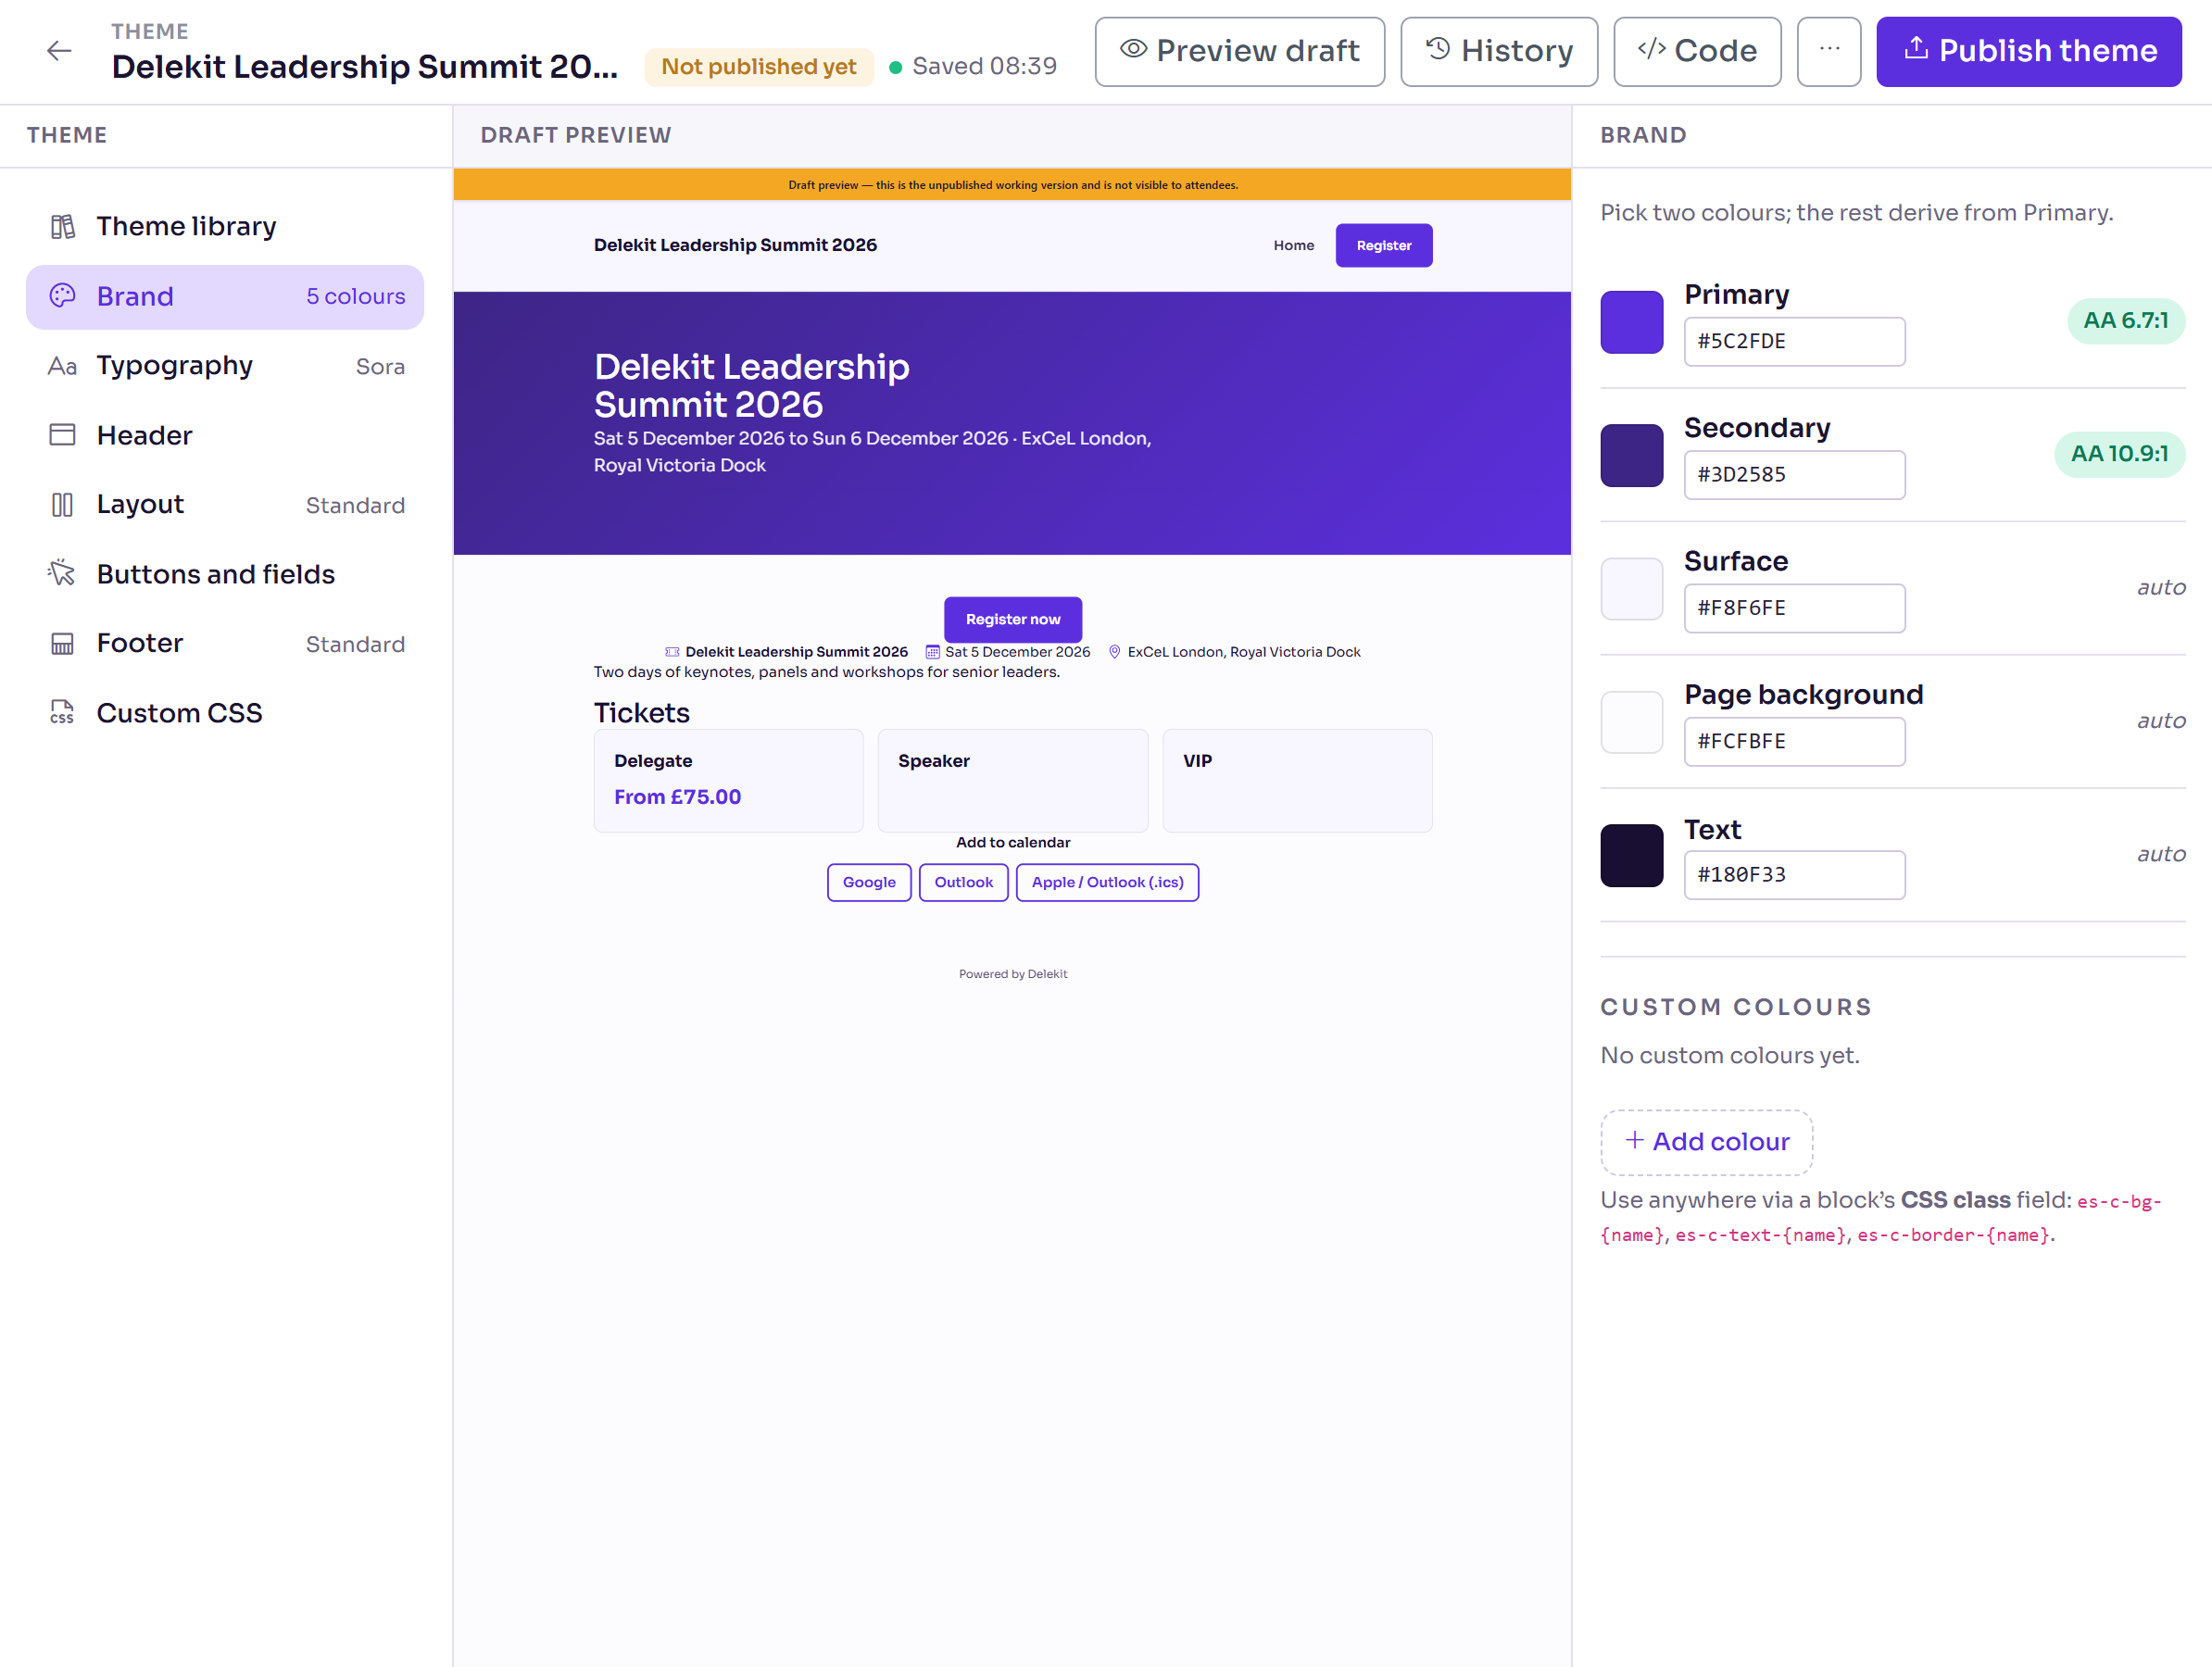
Check the badge on the Primary and Secondary rows. It shows AA and the contrast ratio when text in that colour is easy to read on the page.
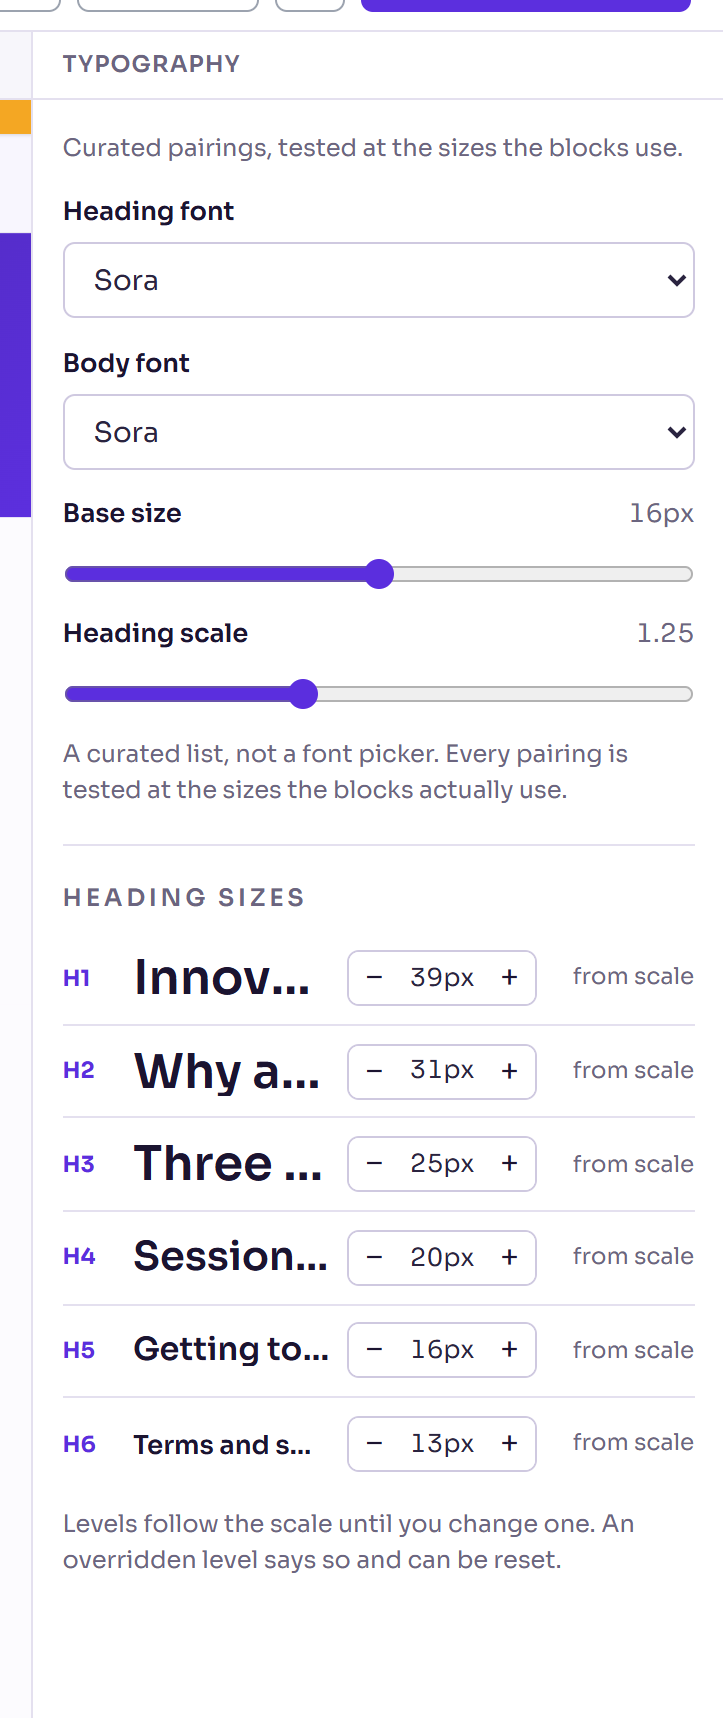
Select Typography and choose the Heading font and Body font. Change the Base size and Heading scale if you like.
Select Header. Under Logo, select Upload for Logo on light, and choose your logo file. Add a Logo on dark and a Favicon the same way.
Look through Layout (how wide content runs), Buttons and fields (Button style, Corners, Form fields) and Footer, and change anything you need.
Surface, Page background and Text follow your Primary colour until you set them yourself; select reset to make one follow it again.
Publish the theme
Select Publish theme.
Select Publish version n to confirm.
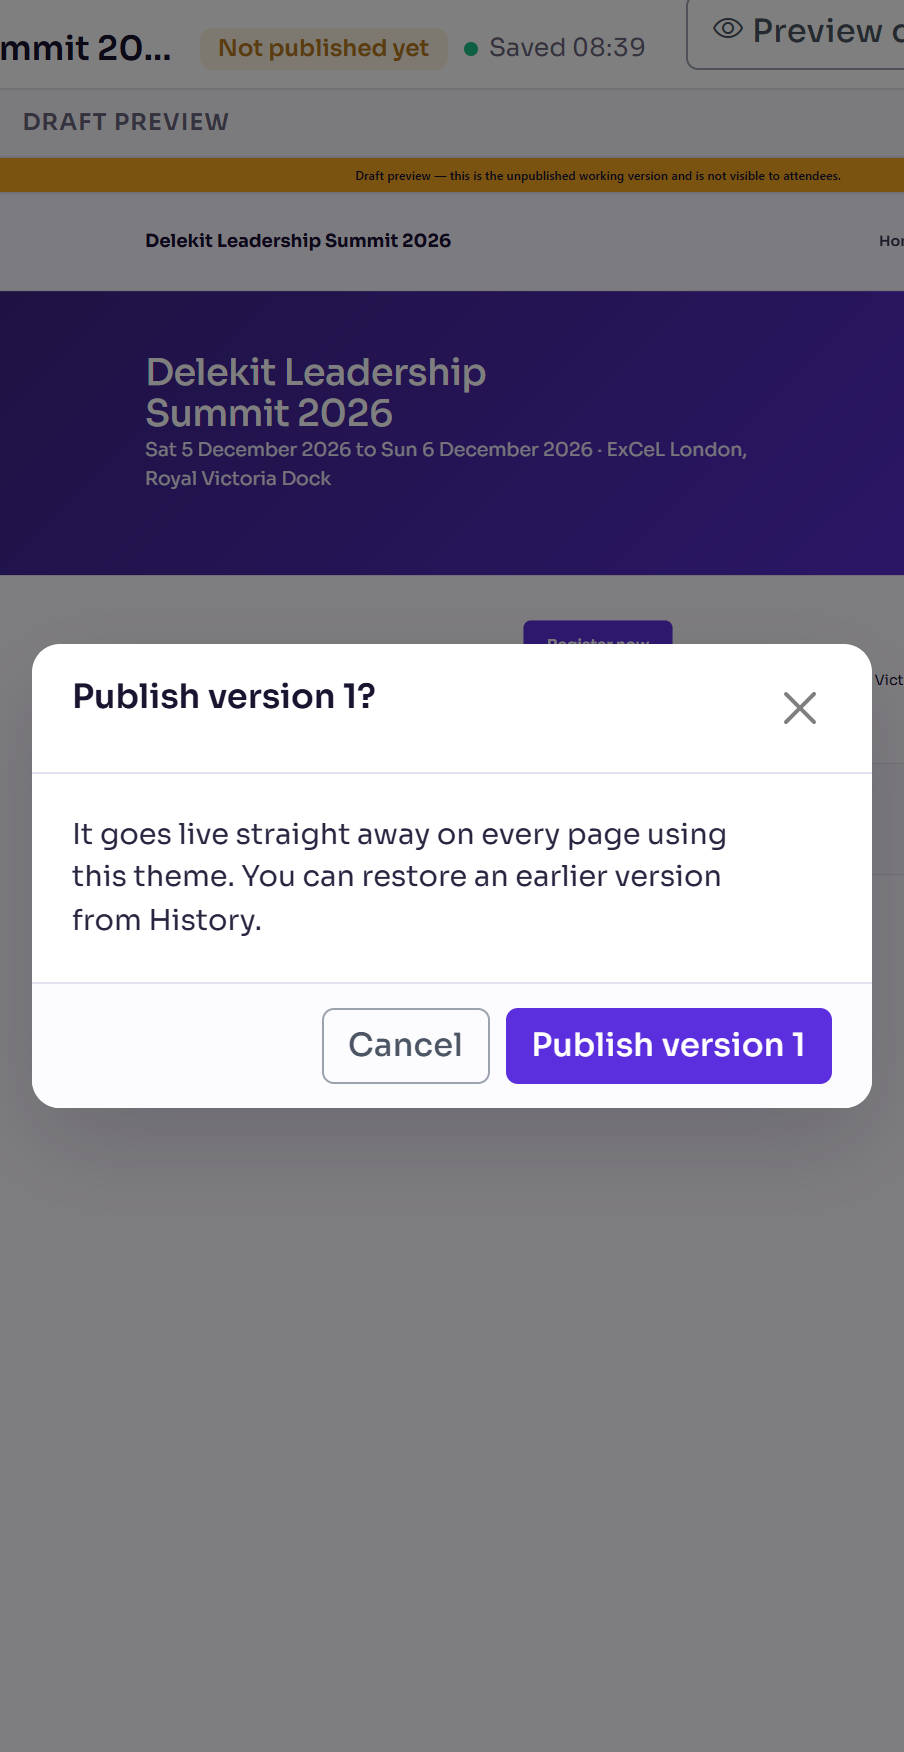
You'll see Version n published.
What happens next
- Every change saves as you make it, as the theme's draft: the bar says Saved with the time. The badge says Not published yet for a new theme, or Draft: not live once a version is live.
- Publishing puts the theme live straight away on every page that uses it, even on a published site. The badge changes to Live: vn, and Publish theme stays unavailable until you change something.
- A theme with low contrast asks again before it's published, with Publish version n anyway.
- History lists the theme's versions. Restoring one copies it into a new draft, so nothing is lost.
Check it works
Select Preview draft to open your site with the draft theme in a new tab. Once the theme and the site are both published, More actions (⋯) › View published site opens the live site.
If something isn't right
- You want to start from a ready-made look: select Theme library and Apply one of the Delekit themes. It replaces the colours, type, header, buttons and footer in the draft; your pages and menu are kept.
- "Removing the credit is available on plans with custom branding." The Show "Powered by Delekit" switch in Footer stays on unless your plan includes custom branding.
- Your logo doesn't show in the header: check the header still has its Site logo block, and that the theme is published.
Related articles
- Your event website: an overview
- Edit the header, footer and navigation menu
- Build a page with the page builder
- Preview and publish your website
Still stuck? Contact Delekit support.
Was this article helpful?
That’s Great!
Thank you for your feedback
Sorry! We couldn't be helpful
Thank you for your feedback
Feedback sent
We appreciate your effort and will try to fix the article