Audience: client administrators and event administrators. Applies to: plans that include the registration form builder. If the Website items show a padlock in the menu, they aren't in your plan.
The header and footer appear on every page of your event website. You build them in the page builder, like any other page, and choose the links in the header's menu in Website › Settings › Navigation.
Before you start
- The header starts with your logo, the navigation menu and a Register button, in a row.
- The footer starts with example content: two columns of links (Programme and Attend) and a Contact column. Replace the links and contact details with your own before you publish.
- The logo picture comes from your theme. See Brand your website with a theme.
Edit the header
In the menu, select Website, then Pages.
Select Edit header. The header opens in the page builder.
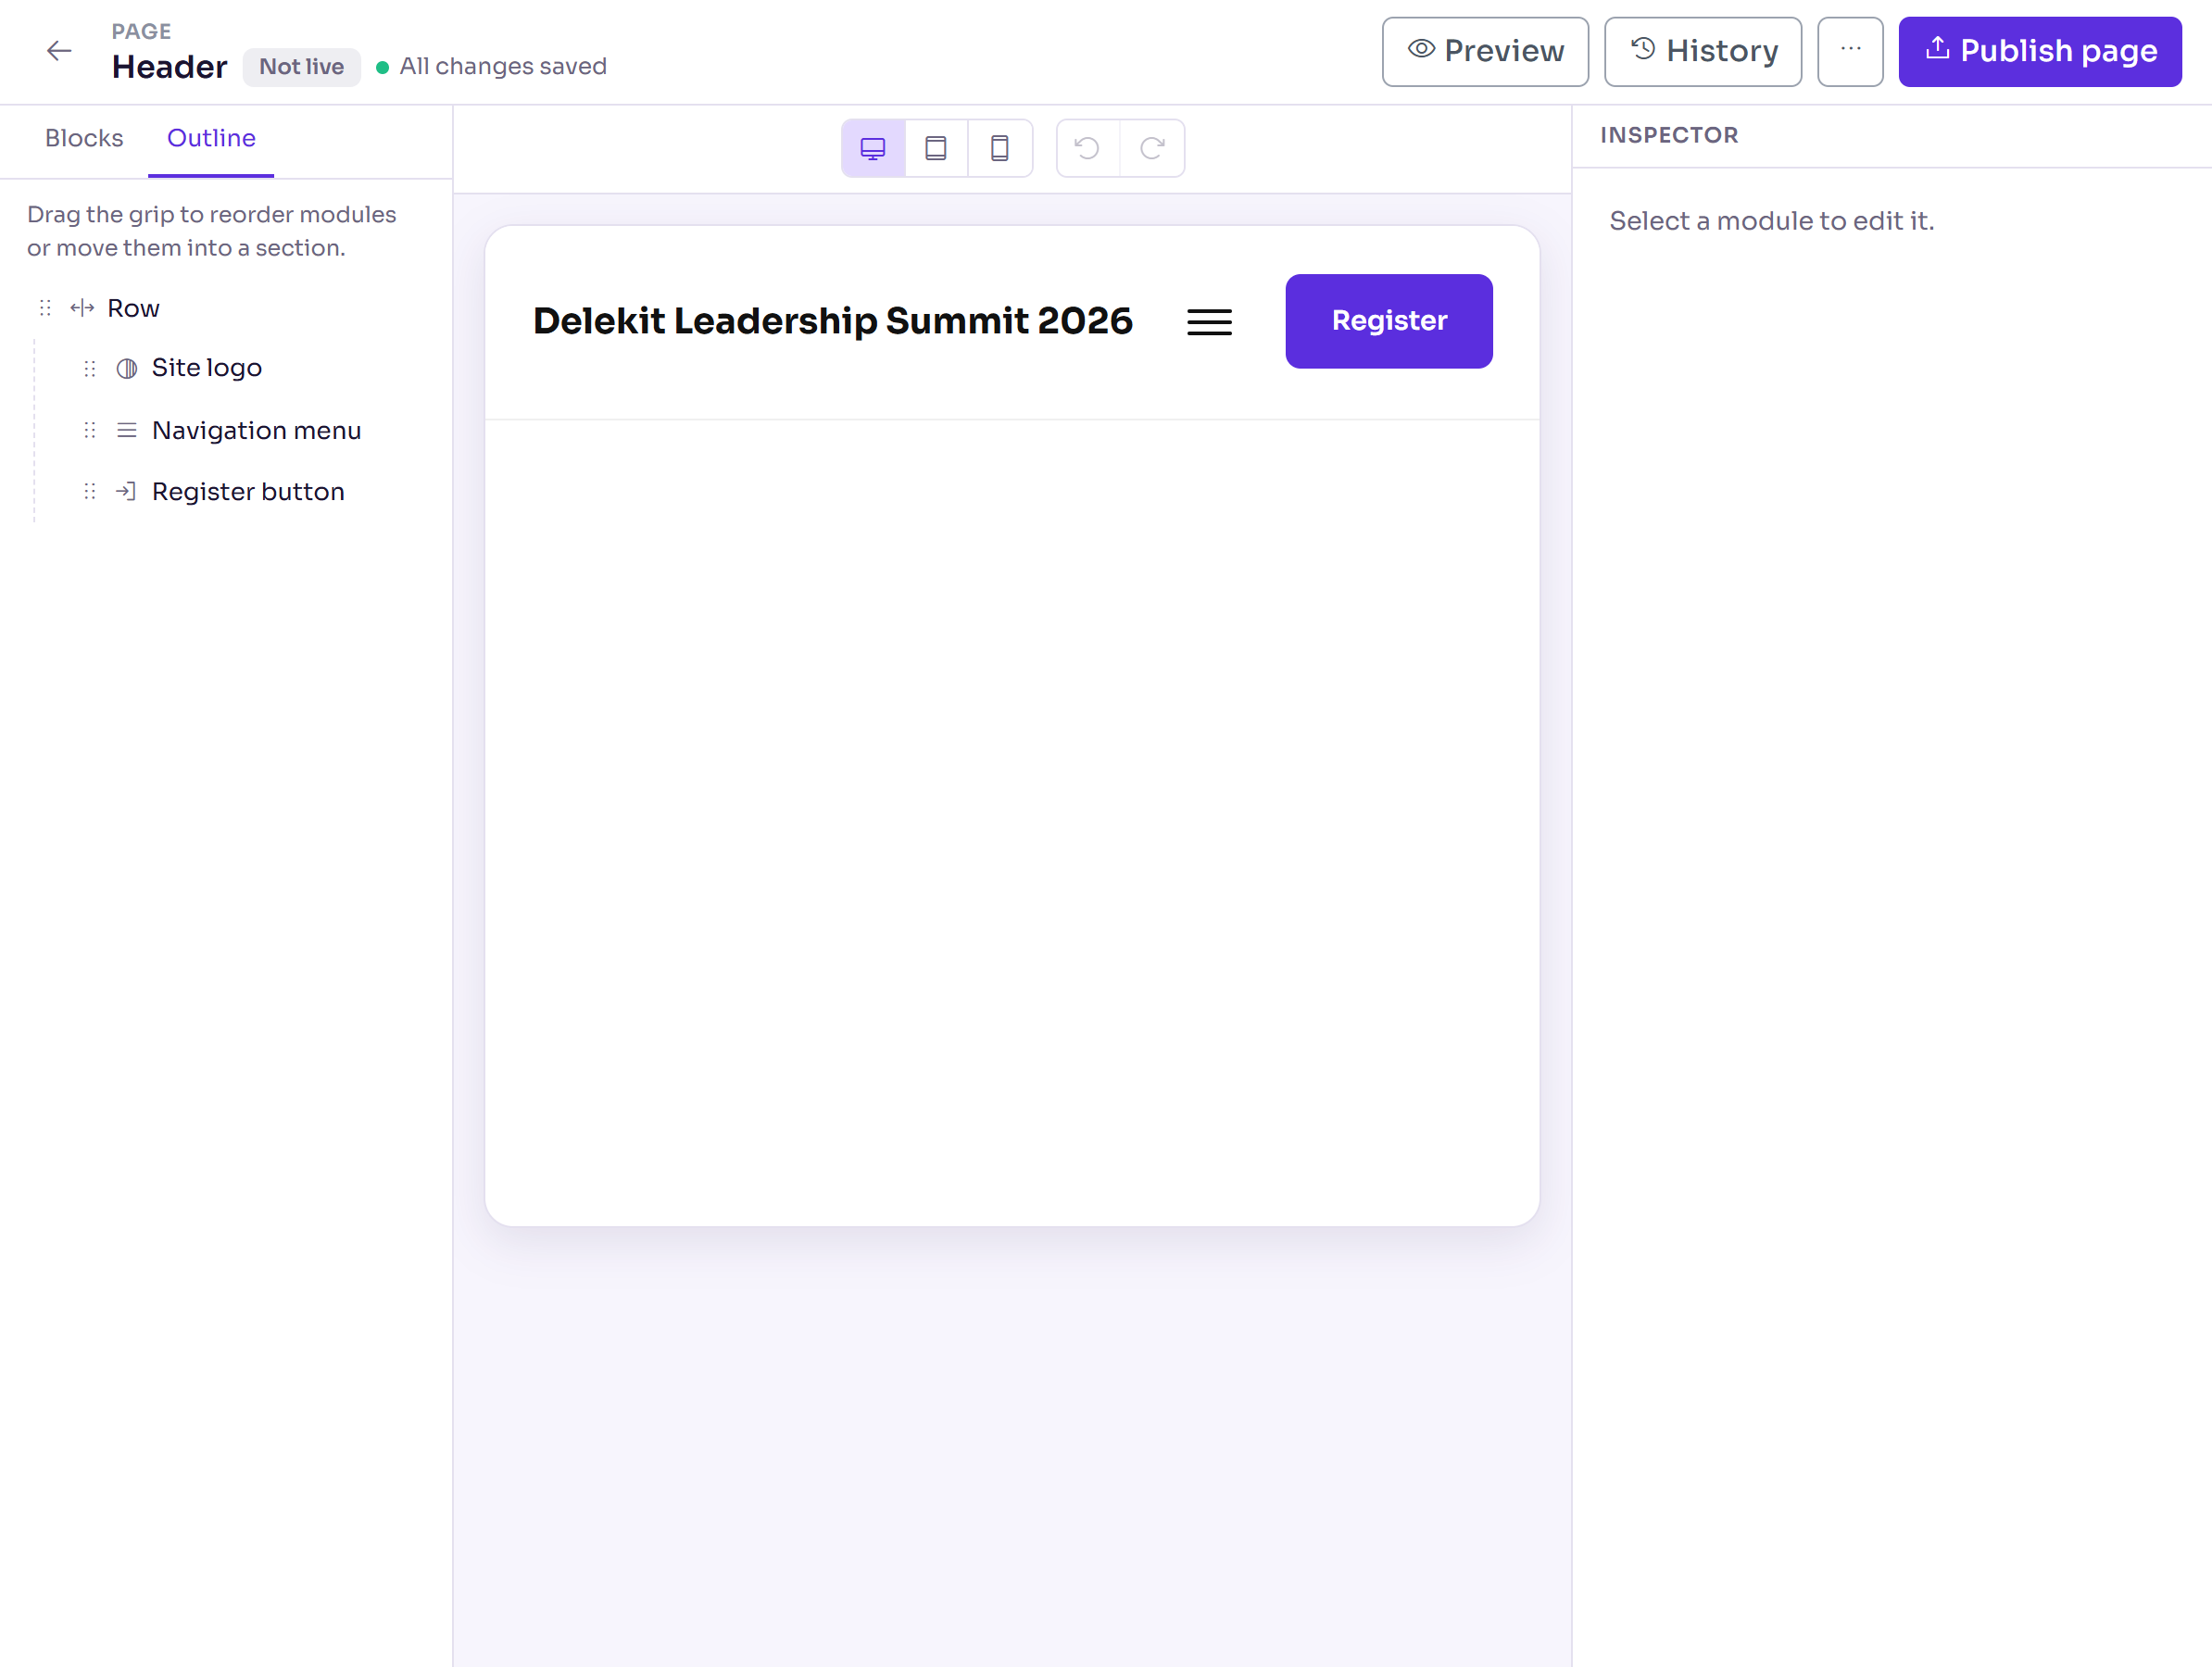
Select a block to change it in the Inspector. For example, select Register button to change its Button text, or its Style on the Style tab.
To add another block, select it on the Blocks tab. The Header blocks are only offered here.
Select Publish page, then Publish page again to confirm.
The Register button always links to your event's registration. The Site logo shows the theme's logo, or the site's name until there is one, and links to the home page.
Edit the footer
- In Website › Pages, select Edit footer.
- Select a Link list block. In the Inspector, change its Heading (optional) and each link's Label and Links to: a page on this site, or an external URL.
- Select the Contact text and change it to your own details.
- Select Publish page, then Publish page again to confirm.
Choose the links in the menu
In the menu, select Website, then Settings, and go to Navigation.
Select Add item. A New item is added to the list and selected.
Enter the Label visitors will see.
Under Links to, choose Internal page and the Page, or choose External URL and enter the URL.
Under Who can see it, leave Public — everyone.
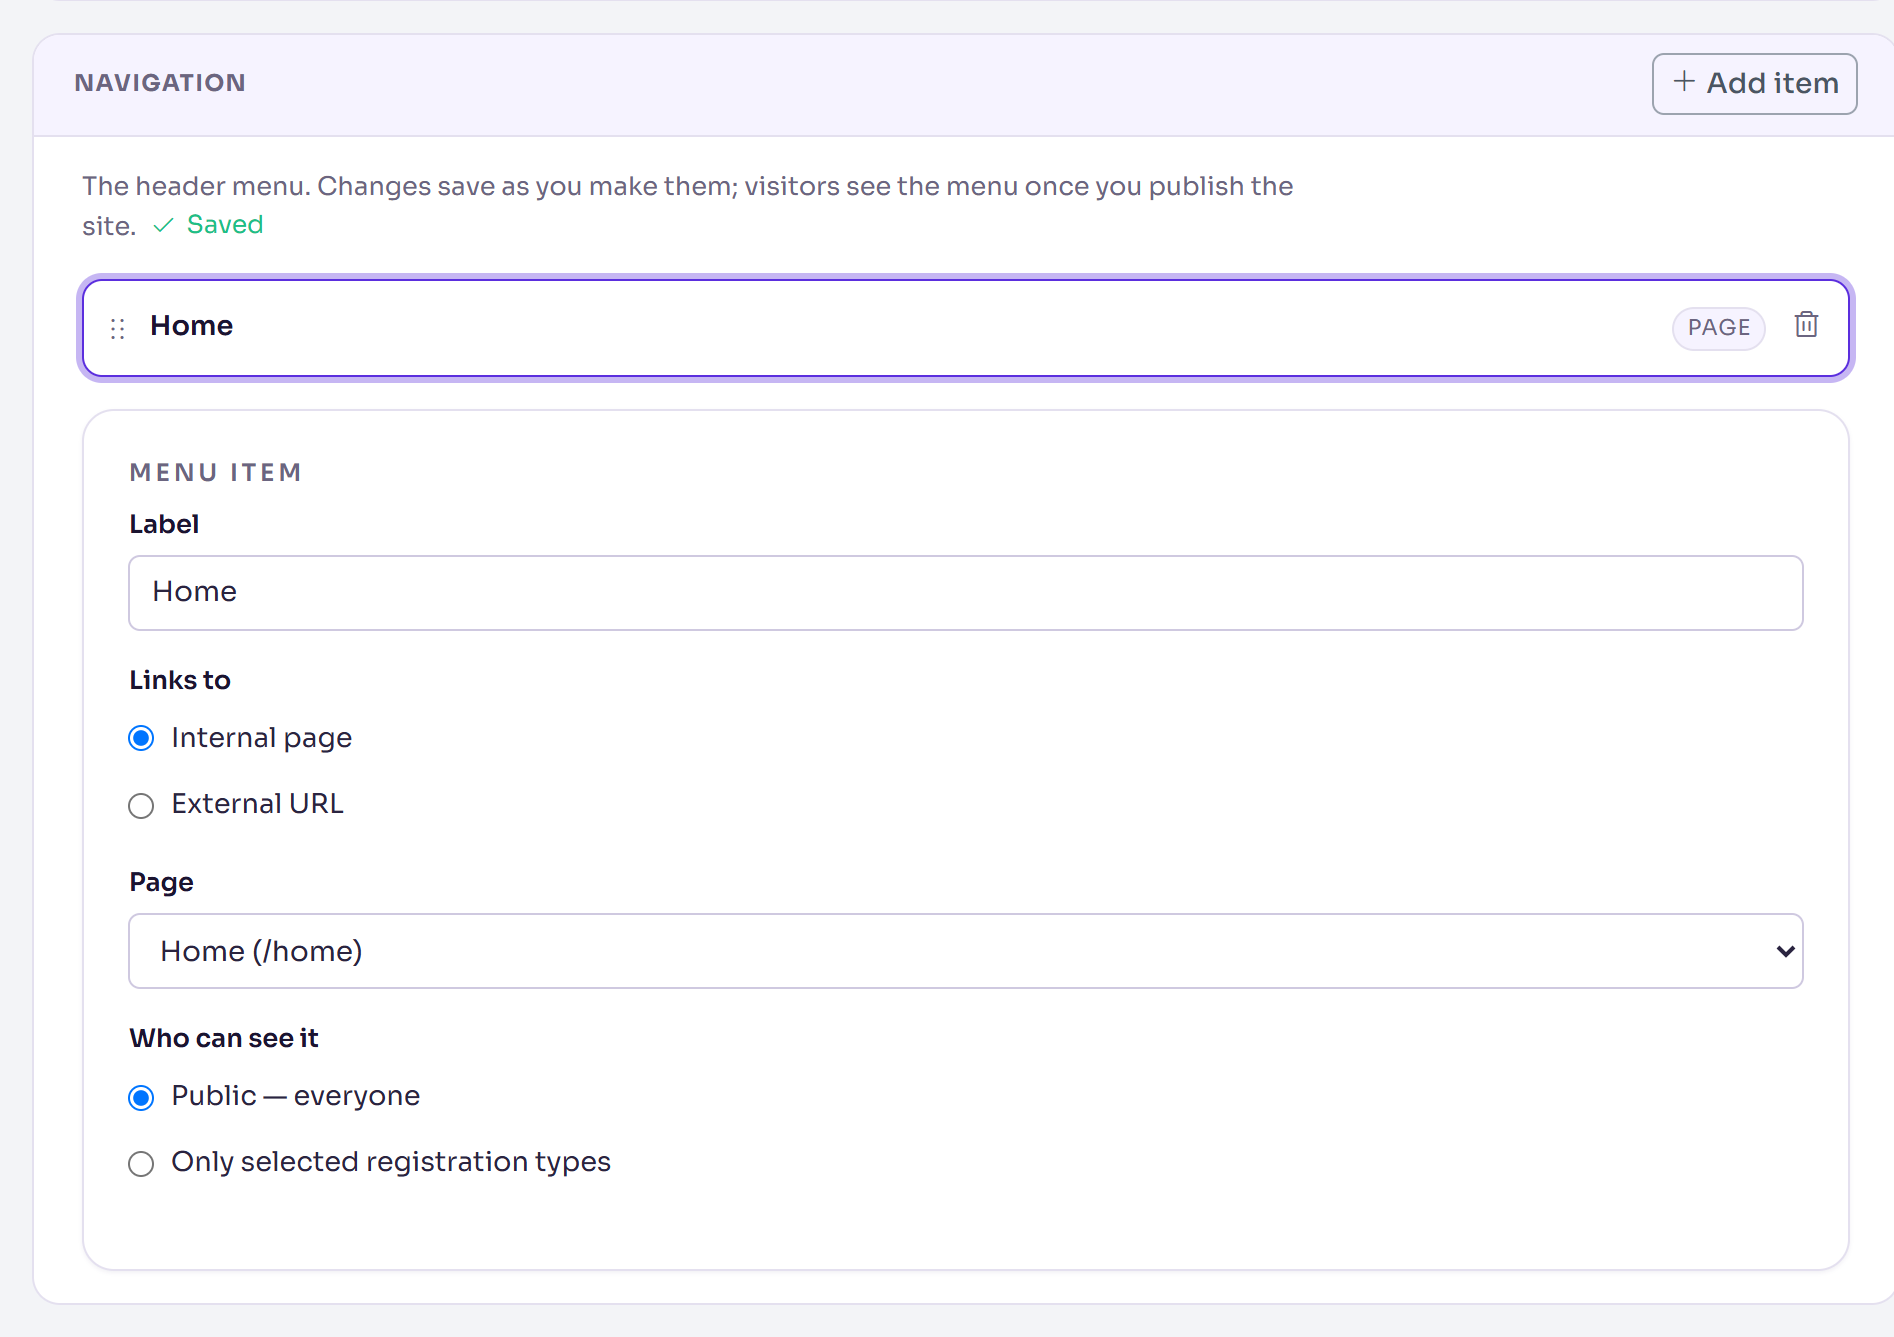
Add the other items. To change their order, drag an item by its grip.
To take an item out, select Remove menu item (the bin) on its row.
What happens next
- The menu saves as you make changes: the editor says Saved.
- Once your site is published, menu changes show on it straight away. There's nothing to publish for the menu.
- The header and footer go live when you publish them, or when you publish the whole site. The live site shows them only once they've been published.
- Until you add a menu item, the menu lists your published pages, apart from the Register page and the pages people see after registering.
- An item set to Only selected registration types shows only to people of those types, on pages they open from their personal link (the link in their emails). Visitors without one, and pages reached by clicking around the site, don't show it.
Check it works
Open any page in the page builder and select Preview: the header and footer show as they are now. Once the site is live, open its web address and try each menu link.
If something isn't right
- A menu item doesn't show: check that it has a Label, that its Who can see it is
Public — everyone, and, for an External URL, that the address starts with
https://. - Your logo doesn't show: add it in Website › Theme under Header, then publish the theme.
Related articles
- Your event website: an overview
- Build a page with the page builder
- Brand your website with a theme
- Preview and publish your website
Still stuck? Contact Delekit support.
Was this article helpful?
That’s Great!
Thank you for your feedback
Sorry! We couldn't be helpful
Thank you for your feedback
Feedback sent
We appreciate your effort and will try to fix the article