Audience: client administrators and event administrators. Applies to: plans that include the registration form builder. If the Website items show a padlock in the menu, they aren't in your plan.
Choose who can open your website's Register page, where people register: anyone, only people with their invite link, or people who know a password. The same setting covers the registration links, the checkout and the waitlist. Other pages you add can be public or password-protected.
Before you start
- Every page starts as Public.
- Invite only works with invite lists. Invitees get in with the personal link in their invitation, so set up an invite list for them first: Create an invite list.
- Invite links and signed-in team members always get in, whatever you choose.
- To protect the whole site, not one page, use Require a password in Website › Settings › Access instead.
Choose who can register
In the menu, select Website, then Pages.
Select Build on the Register page. It opens in the page builder.
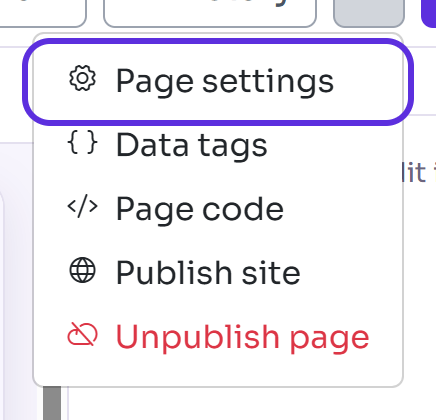
Select More actions (⋯), then Page settings.
Under Access, choose one of:
- Public: anyone can register.
- Invite only: only people with their invite link can register.
- Password: visitors enter a password to register.
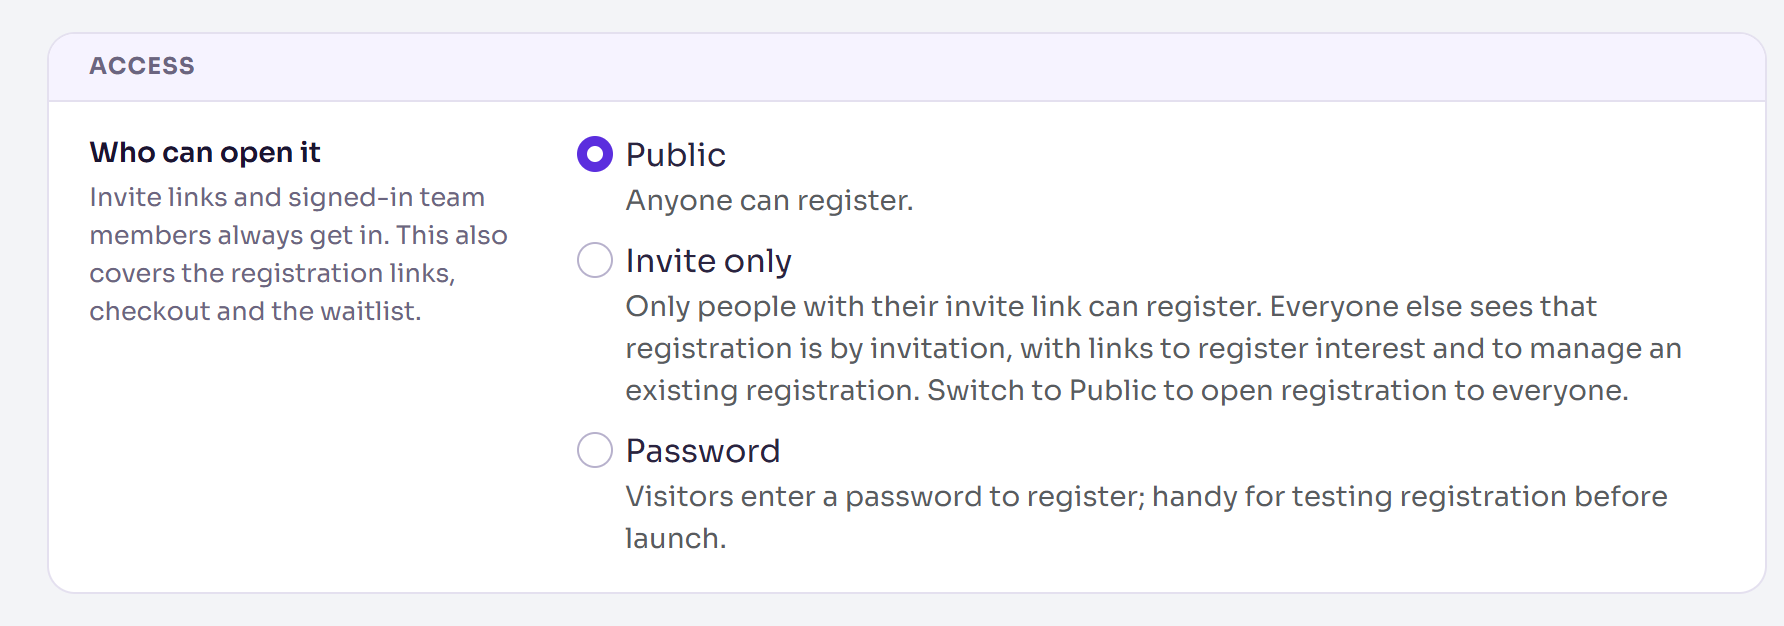
If you chose Password, enter the Password.
Select Save changes.
You're back in the page builder, with Changes saved.
What happens next
- The change applies straight away, even on a published site. There's nothing to publish.
- With Invite only, everyone without an invite link sees that registration is by invitation, with links to register interest and to manage an existing registration.
- With Password, visitors enter the password before they can register. It's handy for testing registration before launch. Share the password with the people who should have it.
- The Pages list shows an Invite only or Password tag on the page's title.
- To change the password later, enter a New password; leave it blank to keep the current one.
Check it works
Open the Register page's web address in a private browser window, where you aren't signed in. You should see the registration form, the invitation message or the password box, depending on what you chose. Your site needs to be published first: see Preview and publish your website.
If something isn't right
- "Set a password to protect this page." You chose Password without entering one.
- You don't see Invite only: it's only offered on the Register page. Other pages can be Public or Password.
- An invitee can't get in: they need the link from their invitation email, not the site's address. See Send or schedule invitations.
Related articles
- Your event website: an overview
- Create an invite list
- Send or schedule invitations
- Preview and publish your website
Still stuck? Contact Delekit support.
Was this article helpful?
That’s Great!
Thank you for your feedback
Sorry! We couldn't be helpful
Thank you for your feedback
Feedback sent
We appreciate your effort and will try to fix the article