Audience: event administrators and client administrators. Applies to: plans that include the registration form builder. If Invite lists shows a padlock in the menu, it isn't in your plan.
An invite list groups the people you invite by their registration type, and says which email they get at each step (invitation, reminder, confirmation and the rest) and which page they see afterwards. Create the list, add its registration types, check its emails, and it's ready to send.
Before you start
- The registration types must exist. Attendees with a list's types are its members. See Create a registration type.
- A registration type can be on one invite list only.
- The emails must be published. A list can choose the event's own templates and your organisation's defaults. See Set up your event's email templates.
- There's no fallback. An email set to Don't send this email isn't sent to the list's members at all.
Create the list
In the menu, select Registration, then Invite lists, then select Add invite list.
Enter a Name, such as VIP guests, and a Description if you like (only admins see it).
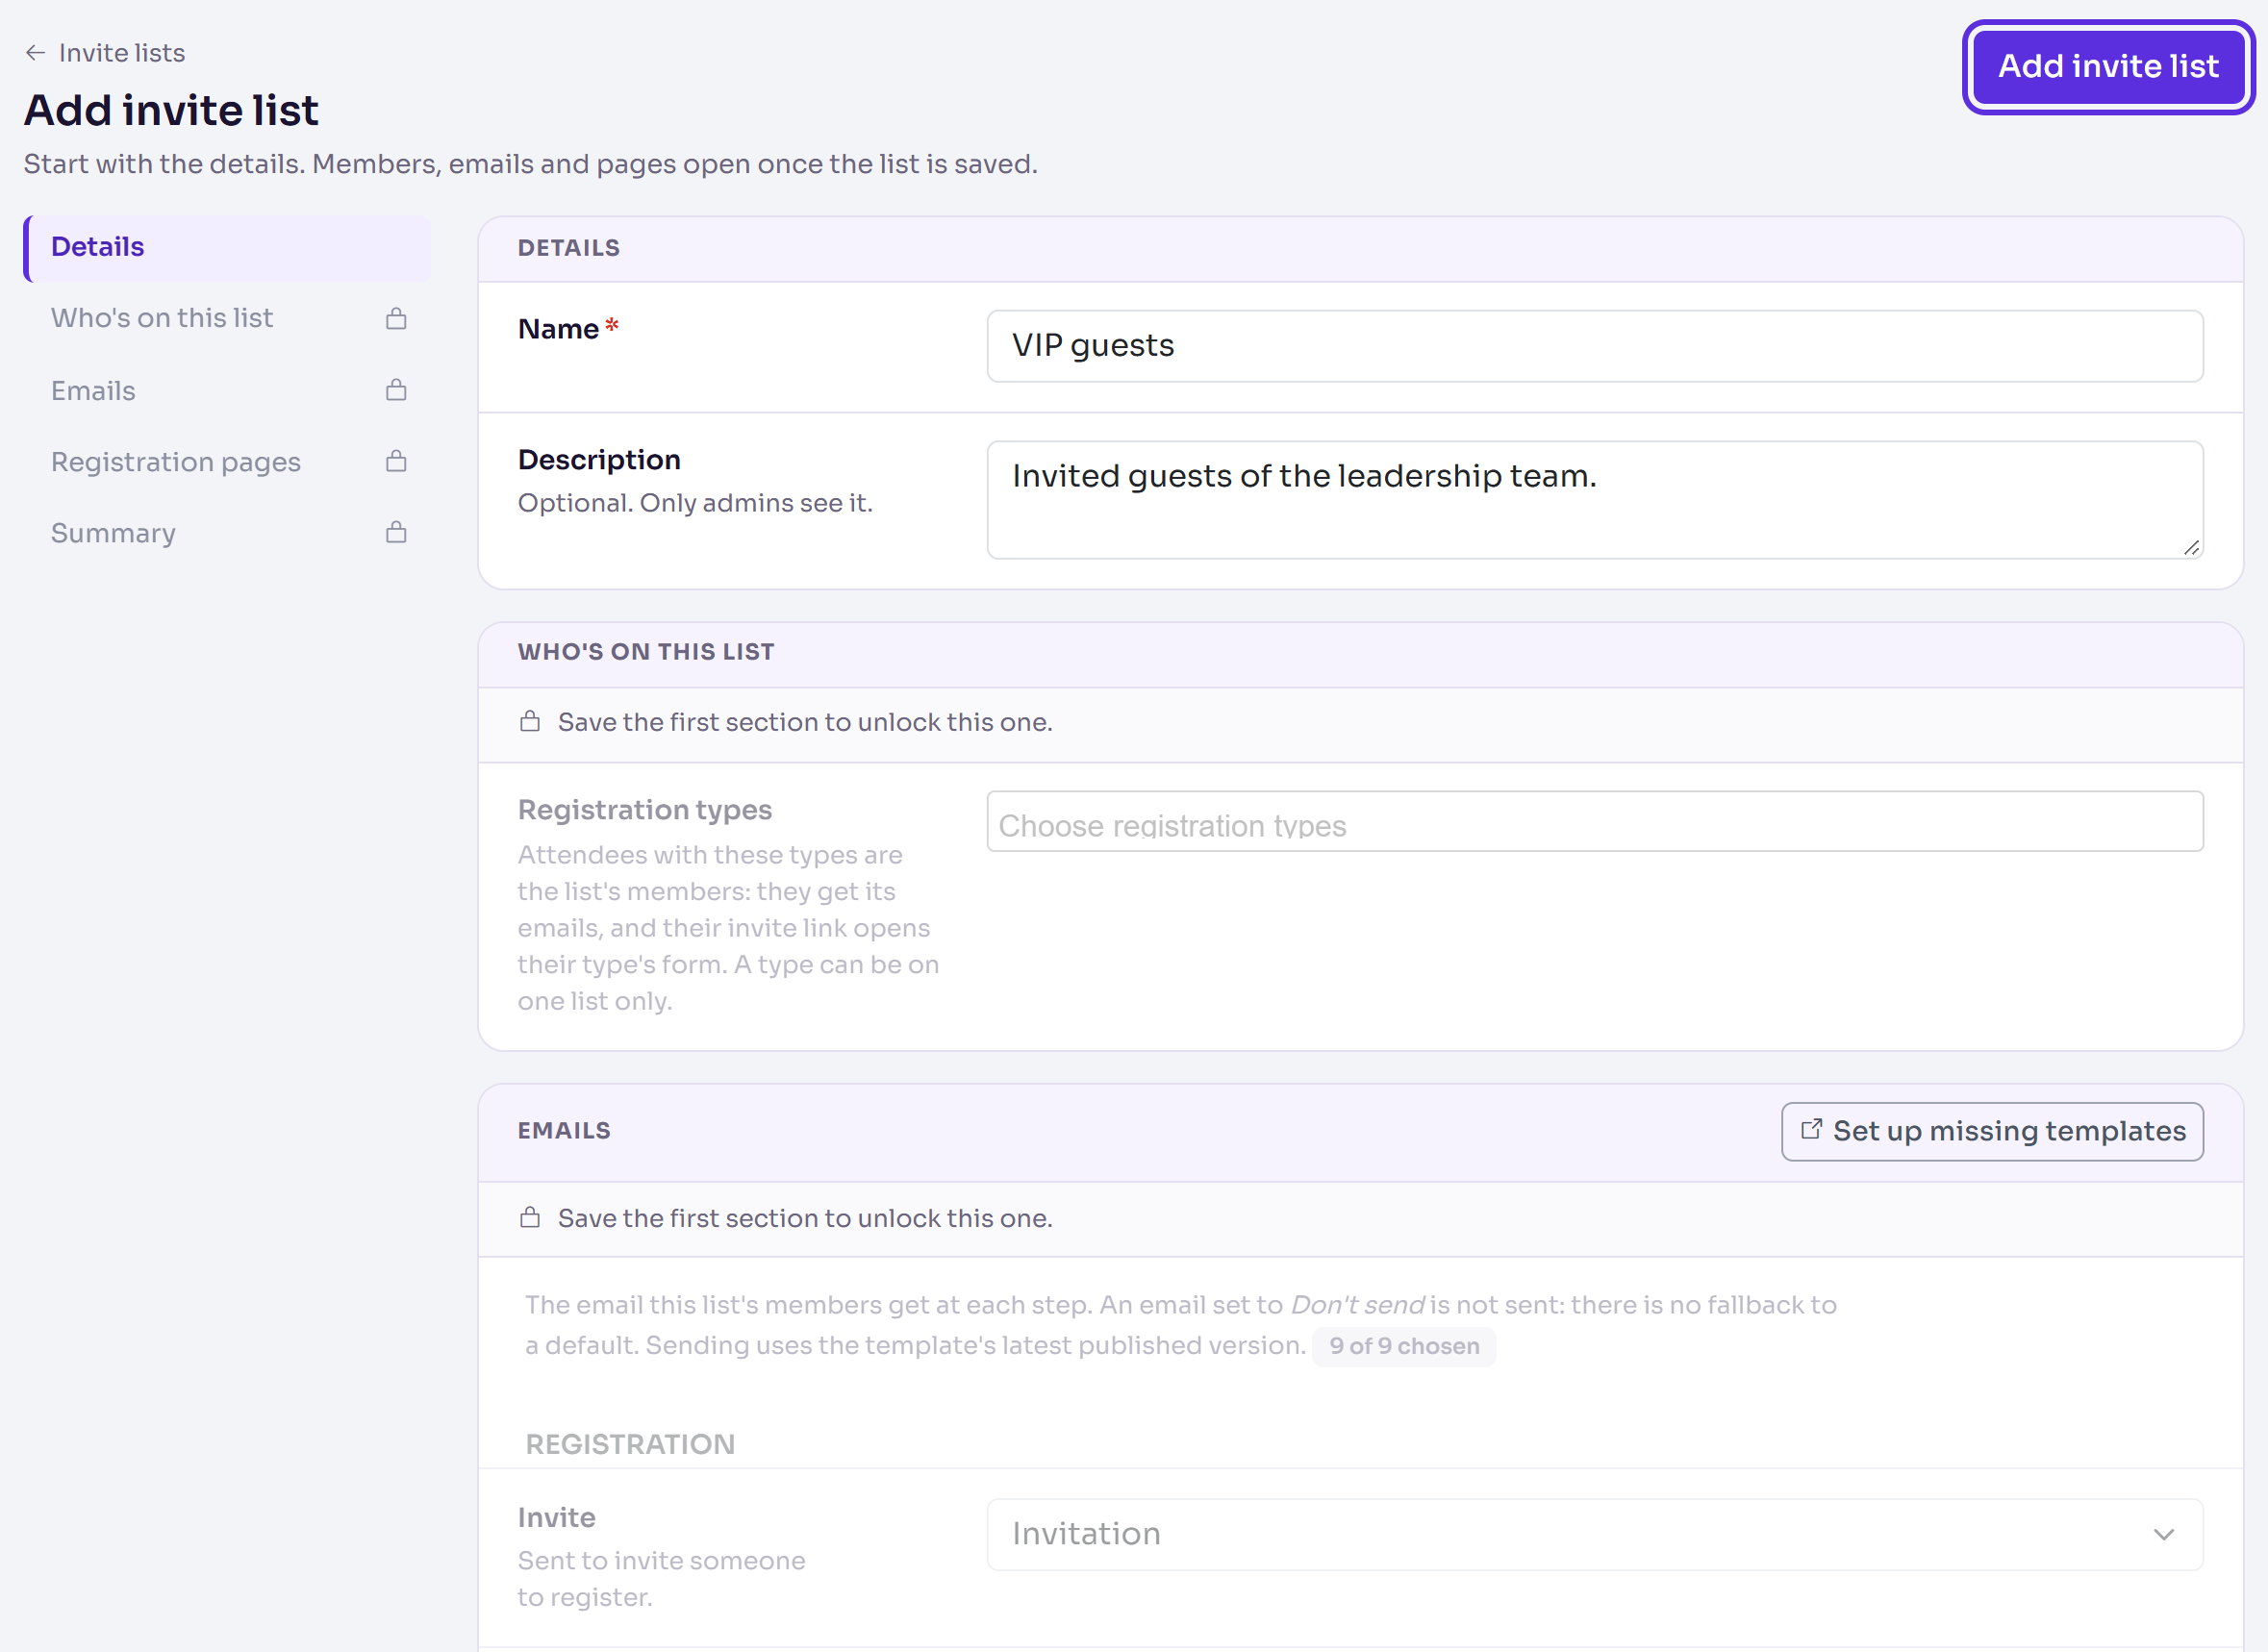
Select Add invite list.
You'll see Invite list created. The list opens, and its other sections are now unlocked.
Choose who's on it and what they get
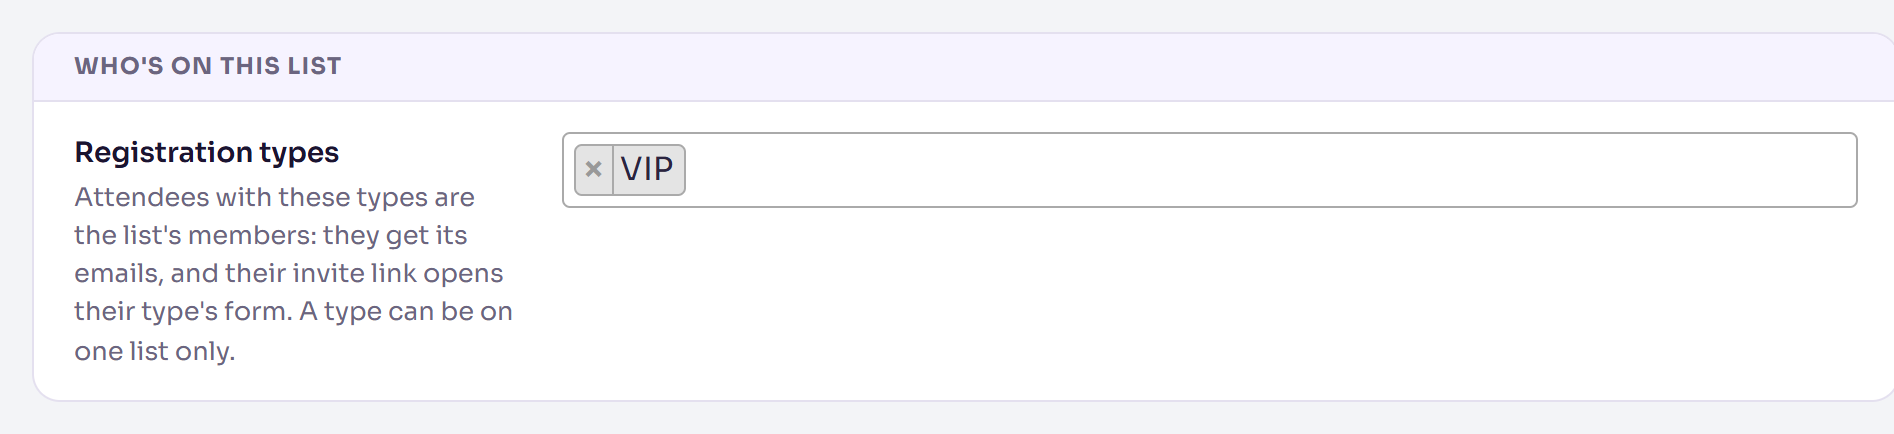
In Who's on this list, choose the Registration types whose attendees you invite, such as VIP.
In Emails, check the email chosen for each step. A new list starts with the best published template of each kind: the event's own first, then your organisation's. Confirmation and Cancellation are required.
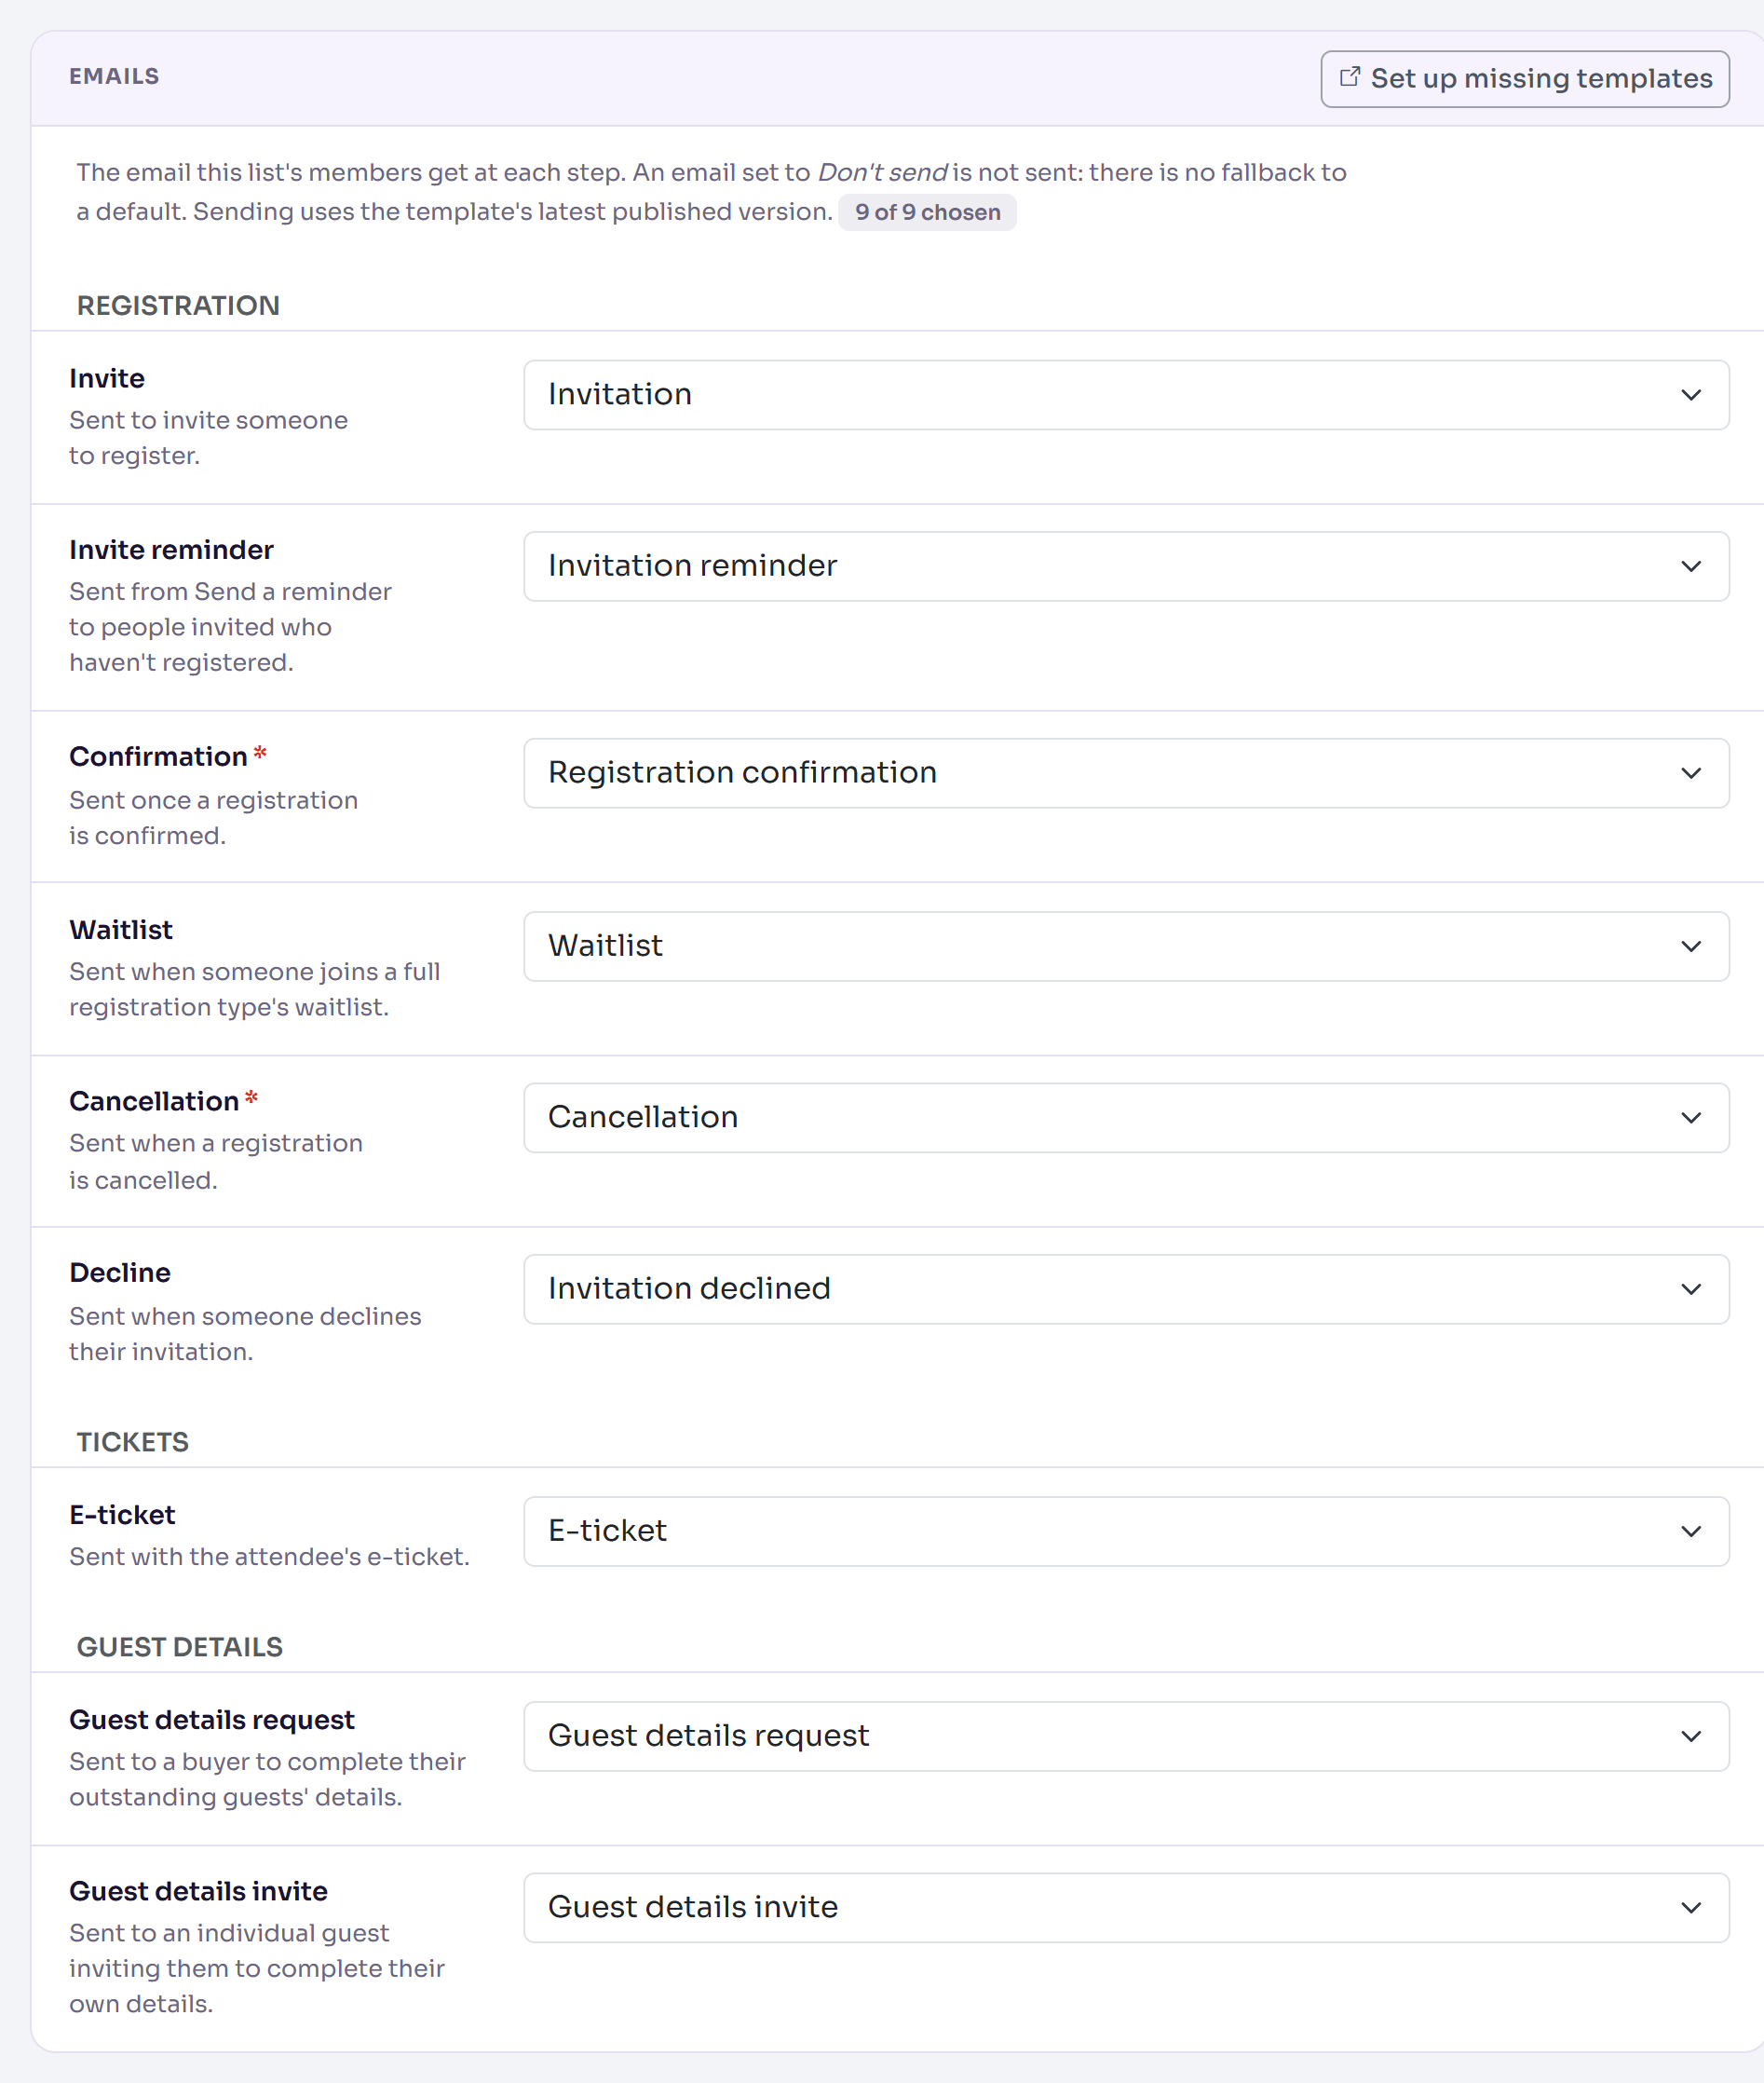
To change one, choose another template, or Don't send this email. If one you need isn't listed, select Set up missing templates (it opens in a new tab), then reload.
In Registration pages, leave Use the site default, or choose a page you've built for this list.
Select Save changes.
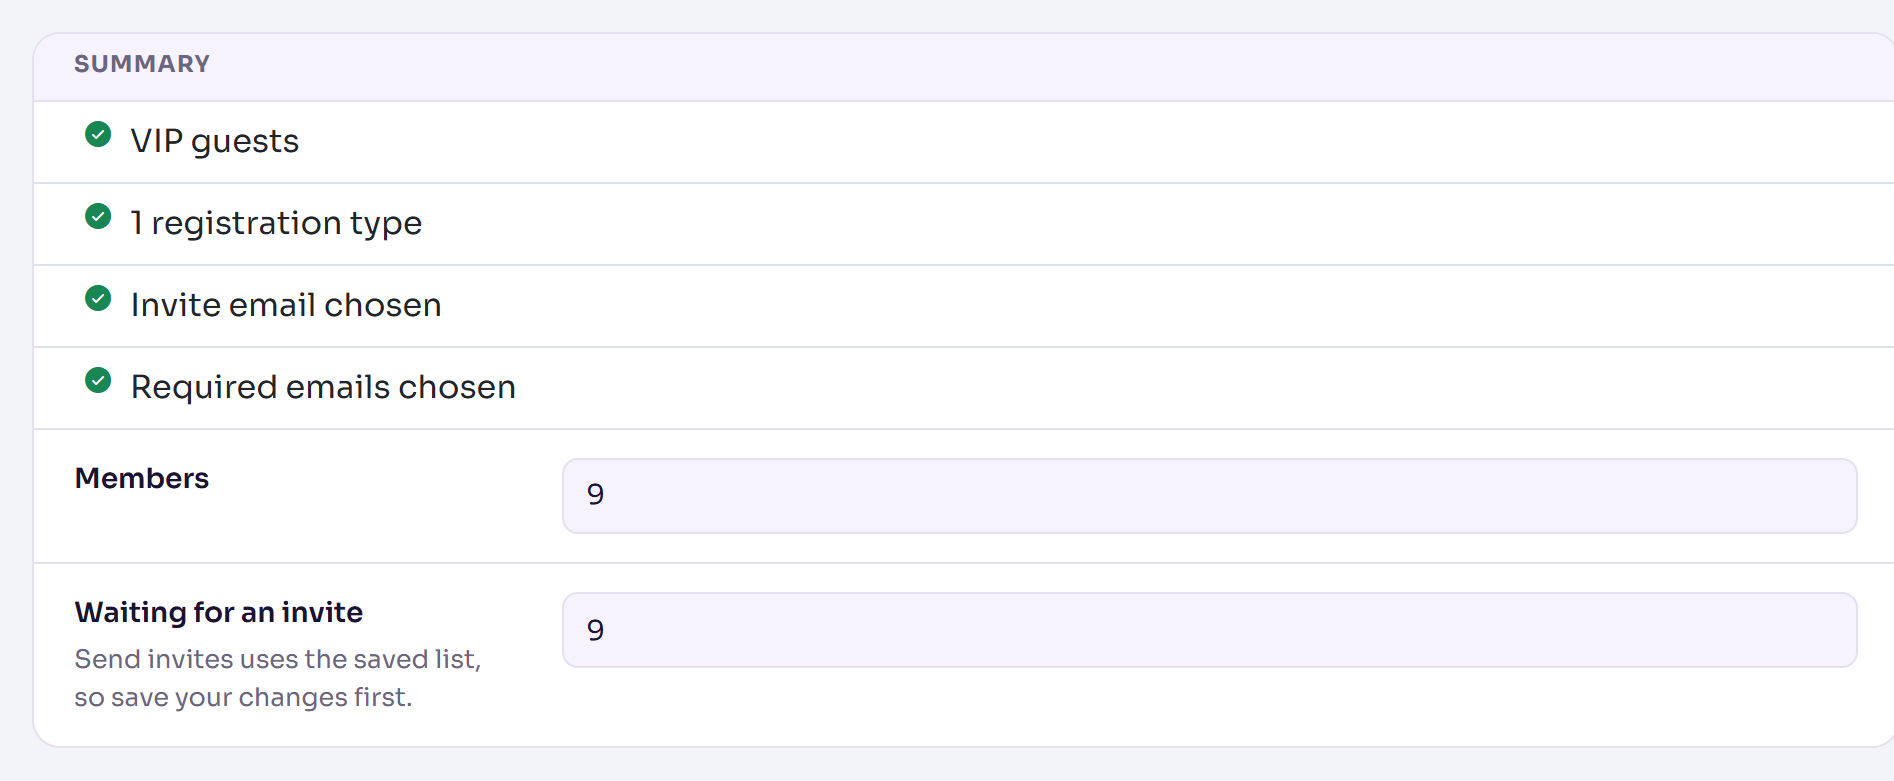
Check Summary. Each line has a tick when it's done.
What happens next
- Nobody is emailed yet. Members counts the attendees with the list's types, and Waiting for an invite those with an email who haven't been invited or registered.
- The list now has Send invites and Send a reminder. See Send or schedule invitations.
- Members' registration emails come from this list: their confirmation is the template chosen here.
Check it works
On Invite lists, the list shows its Members, Registration types and Eligible (the people waiting for an invite). In Summary, every line has a tick.
If something isn't right
- "Already on another invite list: VIP." A type can be on one list only. Take it off the other list, or choose another type.
- Summary says "No invite email, so invites can't be sent": choose an Invite email.
- Summary says "Still to choose: Confirmation, Cancellation": choose those emails.
- "This template has no published version, so it won't send until it's published." Open the template and publish it.
- "An invite list with this name already exists." Choose another name.
- You made the list by mistake: open it and use its Delete invite list section. Its registration types are released so they can join another list.
Related articles
- Set up your event's email templates
- Send or schedule invitations
- Remind people who haven't registered
- Make registration invite-only
Still stuck? Contact Delekit support.
Was this article helpful?
That’s Great!
Thank you for your feedback
Sorry! We couldn't be helpful
Thank you for your feedback
Feedback sent
We appreciate your effort and will try to fix the article