Audience: event administrators and client administrators. Applies to: plans that include the registration form builder. If Email templates shows a padlock in the menu, it isn't in your plan.
A data tag drops a live detail into an email, such as the attendee's first name or the
event's venue. You write it as {{tag}}, for example {{attendee.firstName}}, and it's
filled in for each person when the email is sent. Add tags from the editor's @ list, the
Data tags page, or a communication's Insert tag.
Before you start
- Not every tag works in every email. Tags about one person's booking, and their personal links, only fill in on emails about that booking. The Data tags page says where each one works.
- Event tags follow your settings. Tags such as
{{project.name}}and{{project.location}}come from the event's settings, so changing the event updates every email that uses them.
Add a tag in the email editor
- In the menu, select Registration, then Email templates, and select the email.
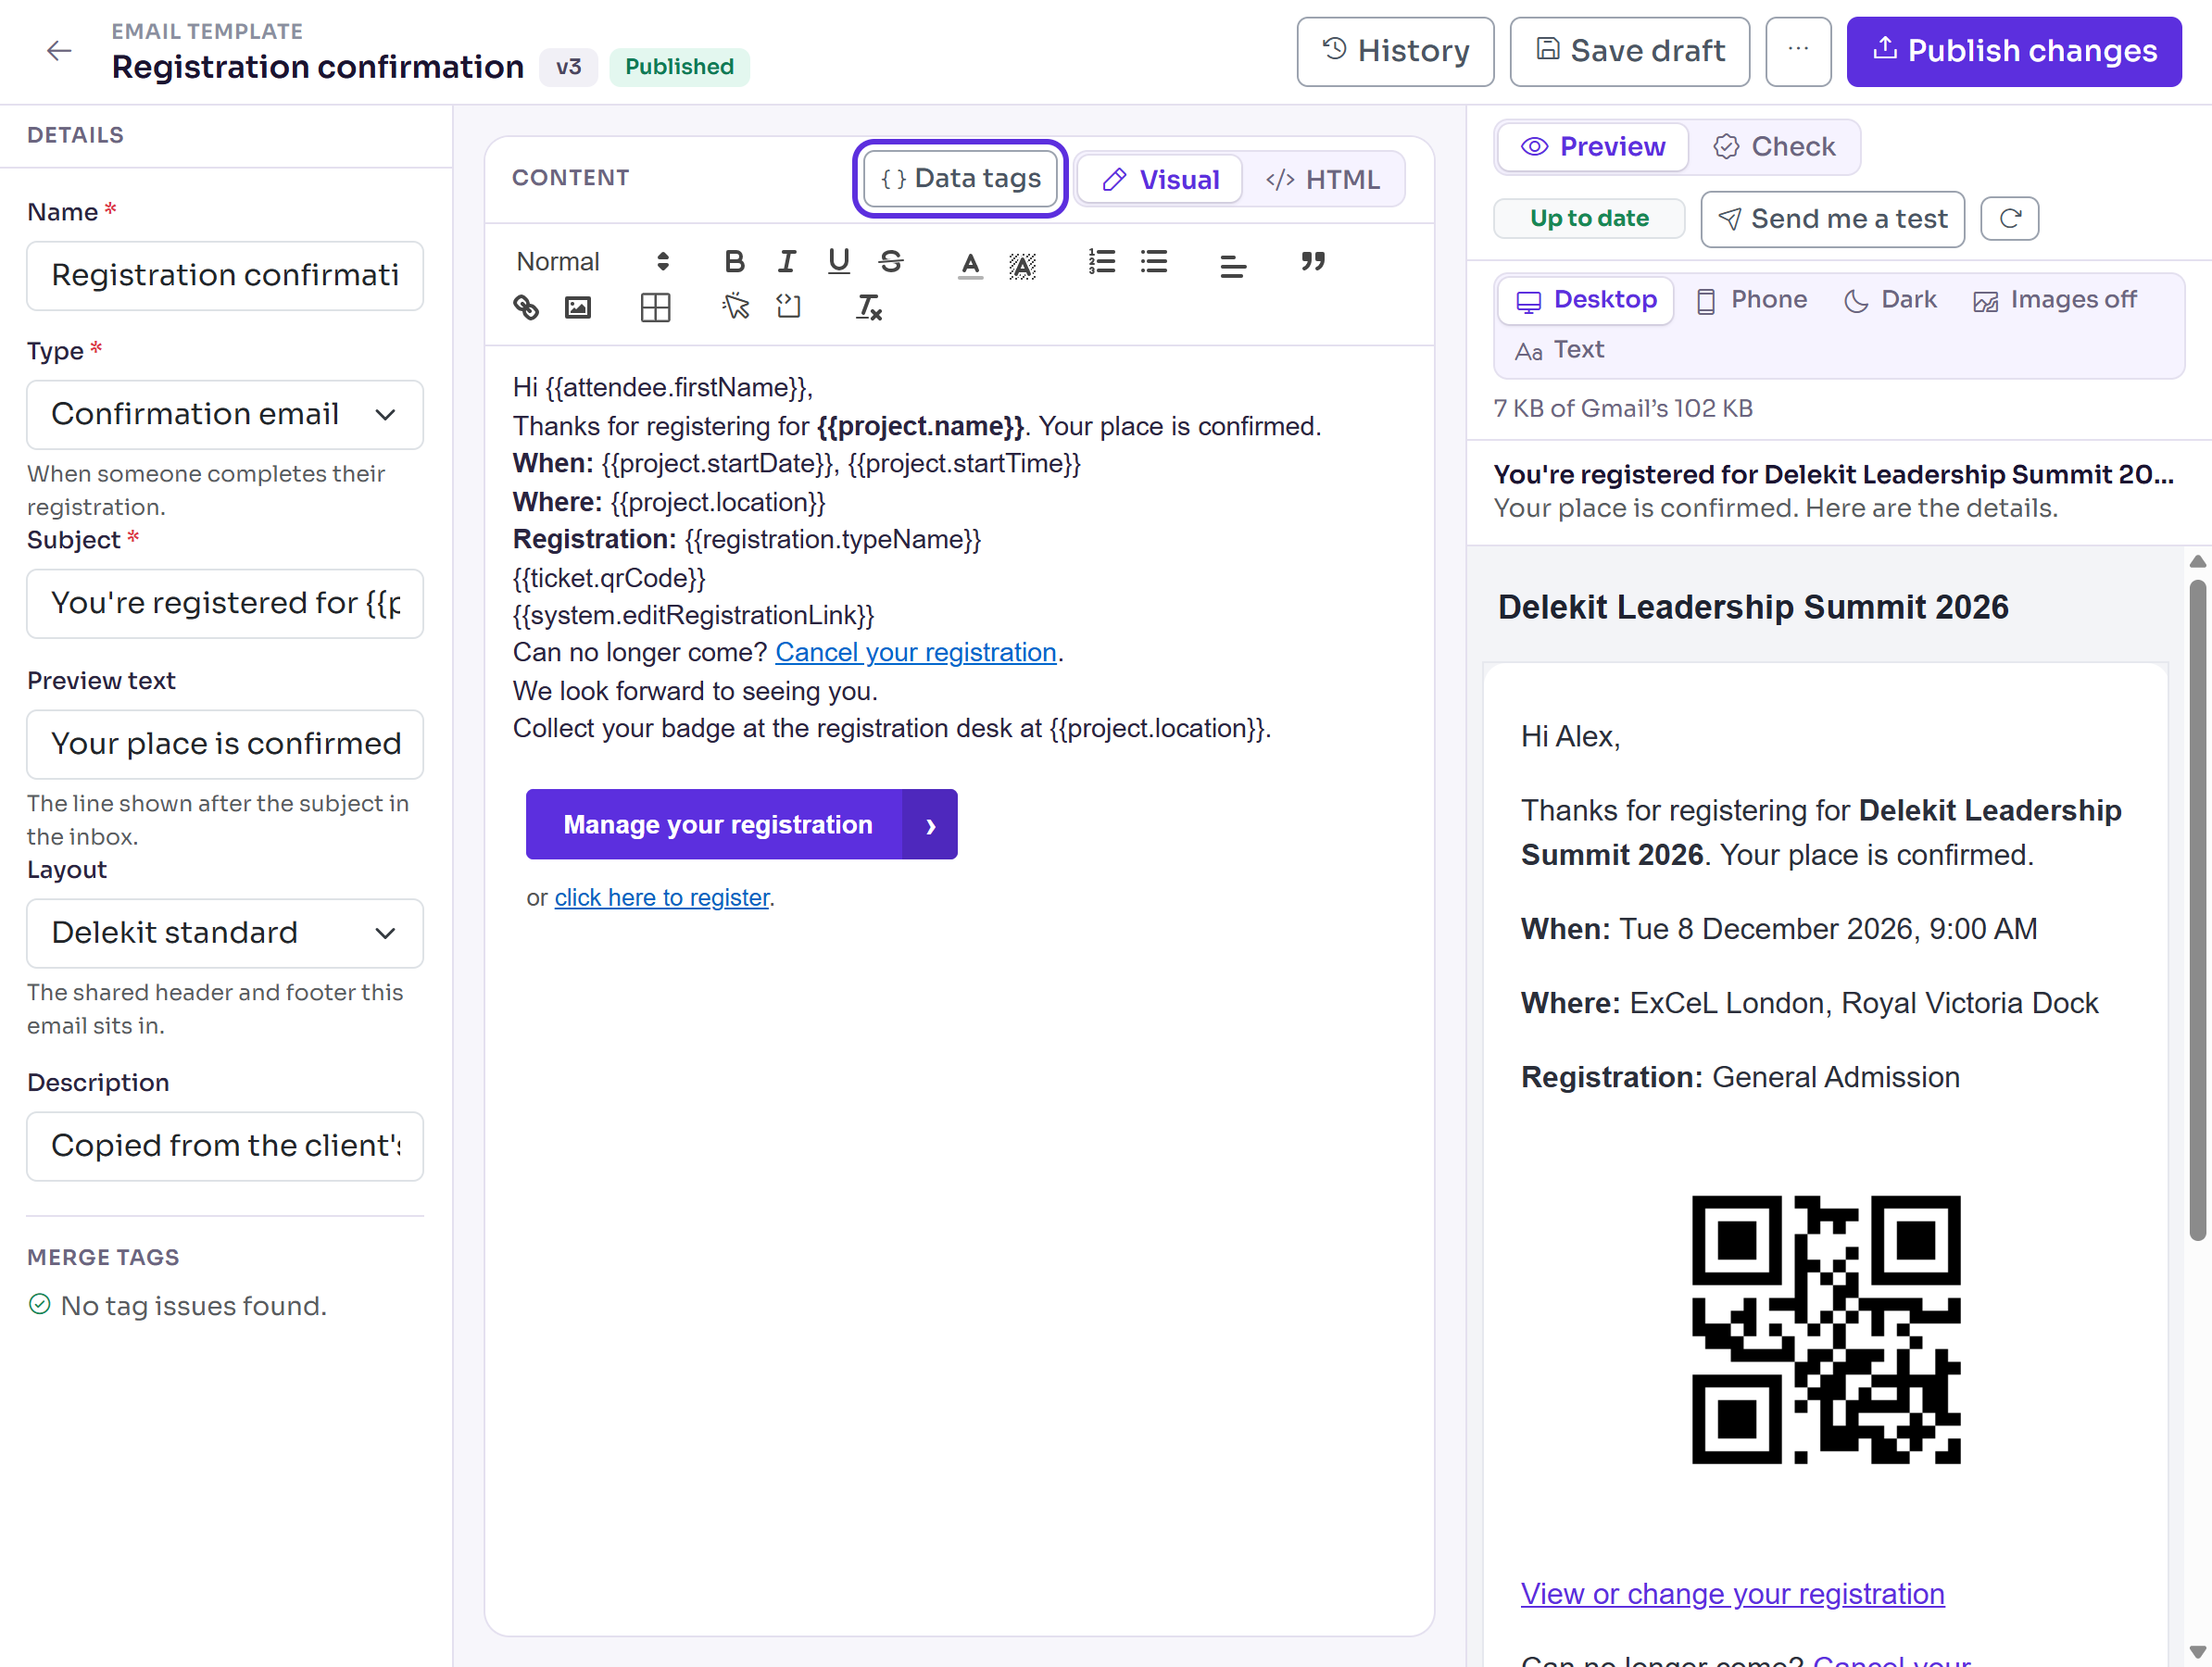
- In Content, place the cursor where the detail should go, then type @ and the start of the tag's name, for example @locat.
- Choose the tag from the list, or press Enter. It's added as a tag such as
{{project.location}}. - To use a link tag in a button, select Insert a button and enter the tag as its
Link, for example
{{system.registrationUrl}}. - Check Merge tags in Details. It says No tag issues found. when every tag works in this email.
The list shows the tags that work in the email you're editing. All data tags and how to use them, at the foot of the list, opens the Data tags page.
Look up a tag on the Data tags page
In the email editor, select Data tags on the Content toolbar. The page opens in a new tab.
Works in starts on the kind of email you came from. Choose Any email or page to see every tag.
Enter a word in Search tags, e.g. name, date, link. Each tag shows what it shows, an example and where it works.
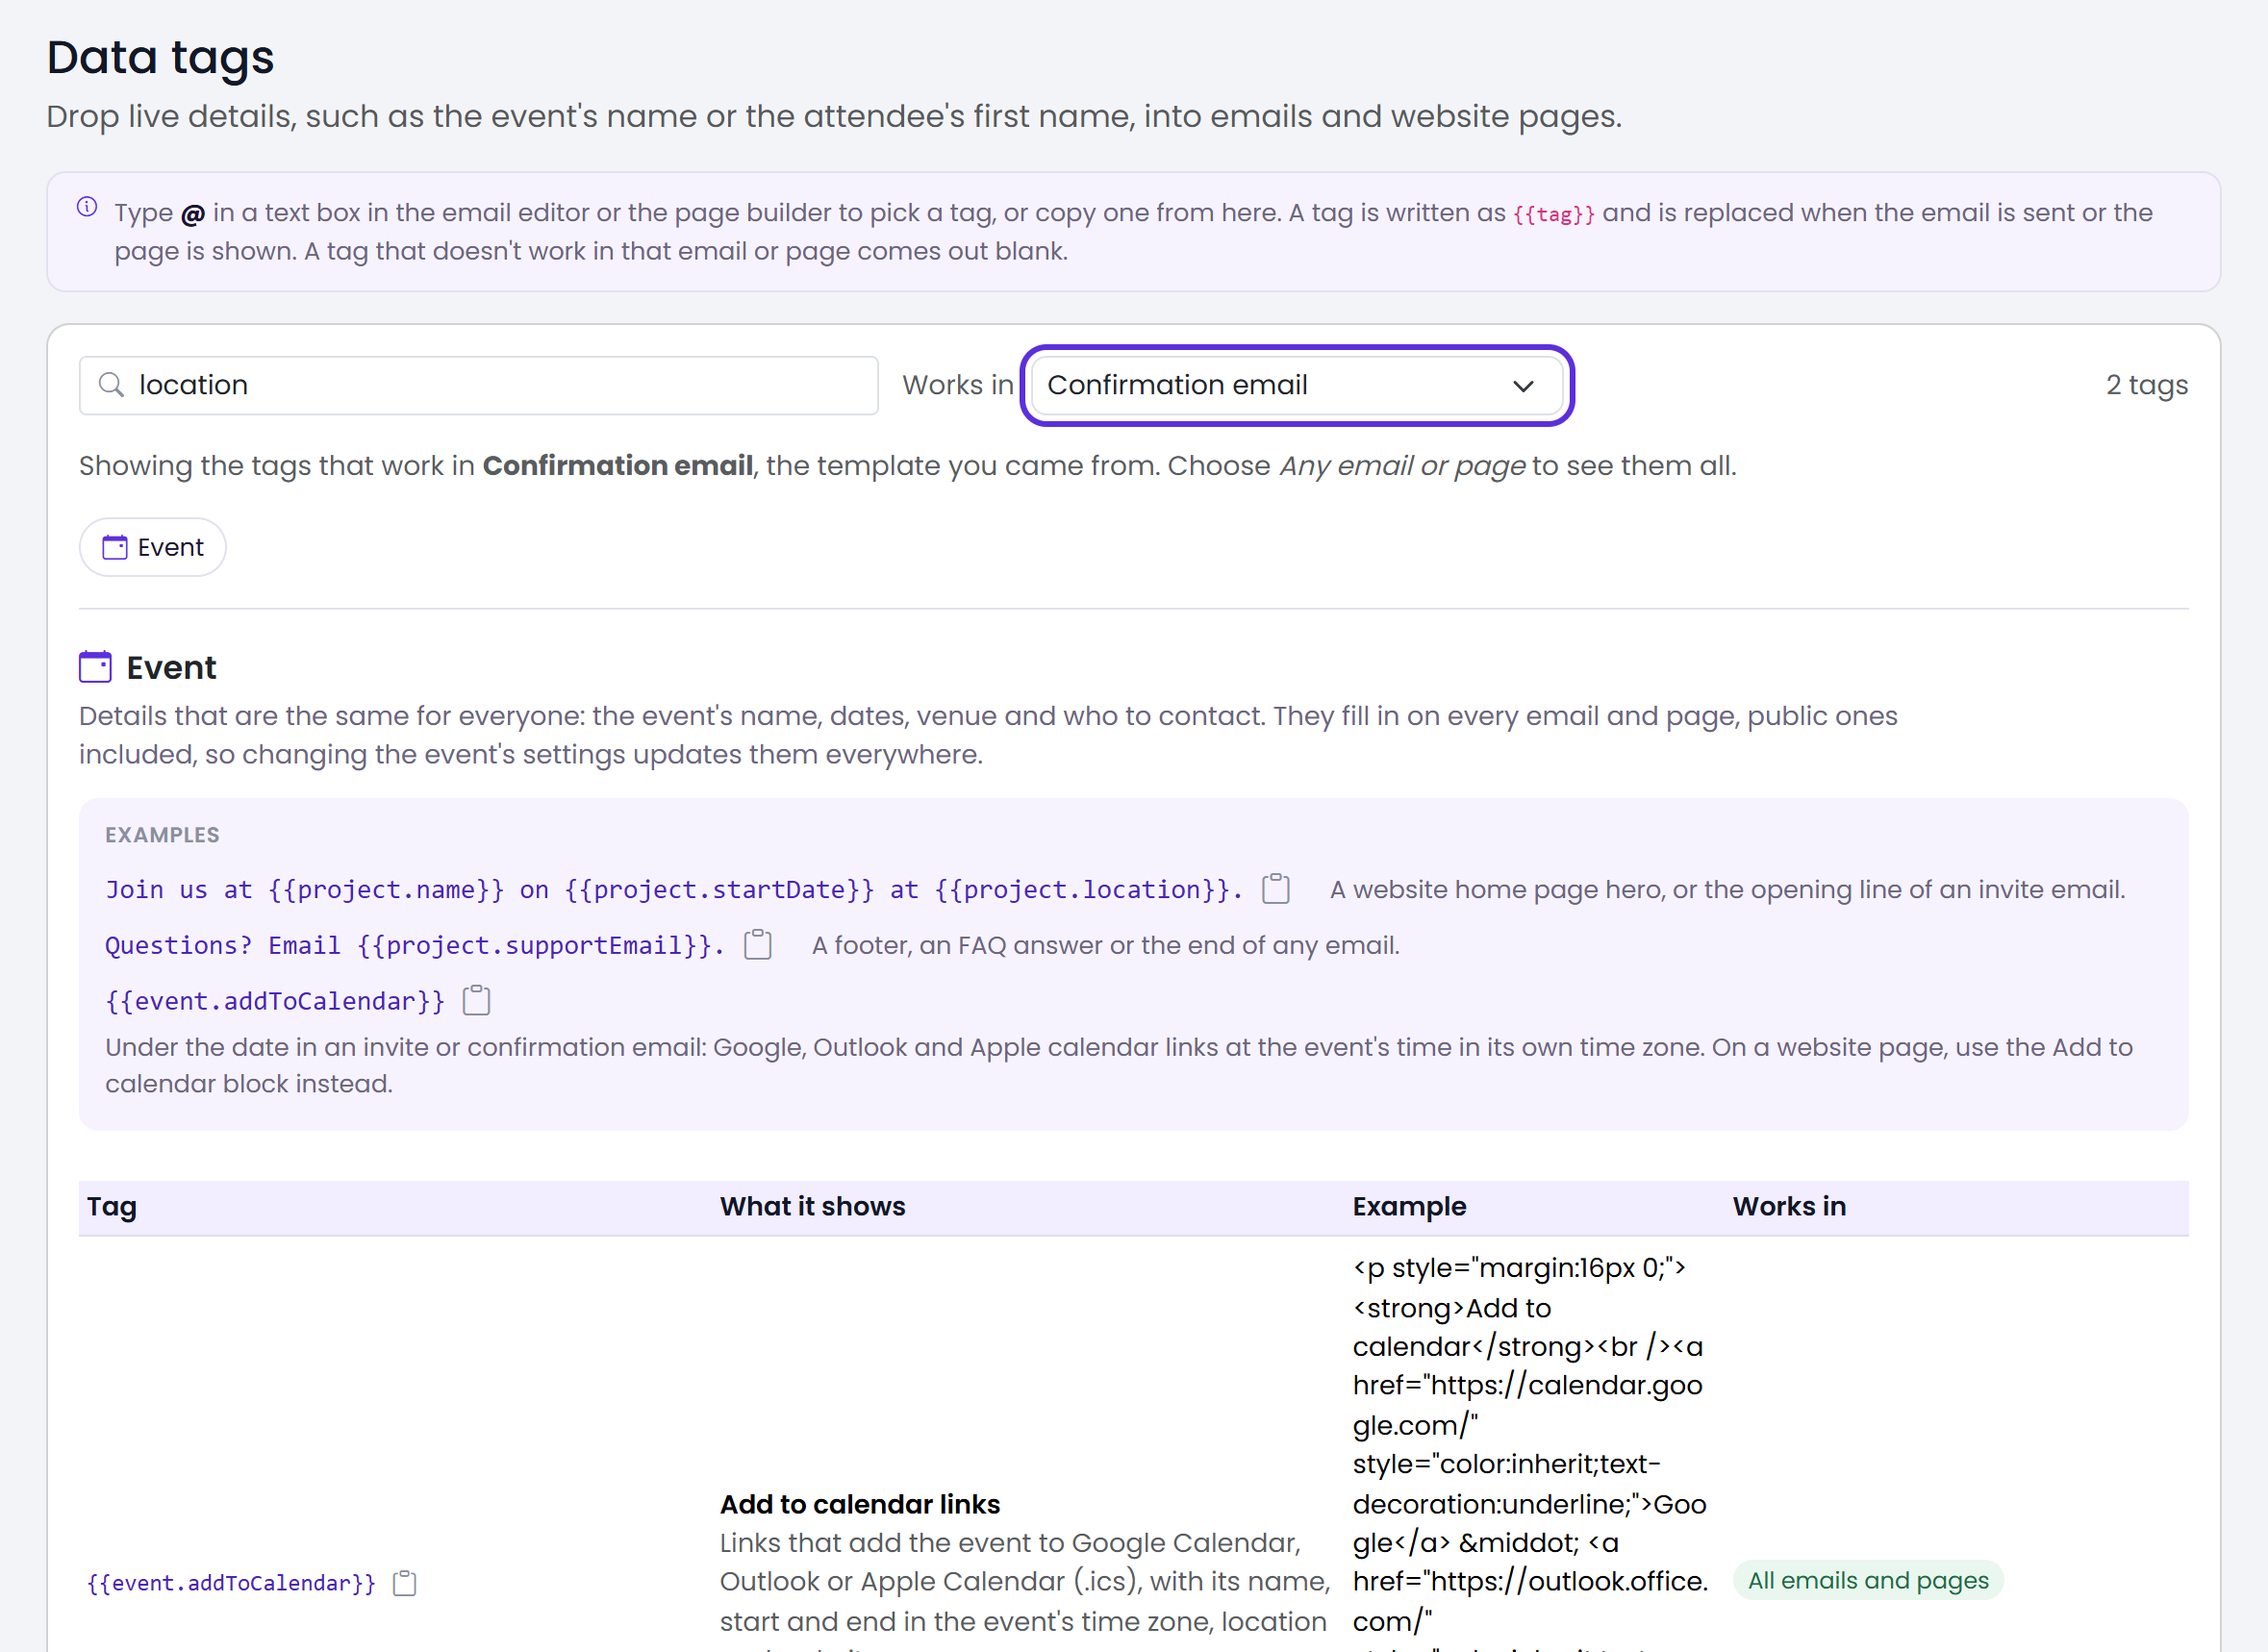
Select the copy button next to a tag, or next to one of a group's Examples, and paste it into the email.
The tags are grouped into Event, Attendee, Registration and order,
Cancellation, Links and system, Branding, Contributor portal and Layouts and
other. Each group starts with what it's for and some examples, such as
Hi {{attendee.firstName}}, for a greeting.
Add a tag to a communication
When you write a new email in a communication, choose its Kind first, then select Insert tag above the email. It lists the tags that work in that kind (before you choose one, only the tags that work in every kind). Search for the tag, for example firstName, and select it to add it where the cursor is.
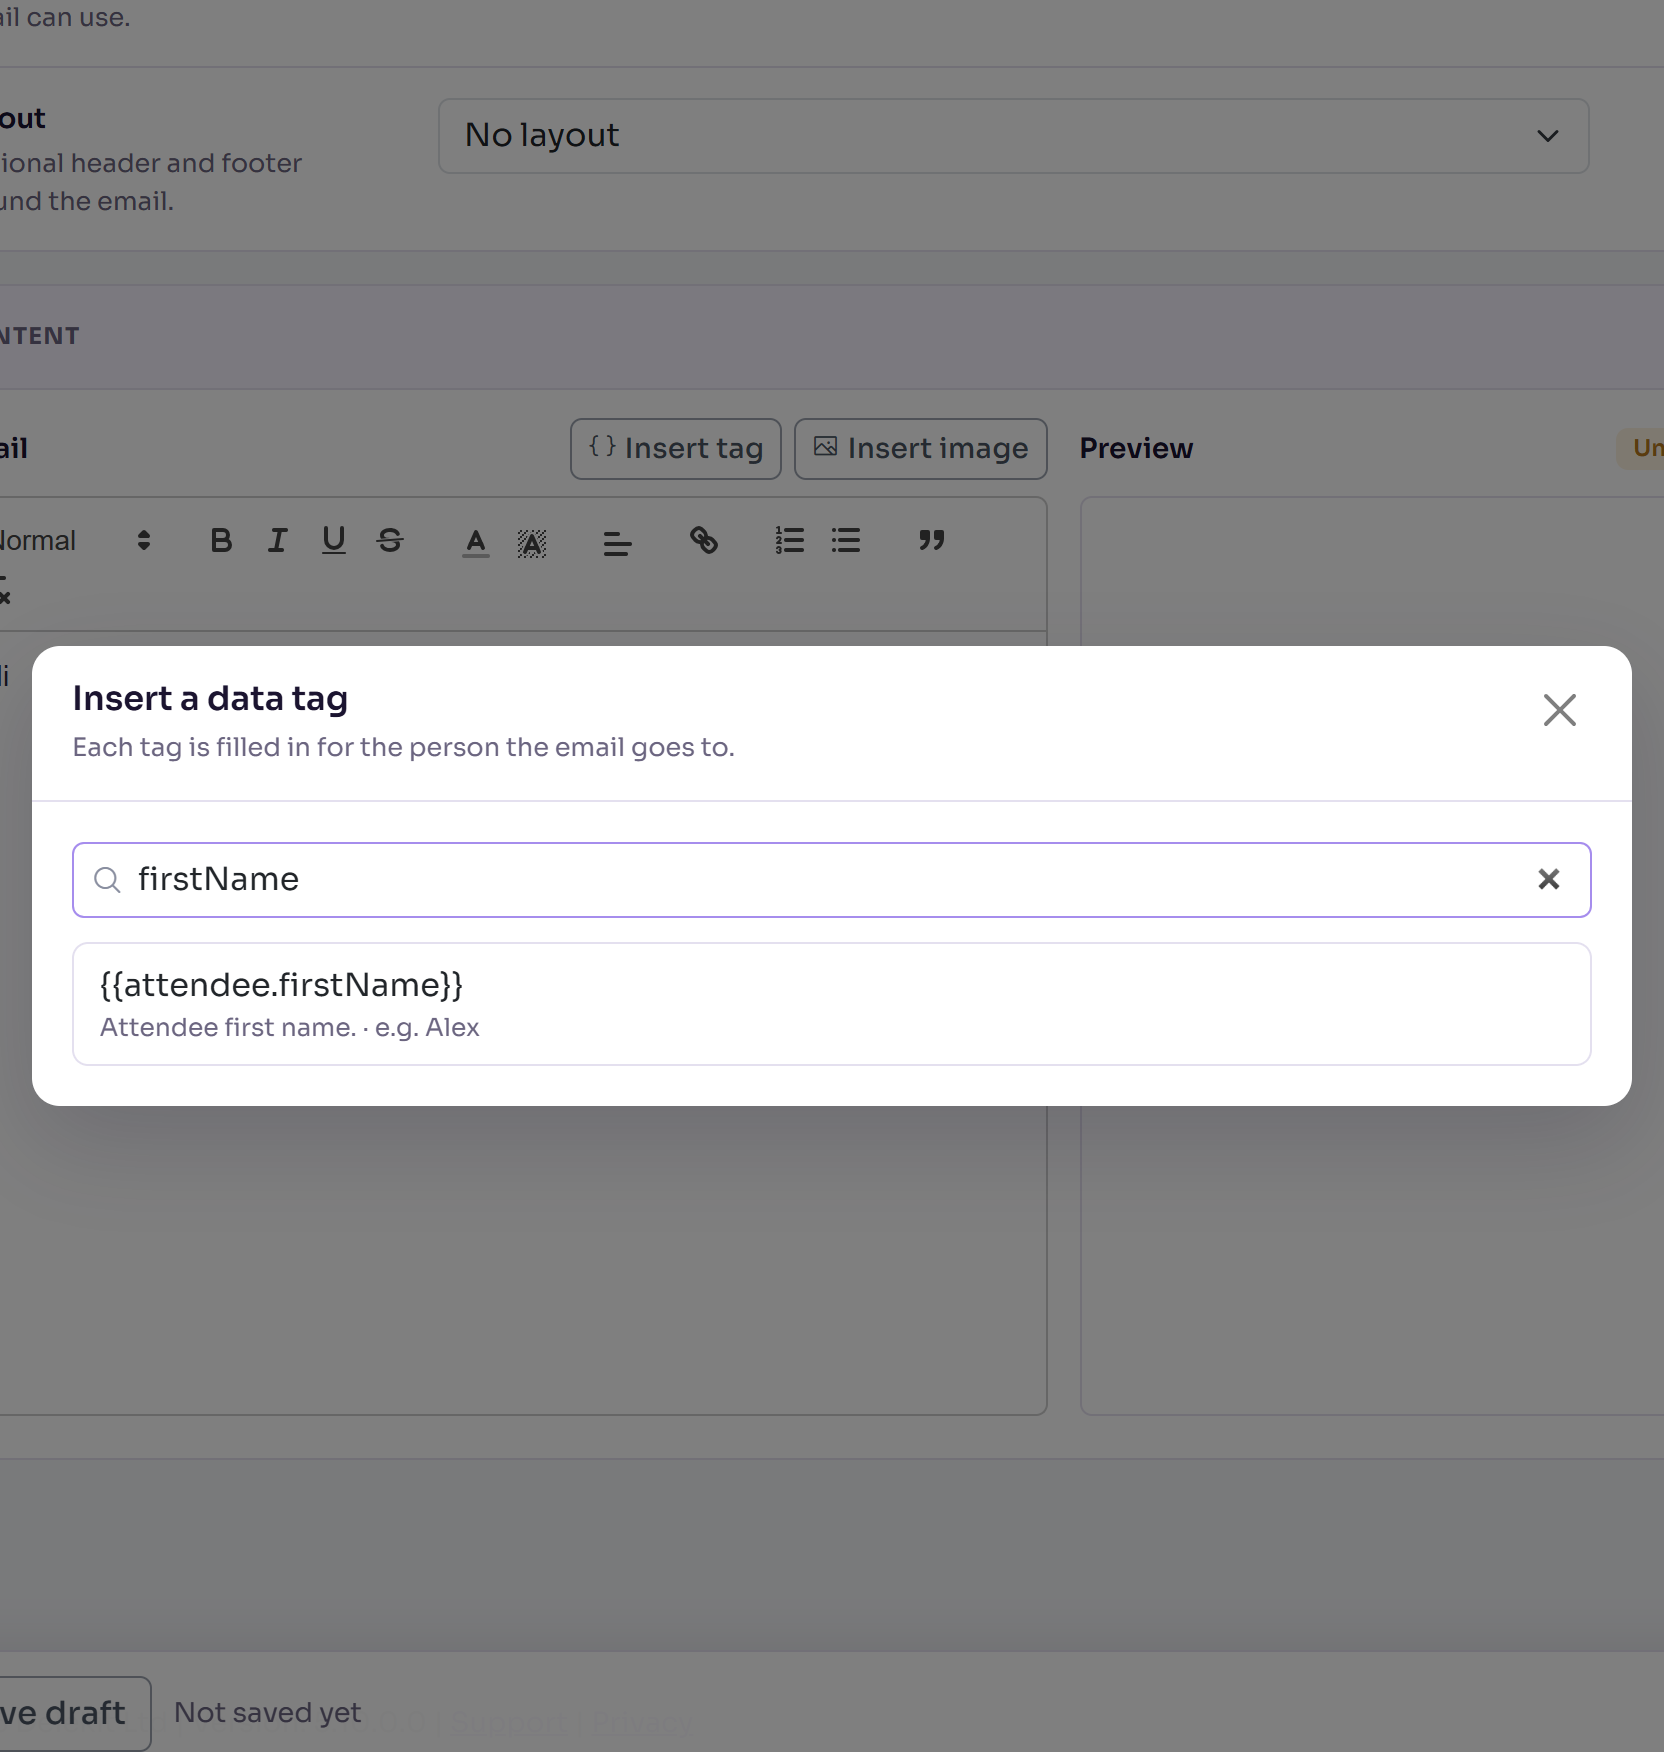
The communication's Preview fills the tags in, and lists any it doesn't know under the email as Unknown tag:.
Check it works
- The editor's Preview shows the email with sample values in place of the tags.
- Select Send me a test in the editor to get the email with sample data. It goes to you only.
If something isn't right
- Merge tags says "Fix these before sending": a tag is misspelt, or doesn't work in this type of email. Registration emails with a tag like that aren't sent, so change or remove it.
- A tag comes out blank: it doesn't work in that email. Check its Works in on the Data tags page.
- A personal link is missing: link tags such as
{{system.registrationUrl}}only fill in where Works in says.
Related articles
- Change the wording of an email
- Send an email to attendees (Communication)
- Which emails Delekit sends, and when
Still stuck? Contact Delekit support.
Was this article helpful?
That’s Great!
Thank you for your feedback
Sorry! We couldn't be helpful
Thank you for your feedback
Feedback sent
We appreciate your effort and will try to fix the article