Audience: client administrators. Applies to: all plans.
If an event's registration runs in Cvent, Delekit can import its attendees and sessions, so you can run badges, check-in and reports in Delekit. You store your Cvent credentials once for your organisation, then link each event to its Cvent event. Delekit keeps it up to date on each sync.
Before you start
- You need to be a client administrator. Cvent is set up on your client's Integrations page. See Integrations: an overview.
- Have your Cvent API credentials: a Client ID and Client secret, and which region your Cvent account is in. Your Cvent administrator can give you these.
- Have the Cvent event id of each event you want to import.
- Cvent becomes the source of truth for the attendees and sessions it imports. Onsite fields, scans and notes kept only in Delekit stay editable.
Add your Cvent connection
On the Integrations page, on the Cvent card, select Configure.
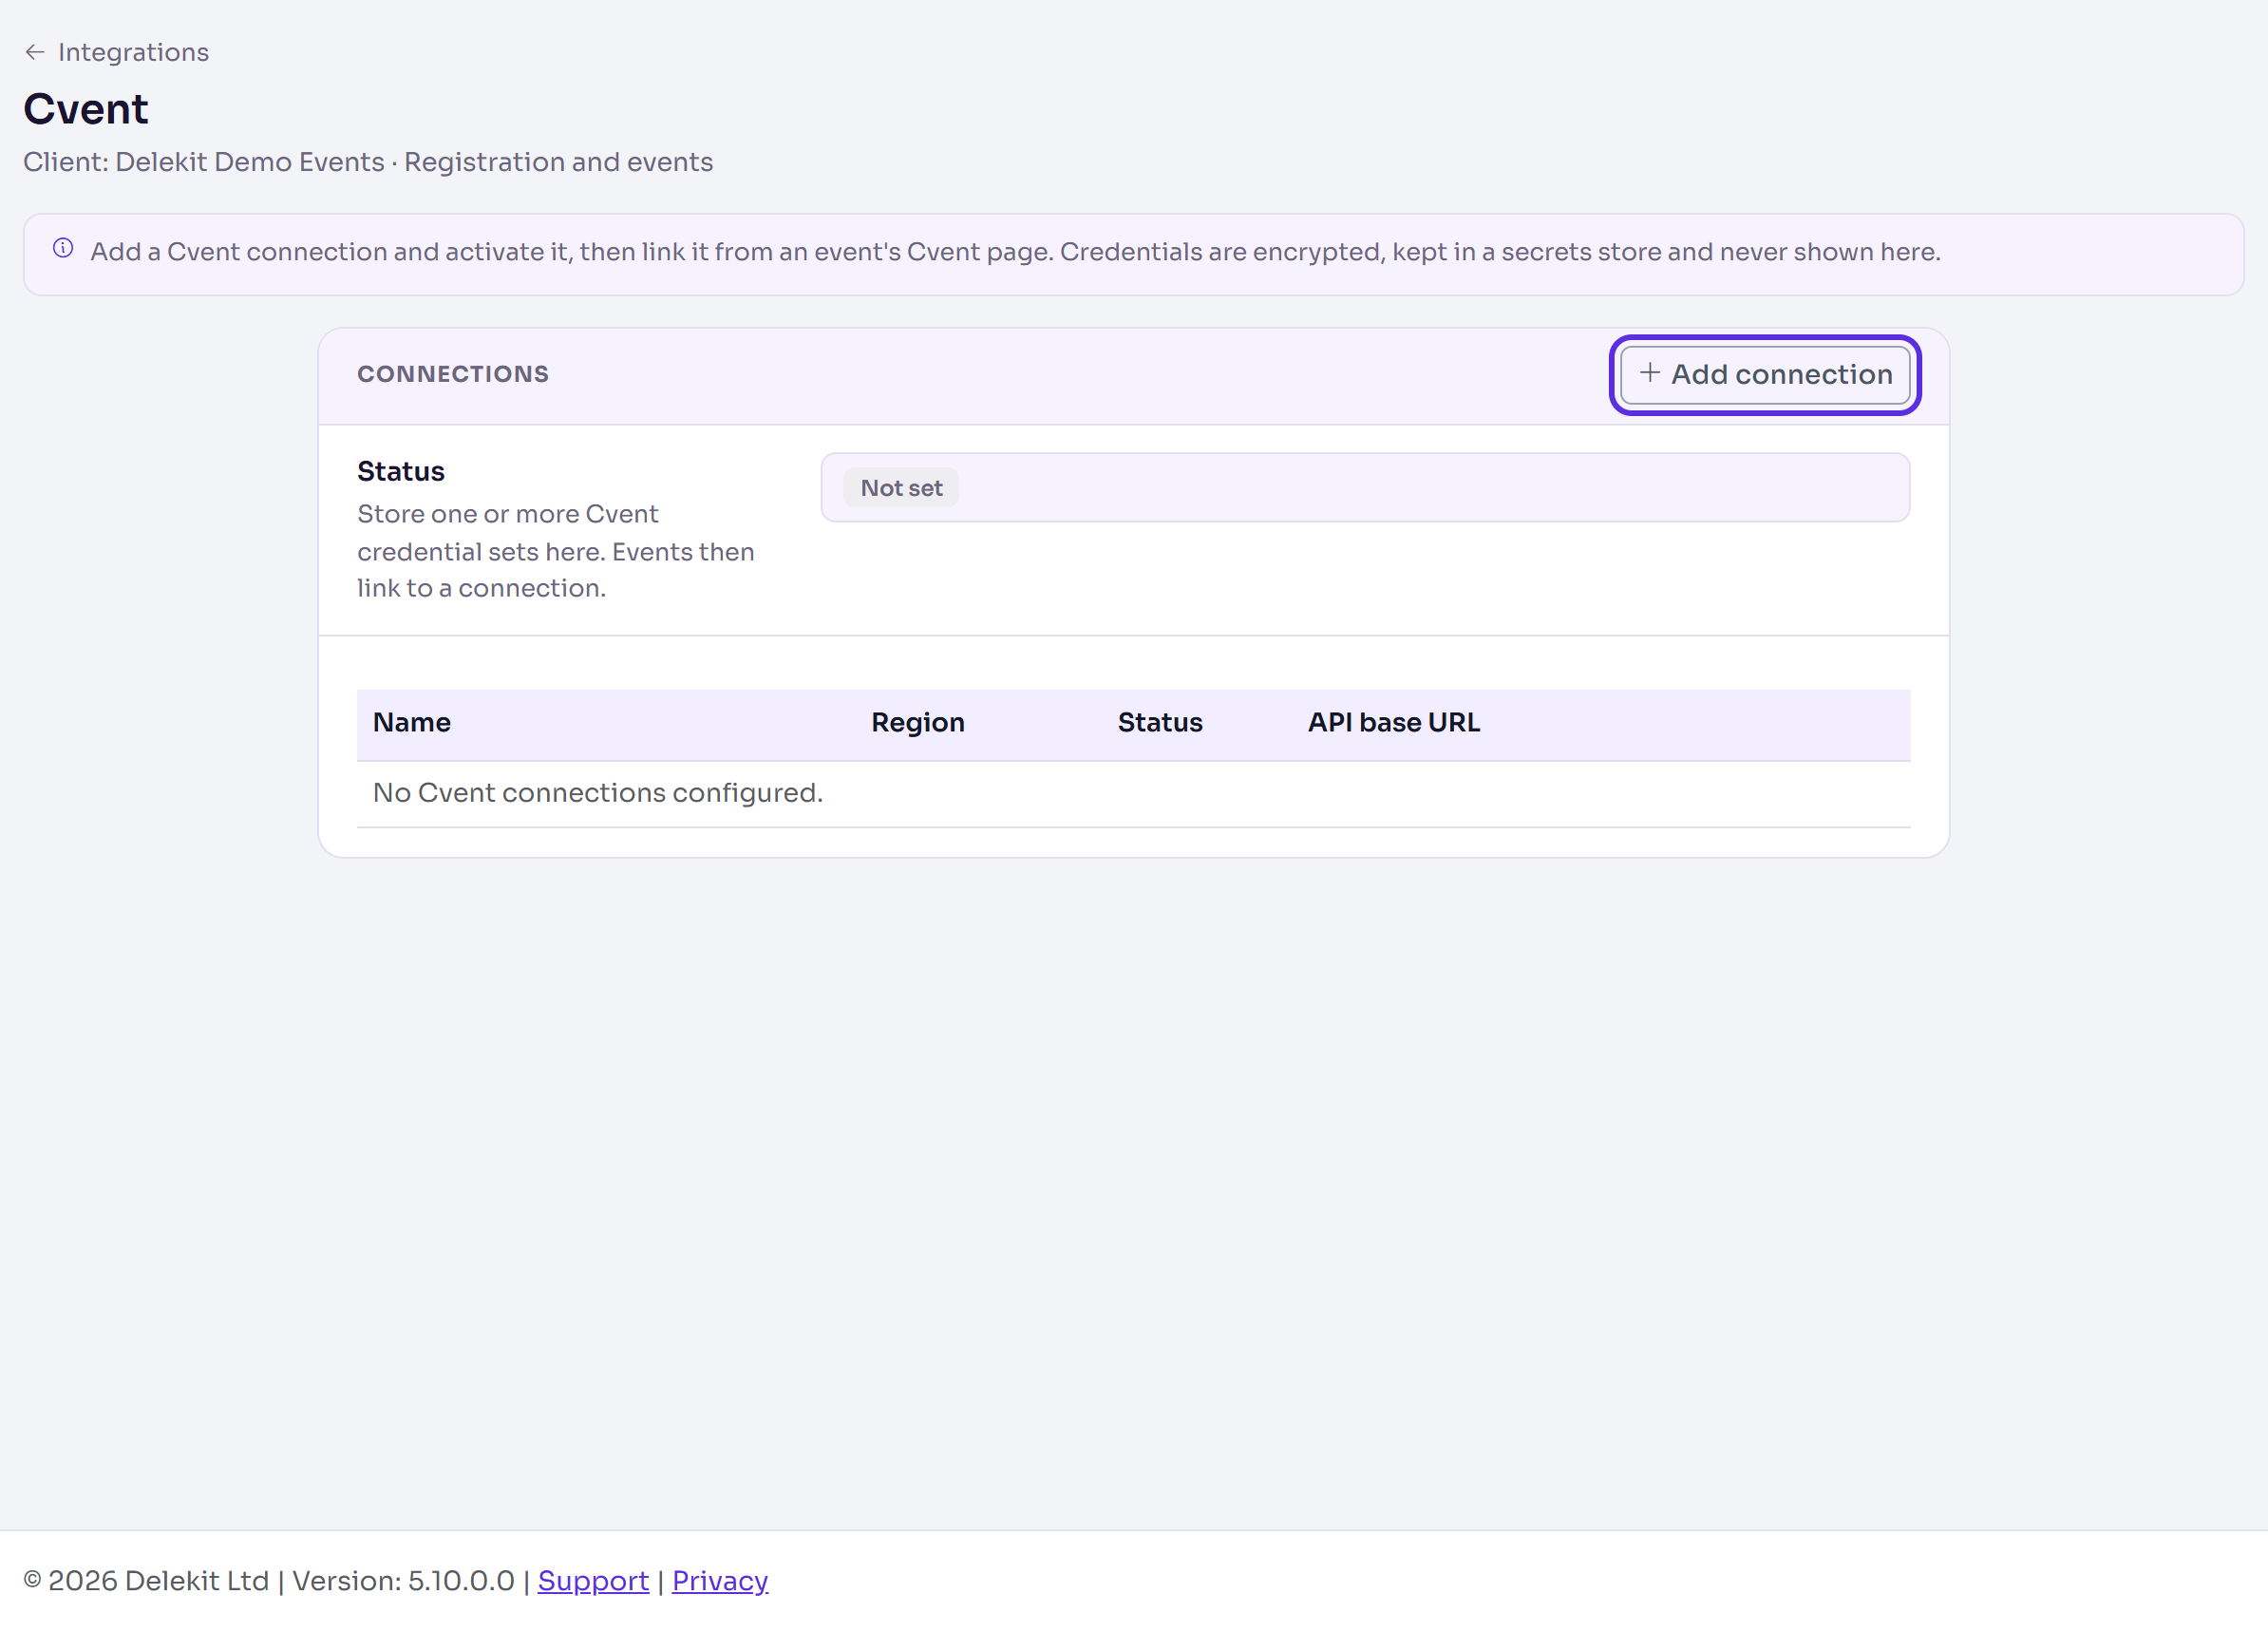
Select Add connection.
Enter a Connection name, and choose the Region: Europe (EUR), North America (NA) or Custom. Leave API base URL (optional) empty unless you need to override the region's host.
Enter the Client ID and Client secret.
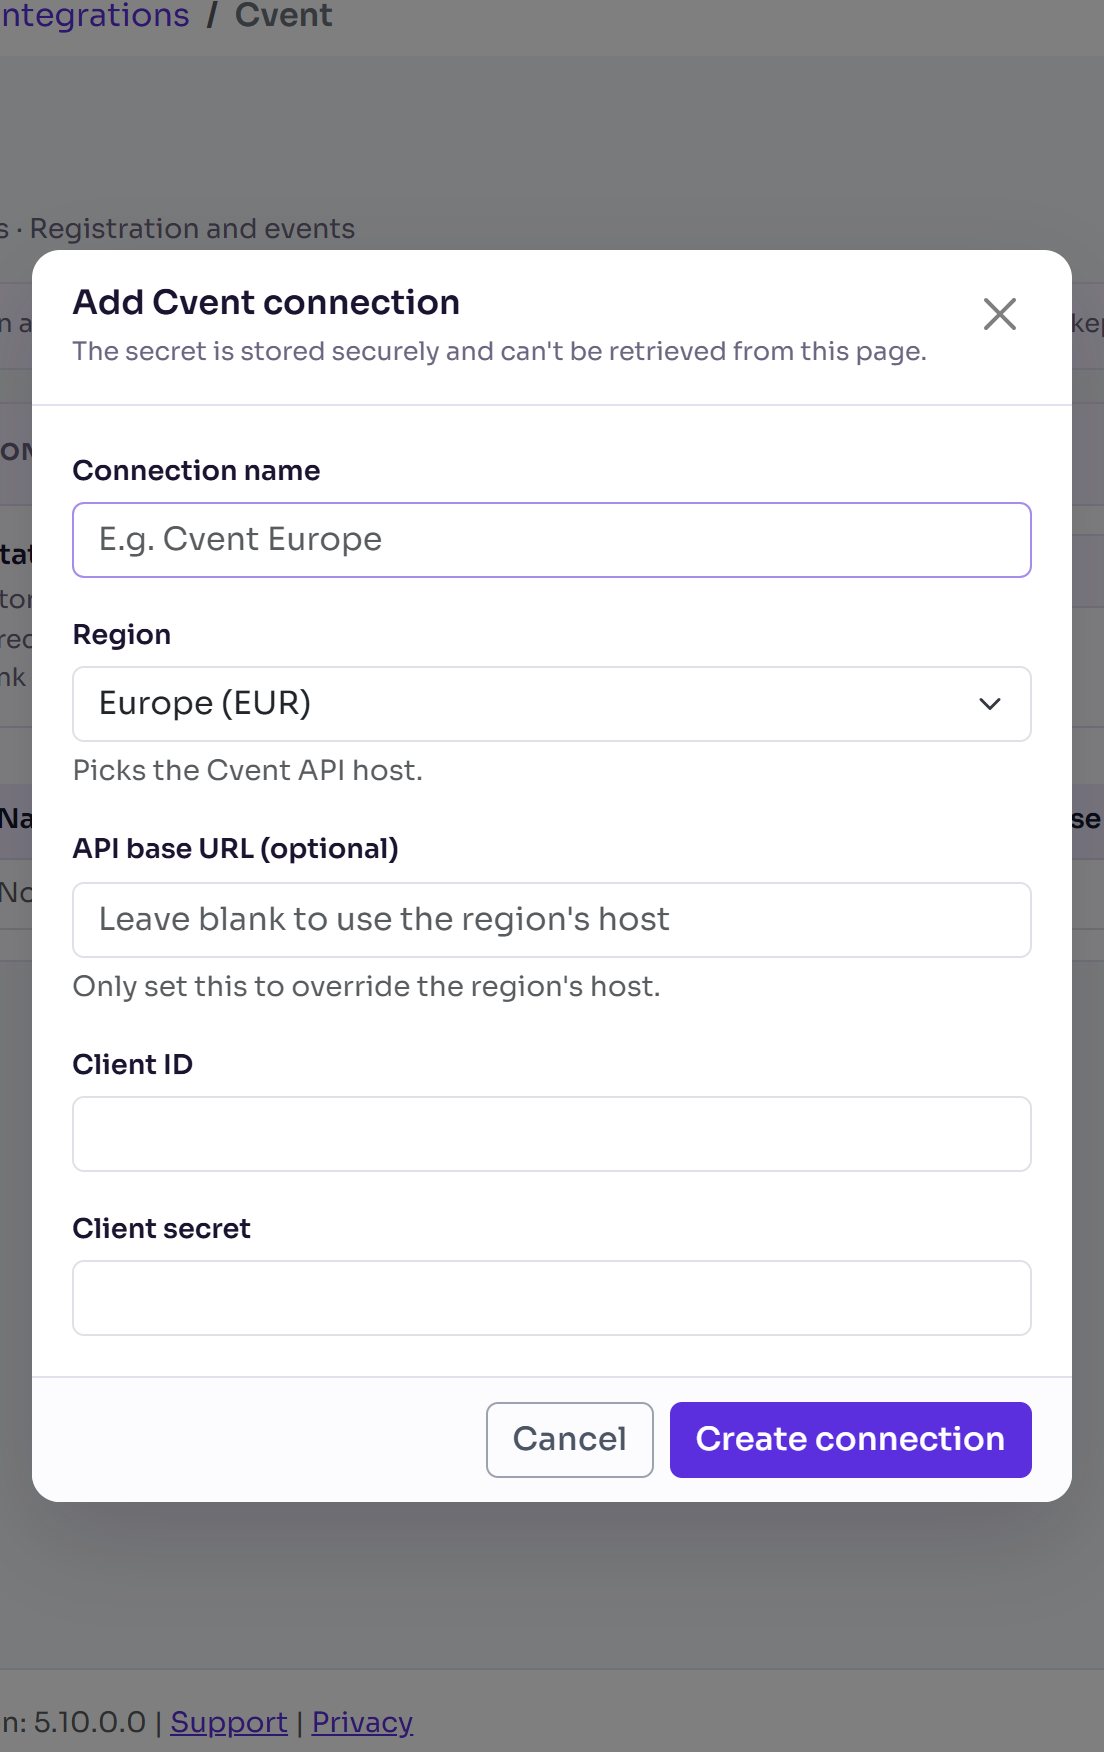
Select Create connection. You see "Cvent connection created."
In Connections, select Activate next to it. You see "Connection activated."
The secret is stored securely and is never shown again. To change it, delete the connection and add it again.
Link an event to its Cvent event
- In the event, select Edit event. In Integrations, select Configure Cvent. The event's Cvent page opens in a new tab.
- In Cvent connection, choose your connection.
- Enter the Cvent event id.
- Leave Import attendees and Import sessions on, or turn off the one you don't want.
- Select Save changes. You see "Cvent integration saved.", and Status says Configured.
You can also reach an event's Cvent page from the client's Cvent page: in Configure for an event, select Configure next to the event.
What happens next
- The sync imports the event by itself: there's no button to start it. Each sync creates or updates attendees with their first name, last name and email, and their company in a custom field called Company (added to the event if it hasn't one). It creates or updates sessions too. After the first, each sync brings in what changed in Cvent since the last one.
- Last sync and Last status, on the event's Cvent page, show when it last ran and whether it worked. They say Not yet synced until it first runs.
- Attendees are matched by their Cvent id, so a person updated in Cvent is updated in Delekit rather than added again.
Check it works
After the next sync, open the event's Cvent page and check Last status. Then, in the menu, select Attendees, then View all, and look for the people from Cvent.
If something isn't right
- "Select a connection and enter the Cvent event id." Both are needed before you save.
- Your connection shows "(inactive)" and can't be chosen: activate it on the client's Cvent page.
- There's no Configure Cvent in Edit event: your organisation has no active Cvent connection.
- Last status says it failed: check the Cvent event id, and that the connection's credentials and region are right.
- To stop importing, select Remove integration on the event's Cvent page. The event is unlinked; attendees and sessions already imported are kept.
- A connection can't be deleted while events are linked to it. Remove it from those events first.
Related articles
Still stuck? Contact Delekit support.
Was this article helpful?
That’s Great!
Thank you for your feedback
Sorry! We couldn't be helpful
Thank you for your feedback
Feedback sent
We appreciate your effort and will try to fix the article