Audience: event organisers and client administrators. Applies to: all plans.
Add new attendees, or update the ones you have, from an Excel or CSV file. You choose where each column goes, see exactly what will change, and only then import. Importing sends no emails: imported people have no status until you invite or confirm them.
Before you start
- Prepare the file. The first row holds the column names; each row after it is one attendee. Up to 5,000 rows and 10 MB. Only the first worksheet is read.
- Include an email address for each person if you can. Rows are matched to attendees already in the event by email address (or External ID), so importing the same file again updates them rather than adding them twice.
- Set up the event first: its registration types, and any custom fields you want to fill. A Registration type column must hold the names of the event's registration types.
- Not sure of the columns? On the first step, Download empty template gives you a column for each of the event's fields and sessions.
Upload the file and match its columns
In the menu, select Attendees, then Import attendees.
Under Excel or CSV file, choose your file.
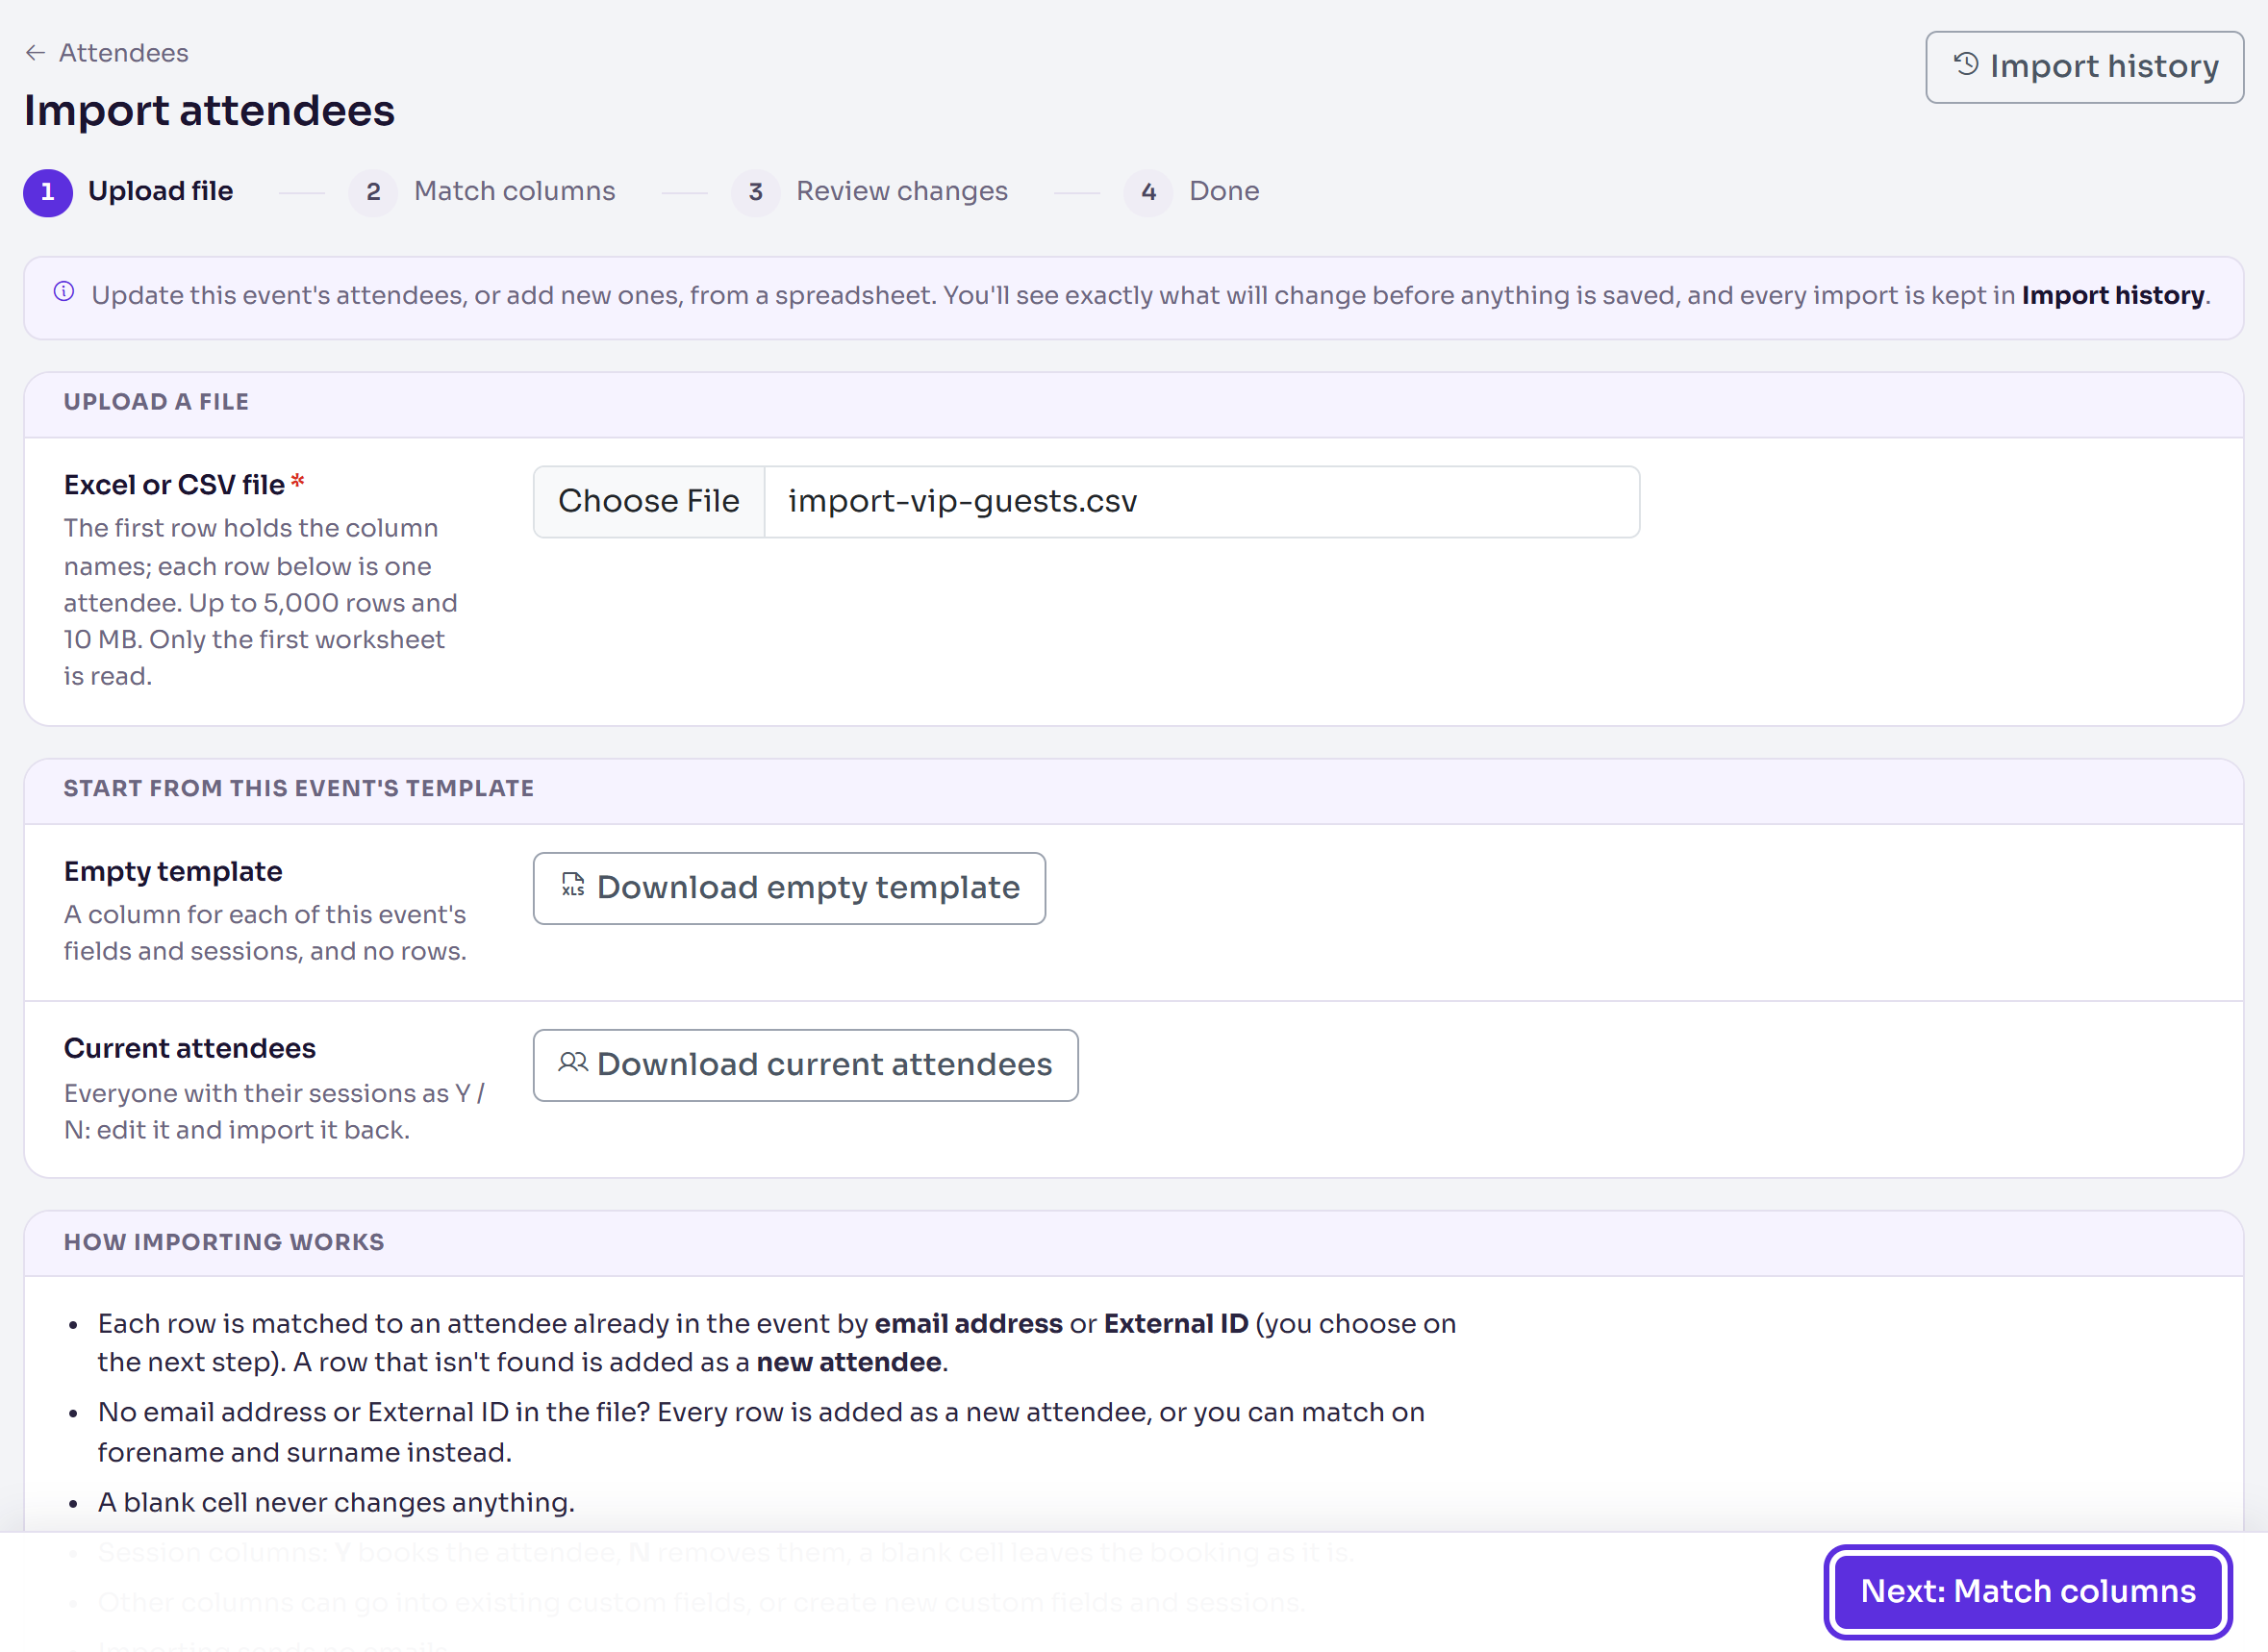
Select Next: Match columns.
Under Find each row's attendee by, choose Email address (or External ID, or Forename + surname if the file has neither).
Check where each column goes. Delekit fills in its first guess: the attendee's own details (Forename, Surname, Email, Registration type), then the event's custom fields and sessions with the same name. Choose Don't import for a column you don't want.
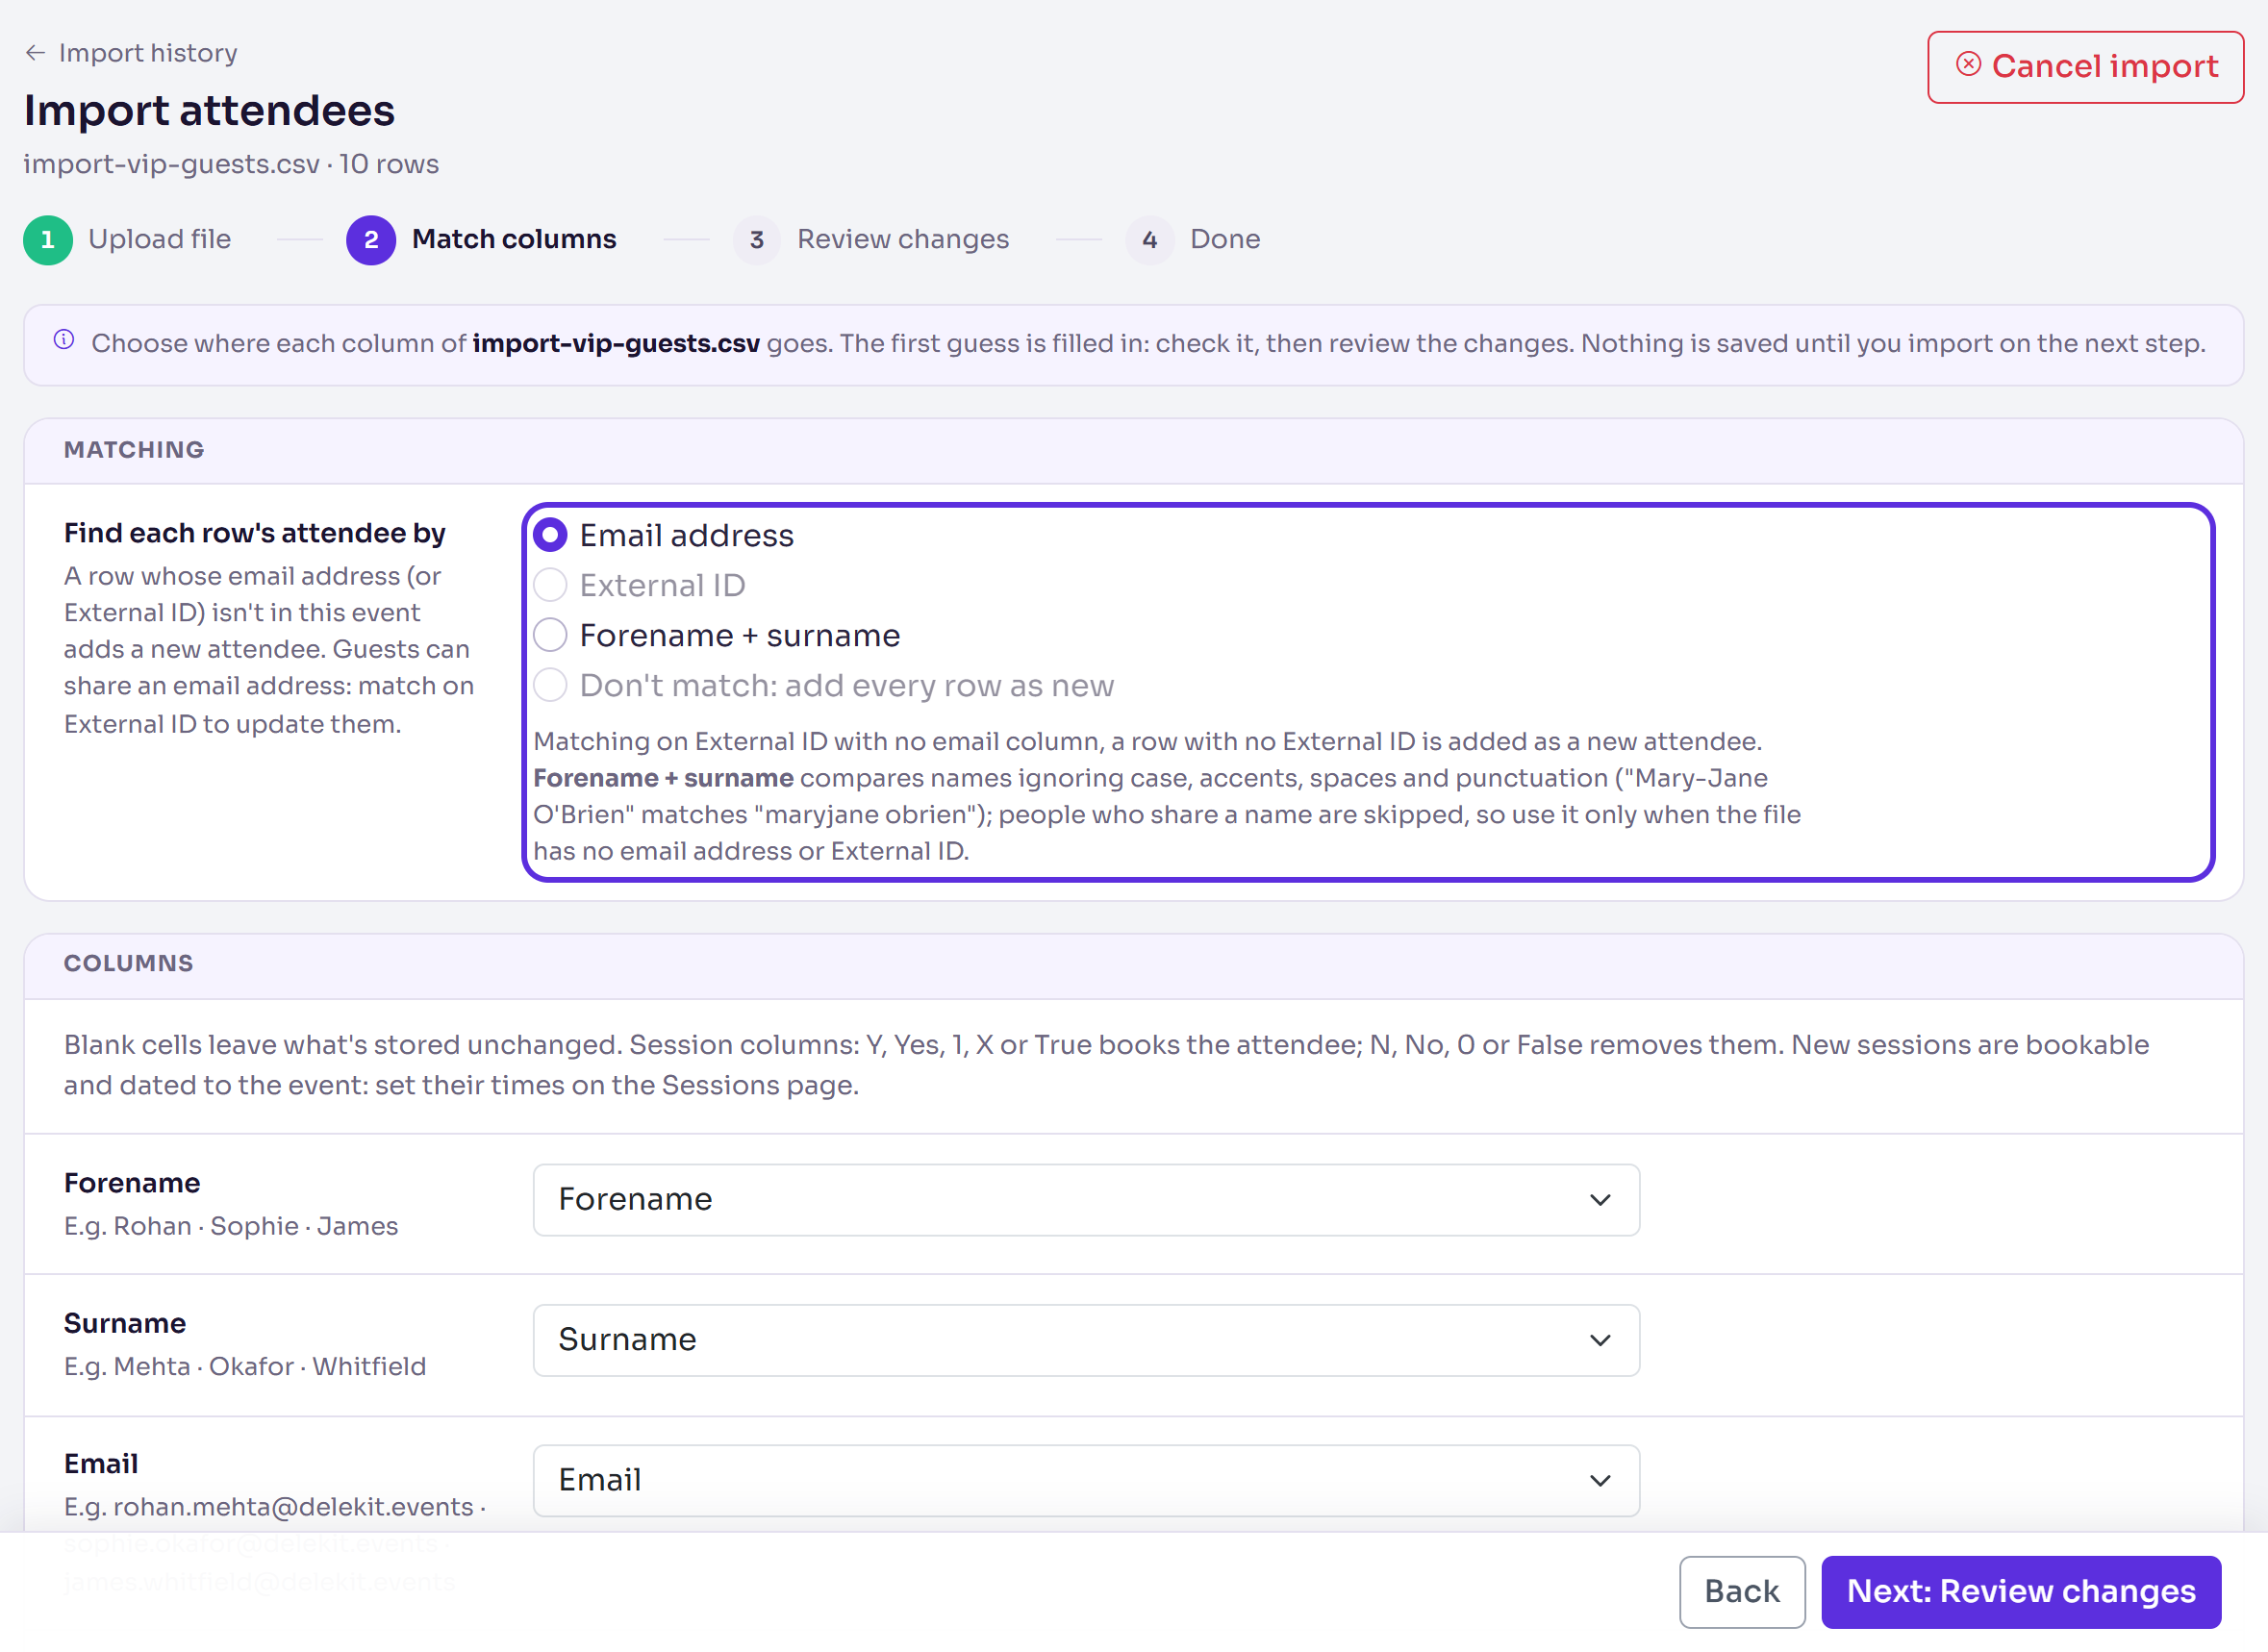
Select Next: Review changes.
A column with no match can create something new: choose New custom field or New session and give it a name.
Review the changes and import
Nothing has changed yet. The Review changes step counts what the import will do: New attendees, Updated, No changes, Skipped rows and Not in the file, and lists them row by row under Row by row.
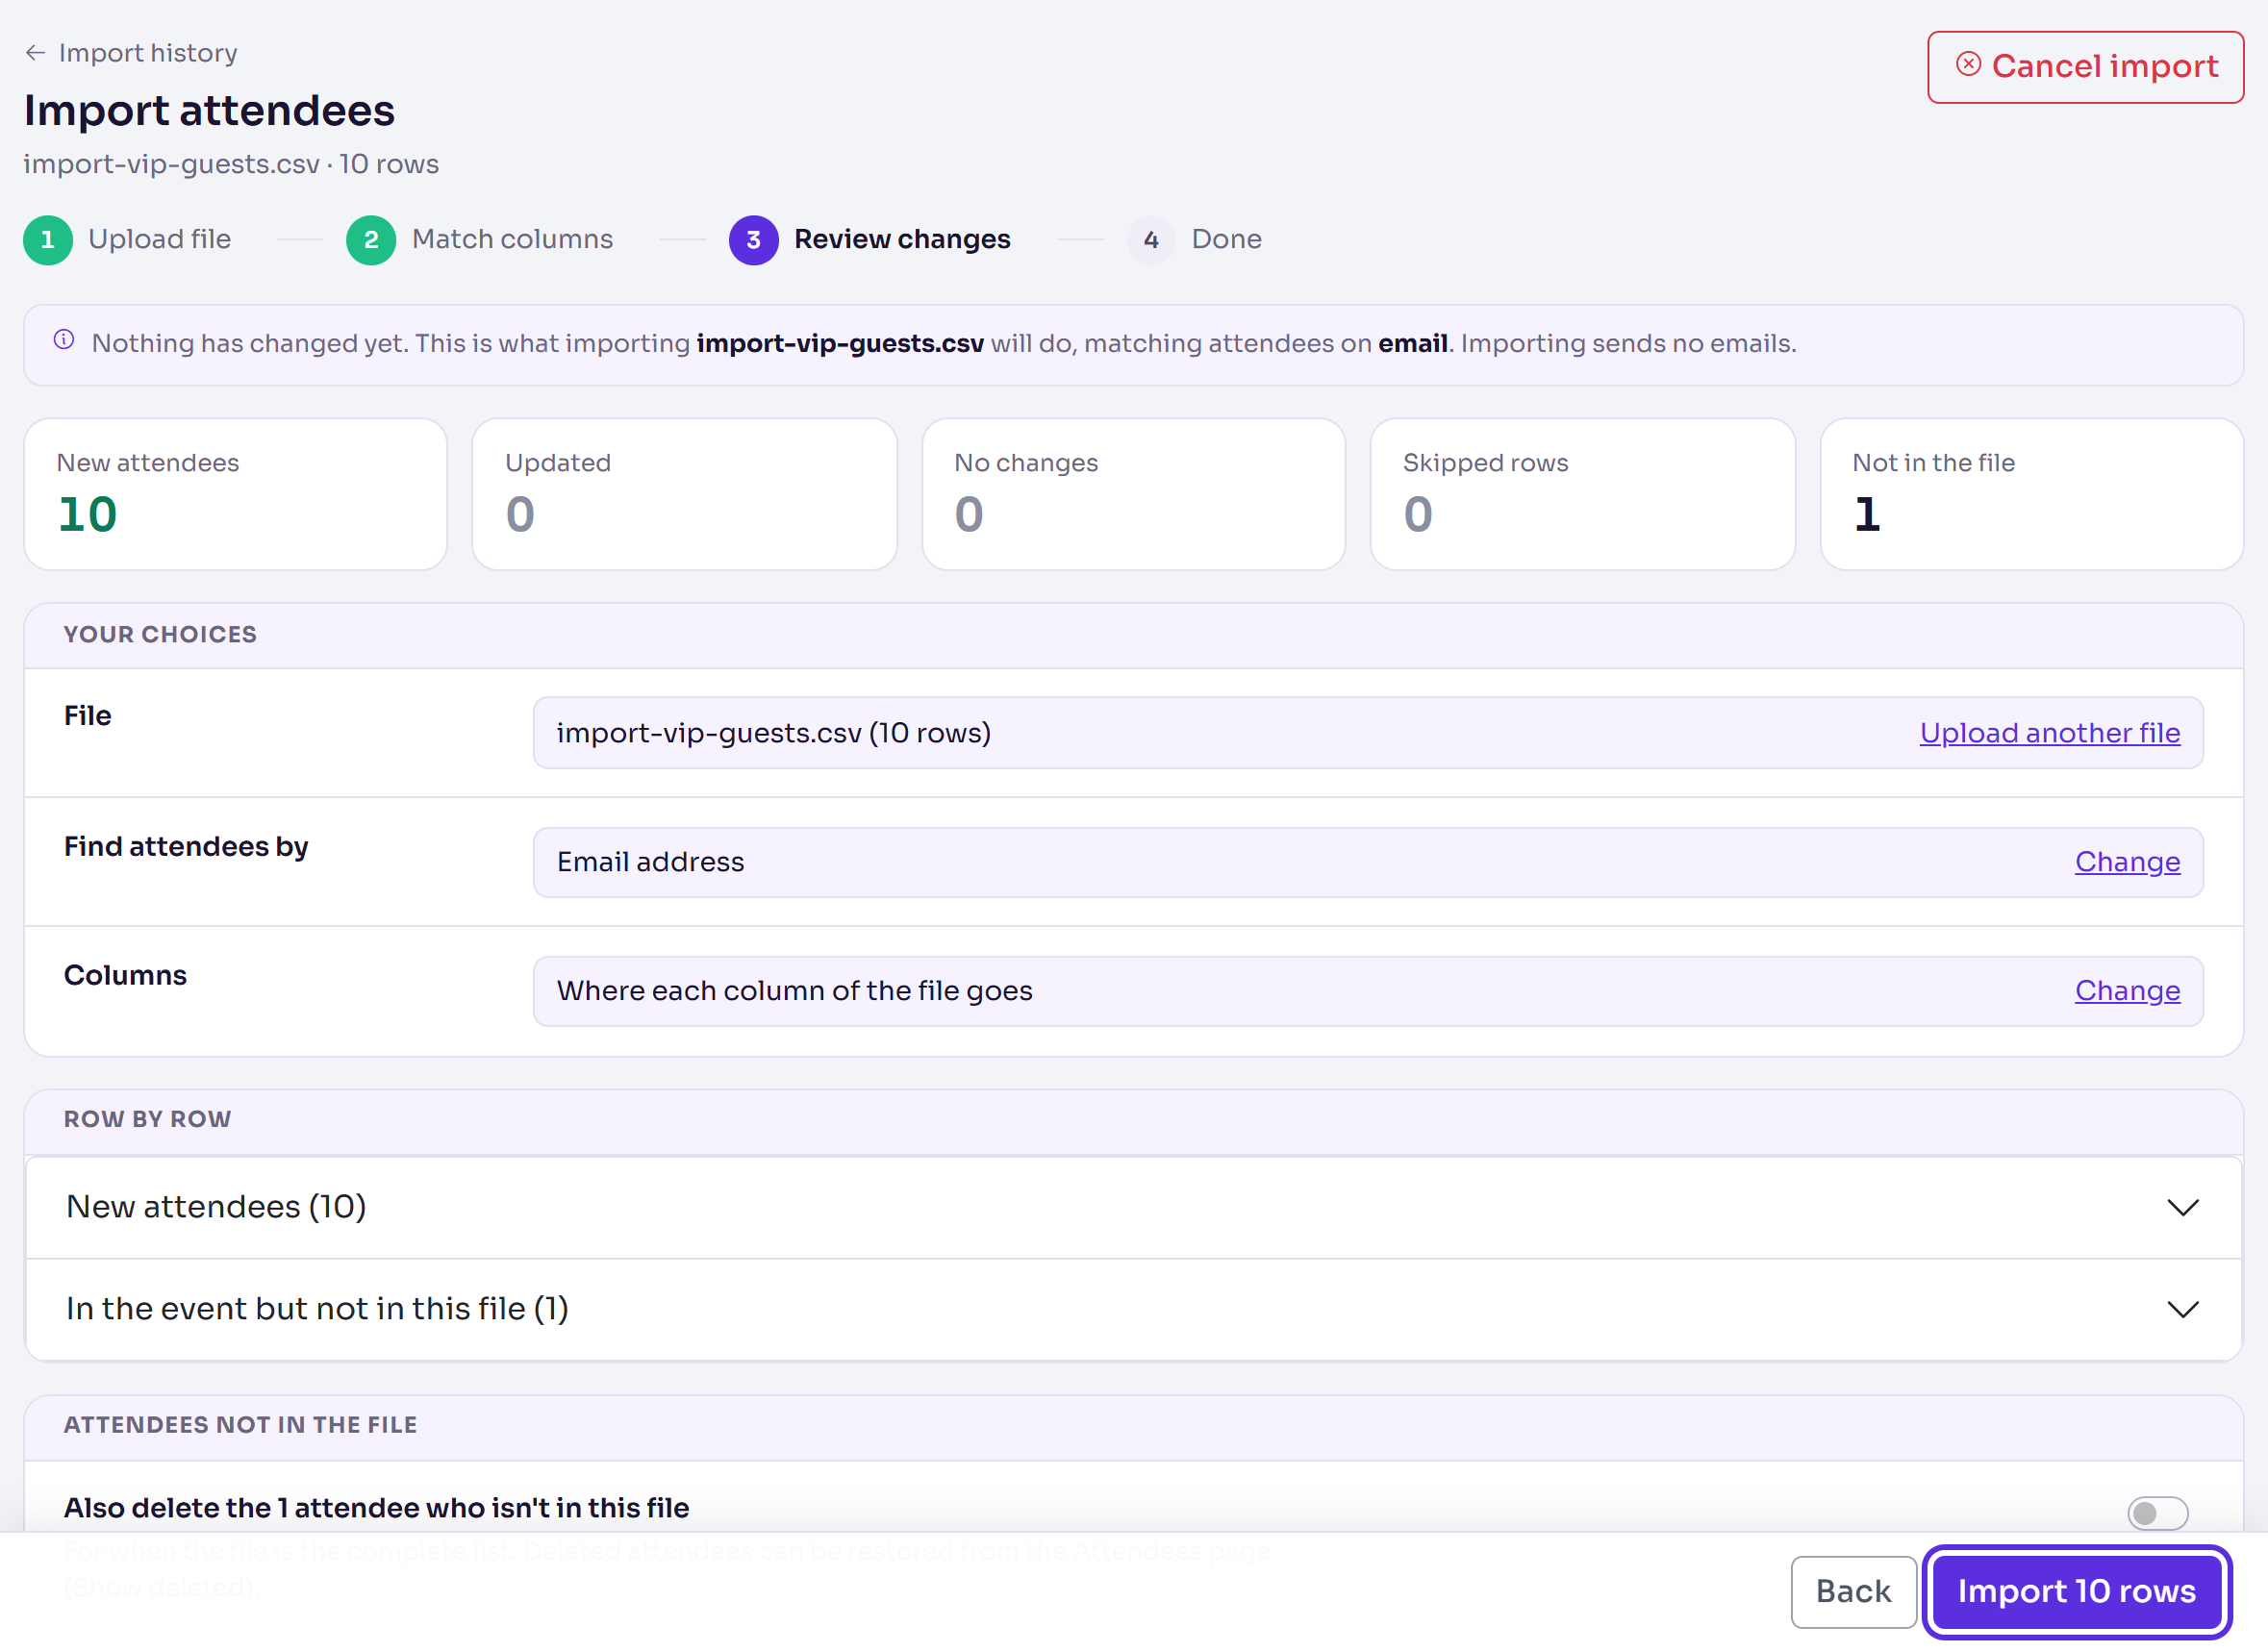
- Open Skipped rows, if there are any, to see why each row was skipped.
- Leave Also delete the attendees who aren't in this file off, unless the file is your complete list.
- Select Import with the number of rows (for example Import 10 rows).
- Select Import with the number of rows again, in the question that opens.
What happens next
The import runs in the background and saves in one go. Its page updates itself every few seconds, and shows Imported when it's done, with the same counts. You can leave the page while it runs.
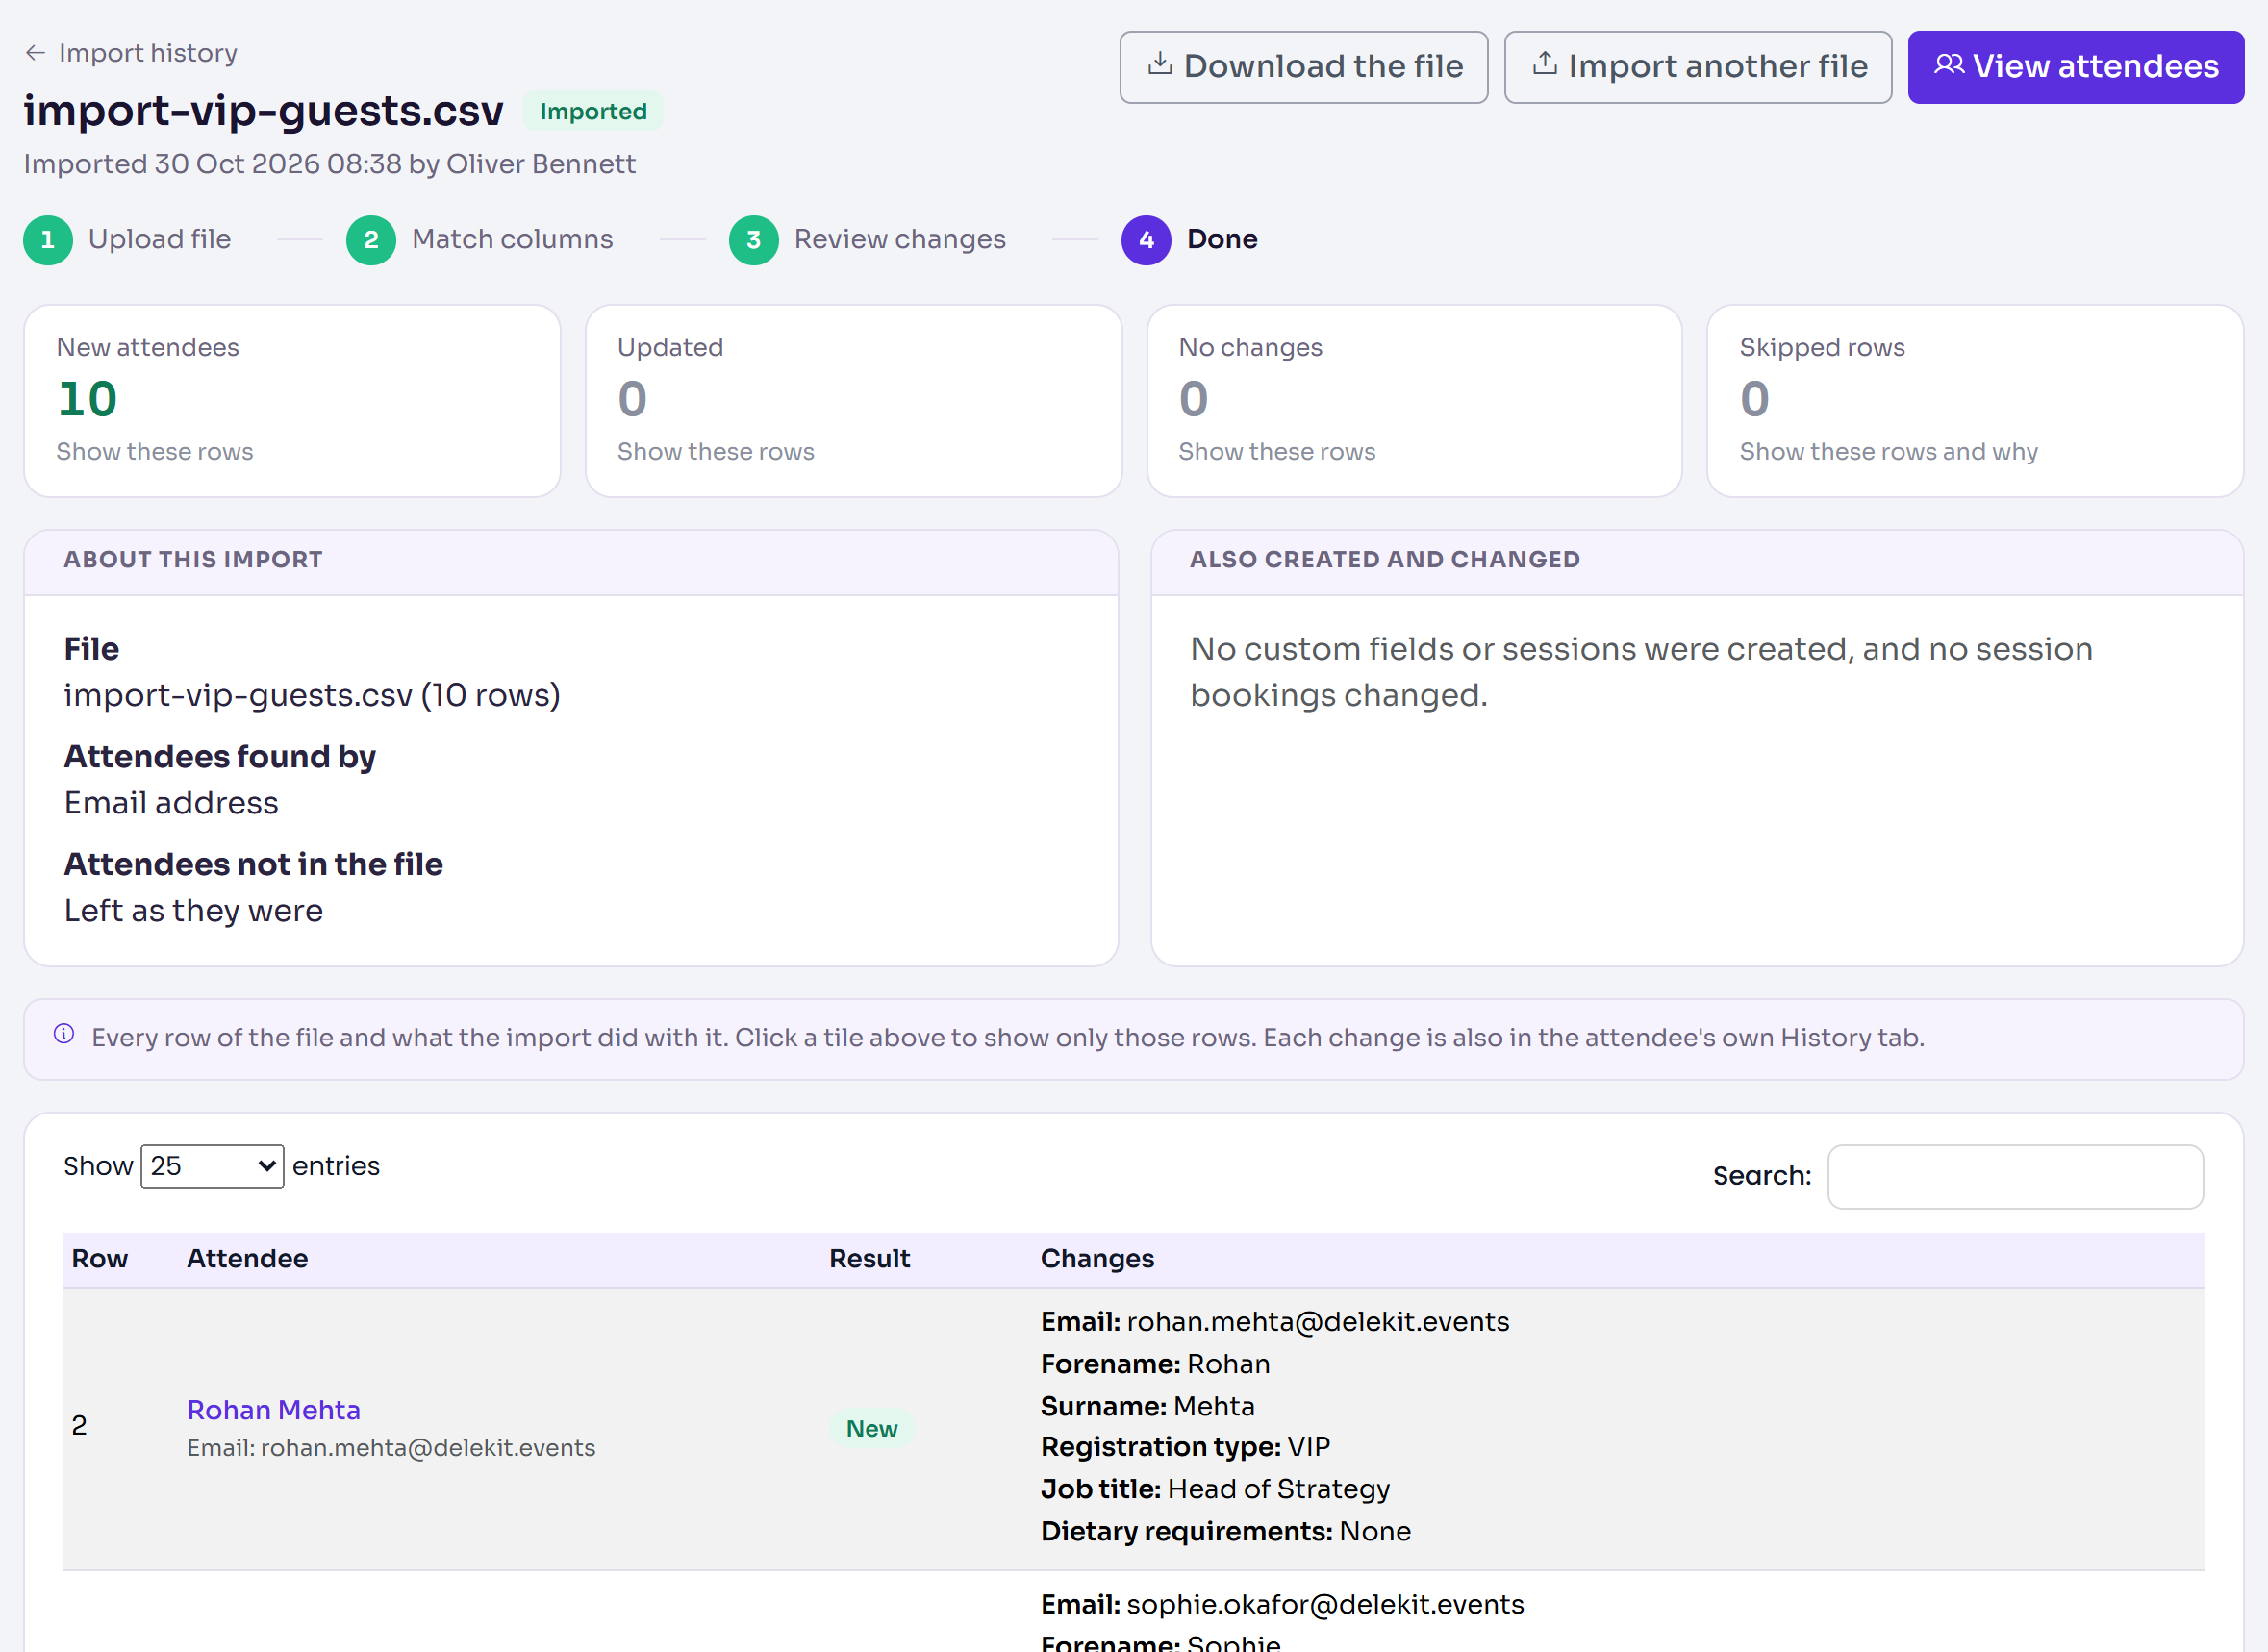
- No emails are sent, and imported people have No status. Invite them when you're ready: see Send or schedule invitations.
- A blank cell never changes anything on an attendee who's already there.
- Every import is kept in Import history (on the Attendees list), with the file and what happened to each row. Each change is also in the attendee's own History.
Check it works
Select View attendees. The people from your file are in the list. Choose Columns on the toolbar to show the custom fields you imported.
If something isn't right
- "Upload an Excel (.xlsx or .xls) or CSV (.csv) file." Save the file in one of those formats.
- A row says "isn't a registration type in this event: not changed". The name in the file doesn't match a registration type. Correct it in the file, or create the type, and import again.
- "There's no identifier for the attendees." No column is set to Email or External ID, so every row is added as a new attendee. Set the column that holds the email address to Email.
- You chose the wrong file or columns: on Match columns or Review changes, select Cancel import. Nothing has been imported until the last step.
Related articles
- Add an attendee
- Find attendees: search, filter and columns
- Change status or type for many attendees at once
Still stuck? Contact Delekit support.
Was this article helpful?
That’s Great!
Thank you for your feedback
Sorry! We couldn't be helpful
Thank you for your feedback
Feedback sent
We appreciate your effort and will try to fix the article