Audience: event organisers and client administrators. Applies to: all plans.
Add one person to an event by hand: their name, email address and registration type, and any custom field answers you already have. Adding someone sends them nothing. They join the Attendees list with no status, ready for you to invite or confirm when you choose.
Before you start
- Set up the event's registration types first. A registration type is the kind of attendee someone is (Delegate, VIP, Speaker), and it decides which form and tickets they get. See Registration types and tickets explained.
- Adding many people? Import them from a spreadsheet instead: see Import attendees from a spreadsheet.
- One email, one attendee. An email address can belong to only one attendee in an event, unless Edit event › Booking again is set to Take a new, separate booking.
Add the attendee
In the menu, select Attendees, then Add attendee. (The Add attendee button on the Attendees list opens the same page.)
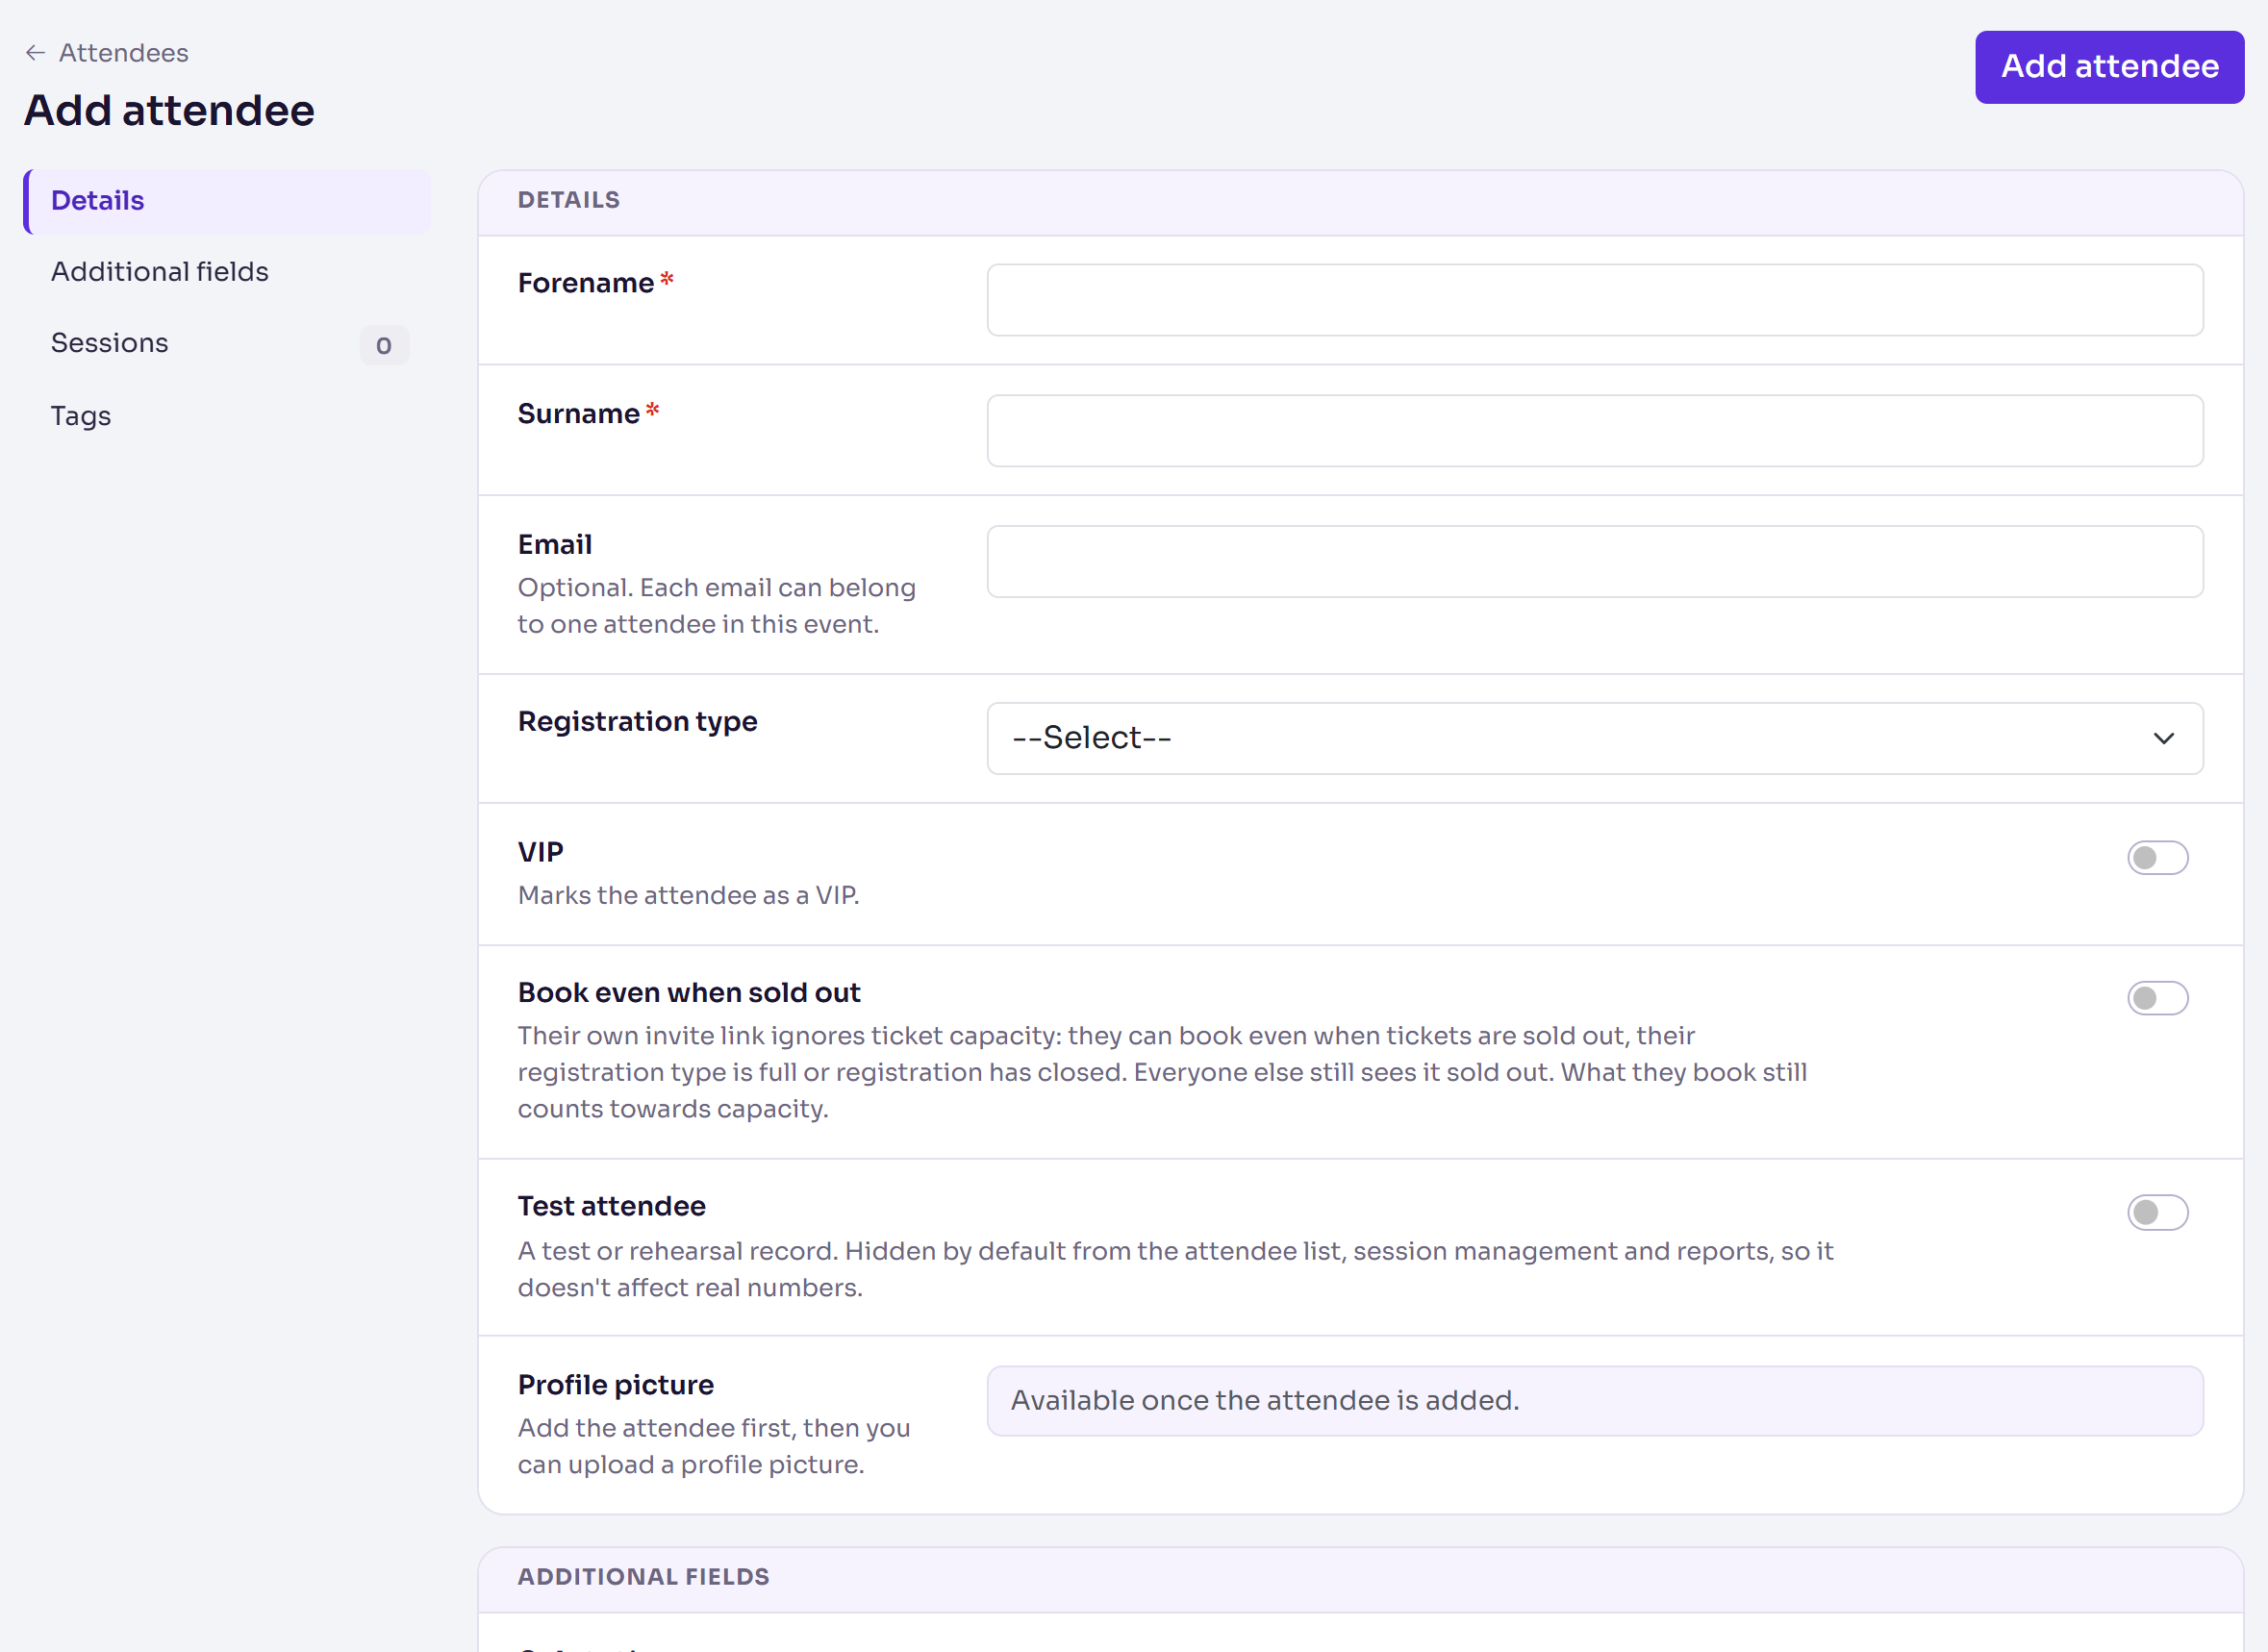
Under Details, enter their Forename and Surname. Both are required.
Enter their Email. It's optional, but without one Delekit can't email them.
Choose their Registration type.
Turn on any switch that applies: VIP marks them as a VIP, Book even when sold out lets their own invite link ignore capacity, and Test attendee keeps a test record out of your numbers.
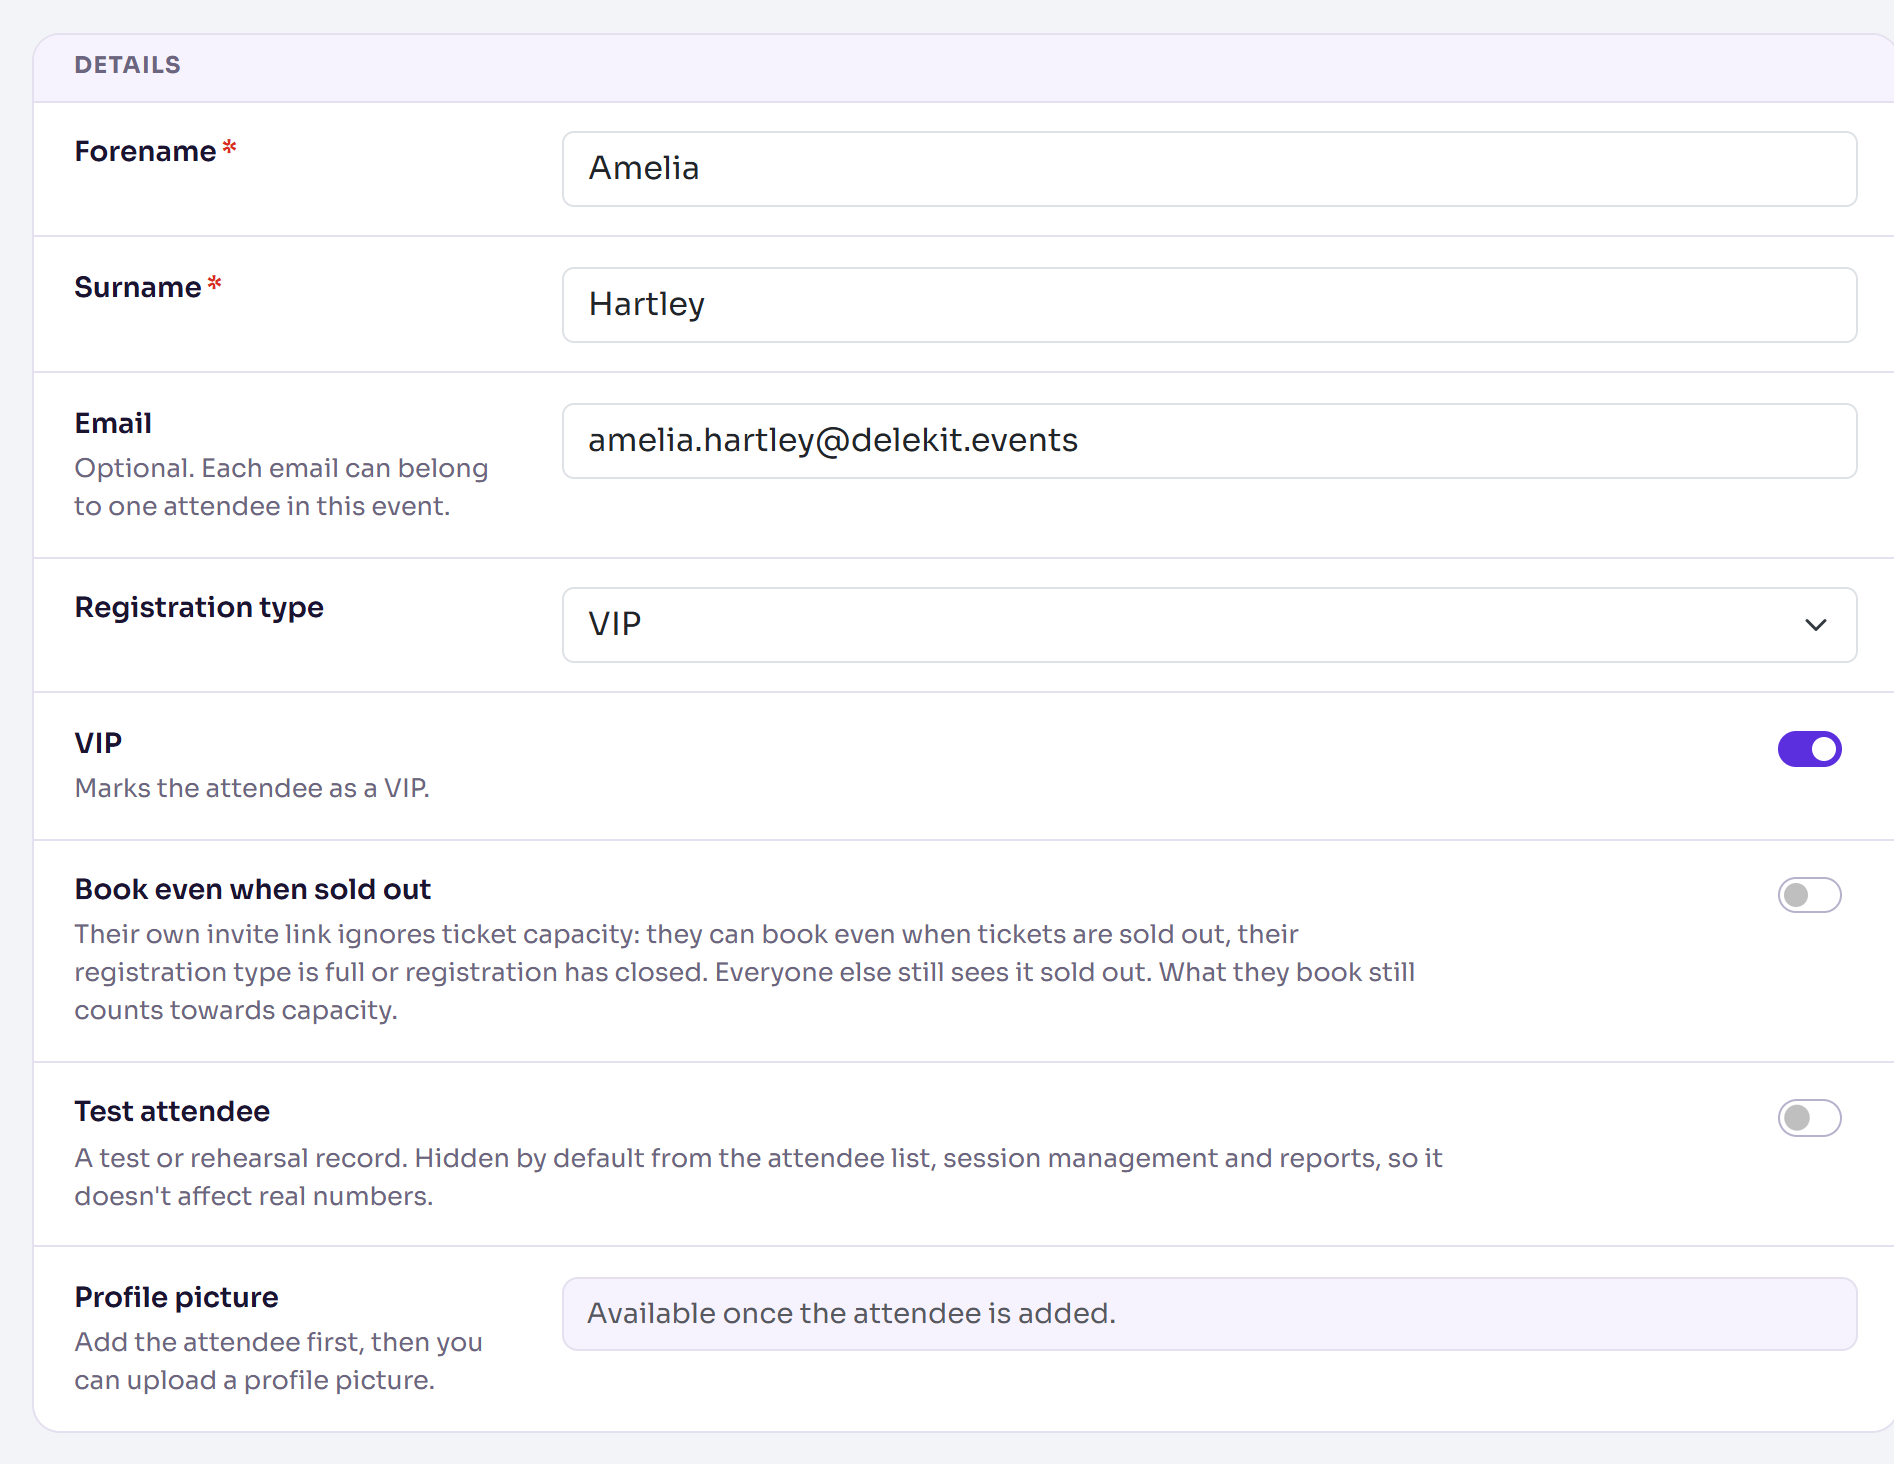
Under Additional fields, fill in any answers you already know.
Select Add attendee.
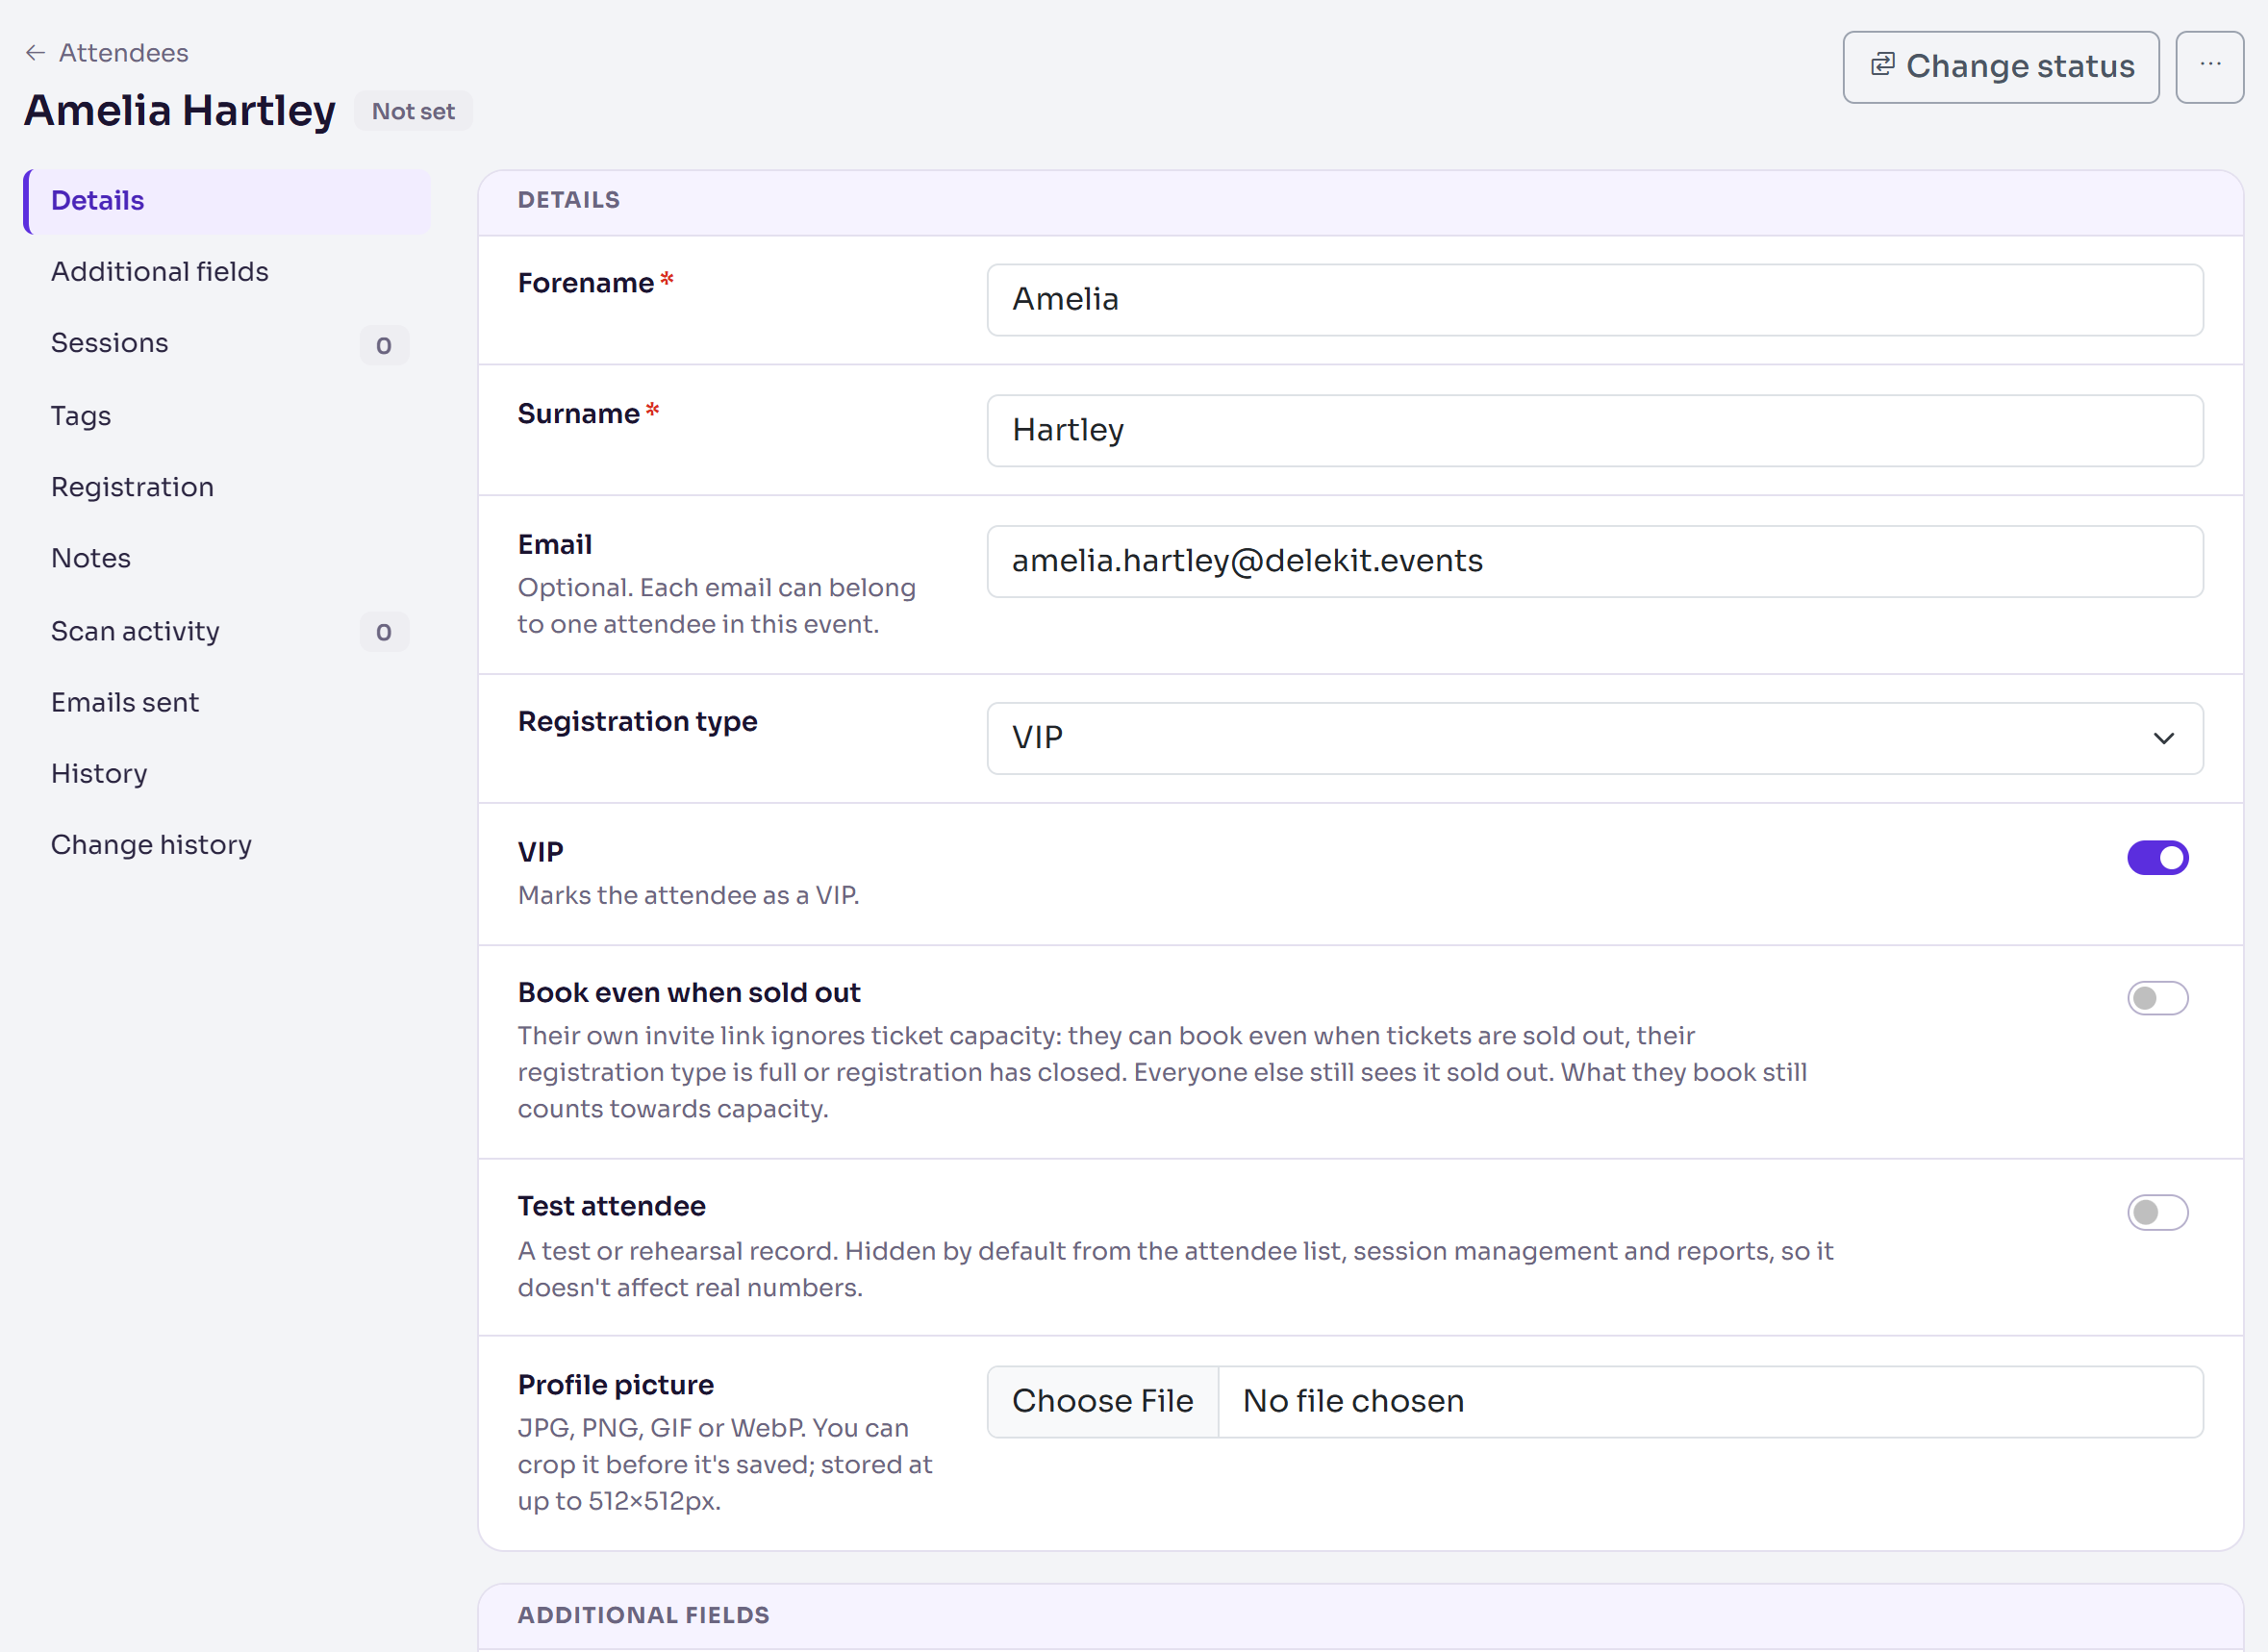
You'll see Changes saved, and the attendee's own page opens.
To put them in sessions at the same time, move their sessions from Available to In under Sessions before you select Add attendee.
What happens next
- Nobody is emailed. The attendee has no status yet (the page shows Not set, and the Attendees list shows No status). See Attendee statuses explained.
- Their page now has more sections: Registration, Notes, Emails sent, History and the rest. You can now upload a Profile picture.
- To change anything later, edit it on their page and select Save changes.
Send them their invite link yourself
To invite them with a message of your own rather than an email from Delekit:
- On the attendee's page, select Change status.
- Choose Invited as the New status.
- Untick Email them about the change.
- Select Invite and copy link.
Their status becomes Invited and their link is copied, ready to paste into your message. It's also listed under Registration as Invite link, with a copy button. To send invitations by email instead, see Send or schedule invitations.
Check it works
In the menu, select Attendees, then View all. Search for their name: they're in the list with No status (or Invited, if you sent their link).
If something isn't right
- "This email address is already registered to another attendee in this event." Someone else in the event has that email. Find them in the list, or change Edit event › Booking again to Take a new, separate booking if each booking really is separate.
- There's no invite link: they need a status that has one (Invited, or a status after registering) and a registration type. If Invite and copy link says the link isn't ready, publish your event site's Registration page first.
- A custom field is missing: add it to the event first. See Add custom fields to your event.
Related articles
- Import attendees from a spreadsheet
- Attendee statuses explained
- Find attendees: search, filter and columns
Still stuck? Contact Delekit support.
Was this article helpful?
That’s Great!
Thank you for your feedback
Sorry! We couldn't be helpful
Thank you for your feedback
Feedback sent
We appreciate your effort and will try to fix the article