Audience: event organisers and client administrators. Applies to: all plans.
Find the people you need in an event's Attendees list: narrow it by status with the tiles, search by name or email, filter on any field, and choose which columns you see. Every filter shows as a chip with the number of matching attendees, so nothing narrows the list without you knowing.
Before you start
- Open the event first. The Attendees list shows one event's attendees.
- Test and deleted attendees are hidden until you tick Show test or Show deleted on the toolbar.
- To export the list, select More actions (⋯), then Download attendees: an Excel file of everyone, with their sessions as Y / N, which you can also edit and import back.
Open the list and narrow it by status
In the menu, select Attendees, then View all.
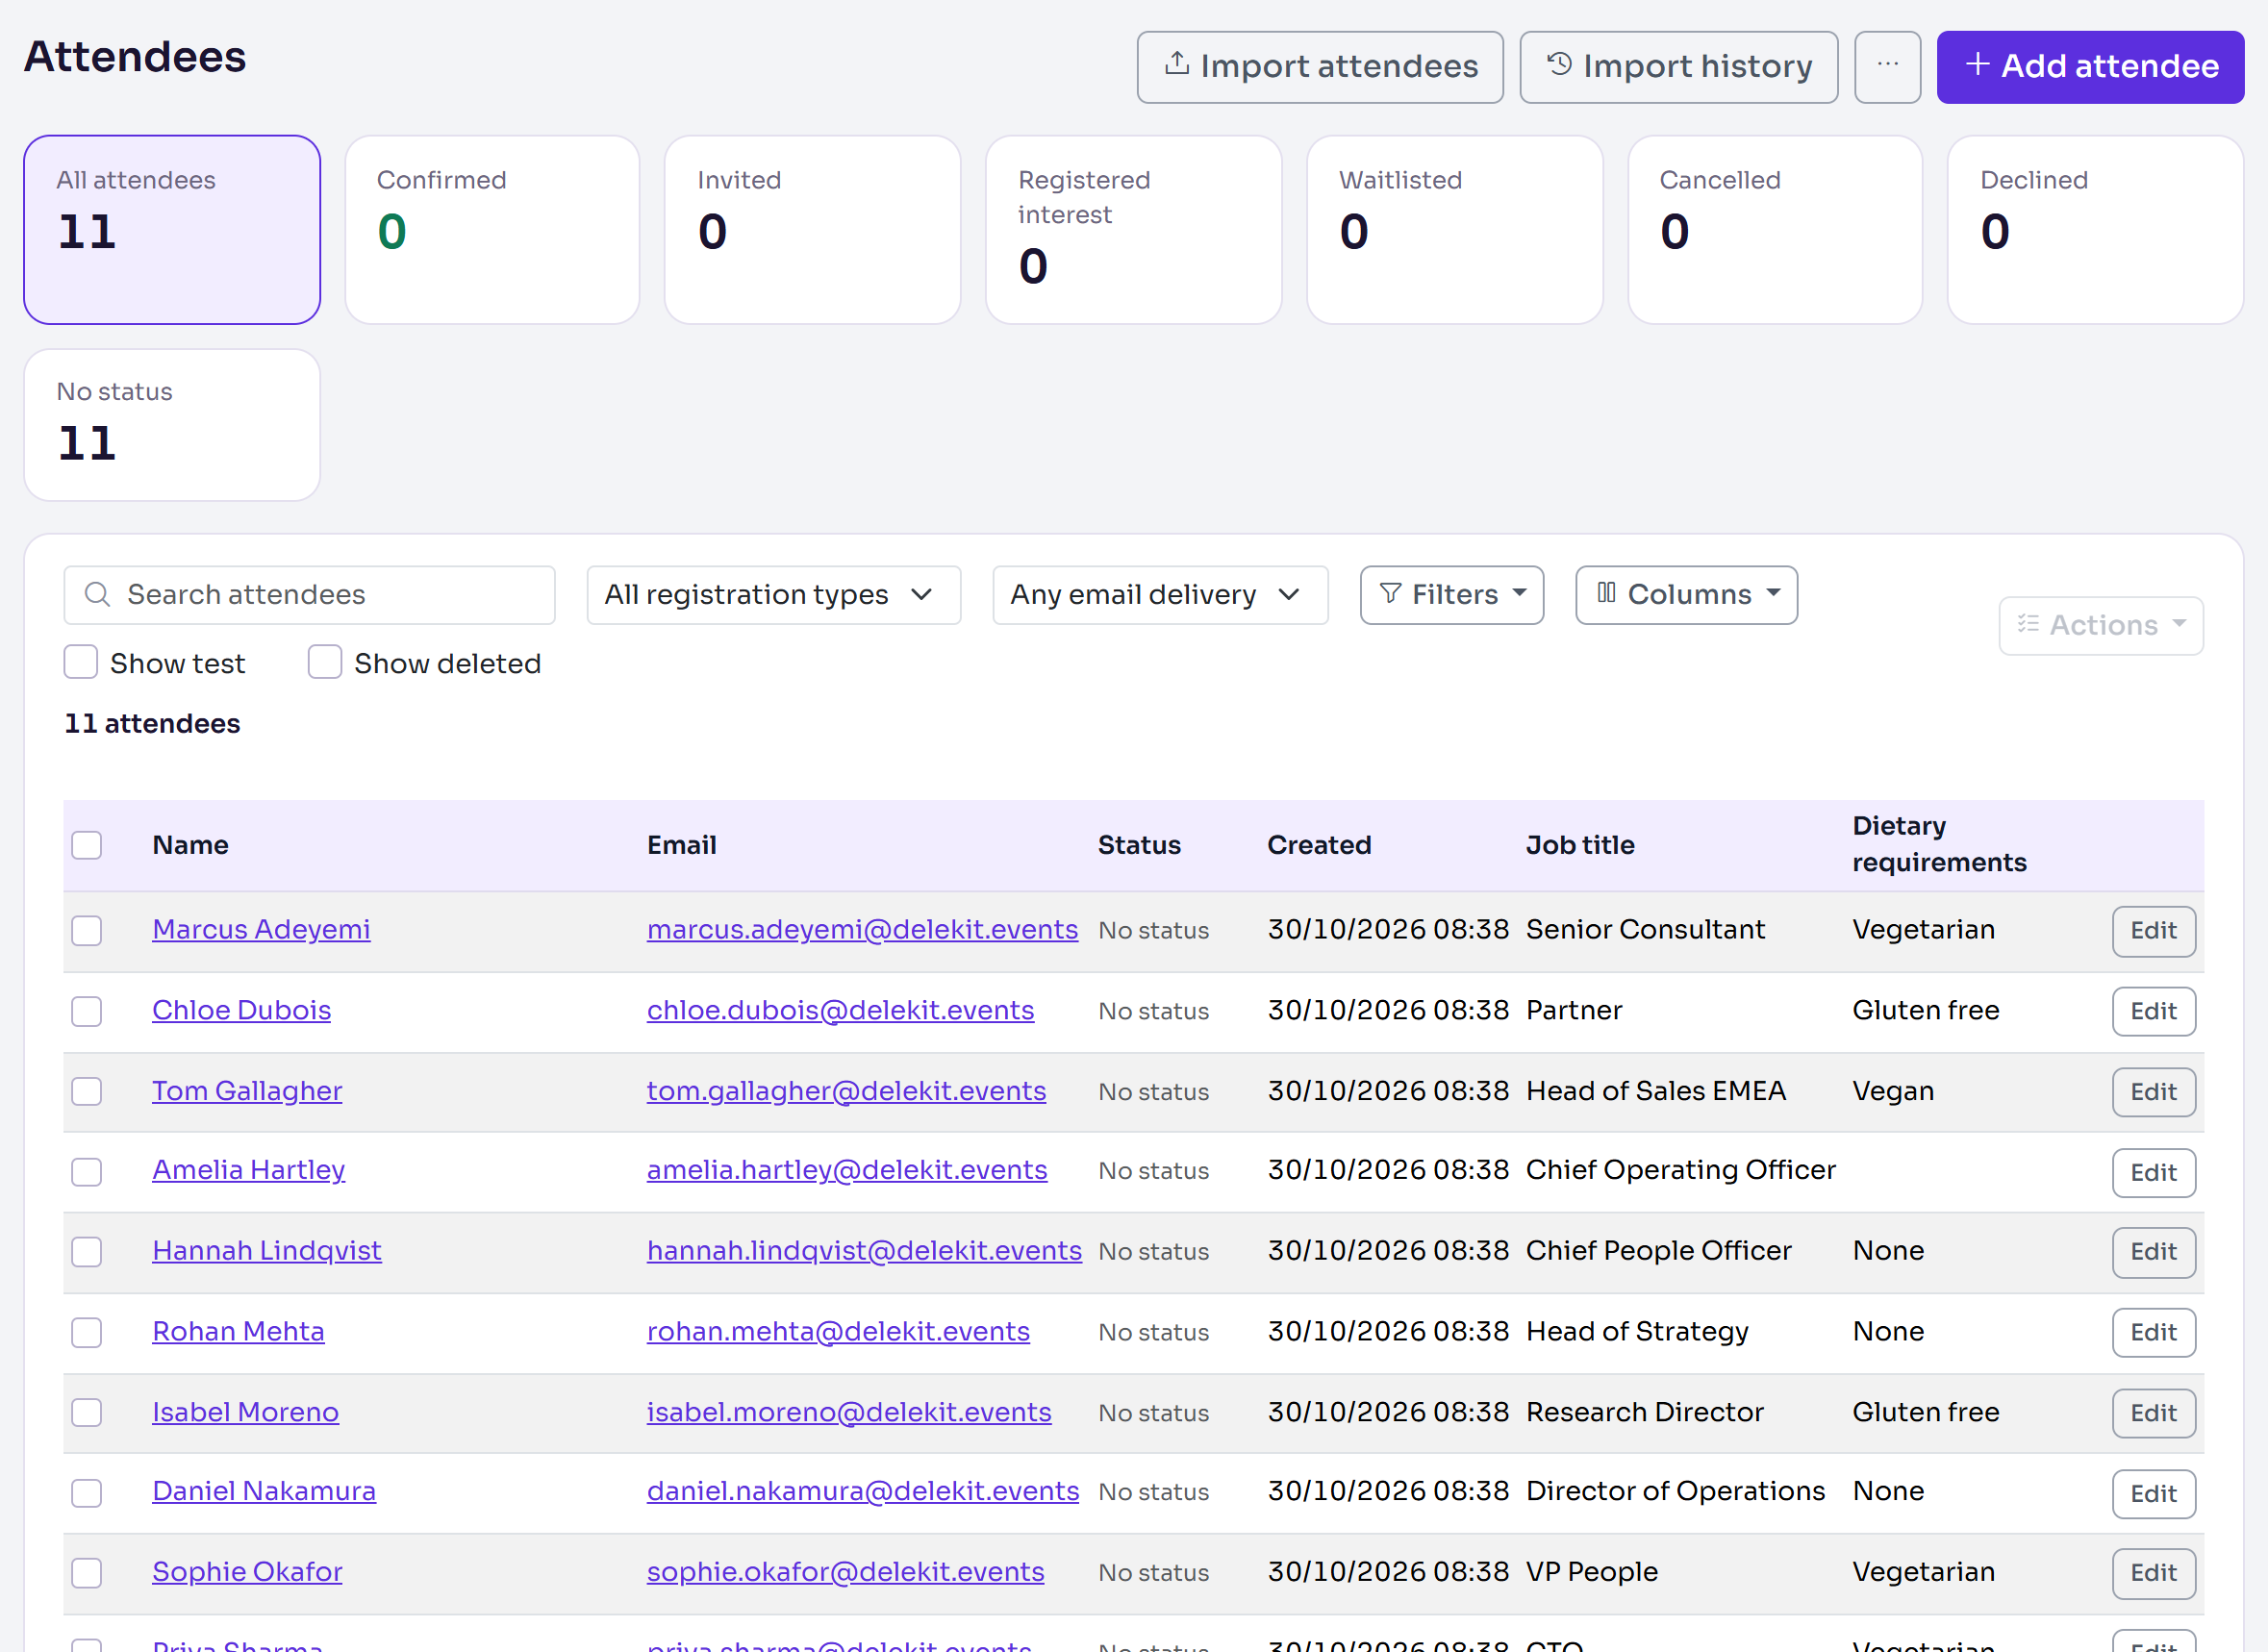
Select a status tile, such as Confirmed or No status, to show only those people. Select it again (or All attendees) to show everyone. Each tile counts the attendees that match your other filters.
To find someone, enter part of their name in Search attendees. The search also looks at email addresses, custom field answers and order references.
To show one kind of attendee, choose it in All registration types. To find delivery problems, choose Email bounced, Hard bounce, Soft bounce, Spam complaint or Unsubscribed in Any email delivery.
Select a person's name, or Edit, to open their page.
Filter on any field
On the toolbar, select Filters.
After Where, choose the field, such as a custom field, Registration status or Registered (date).
Choose the condition, such as equals, contains or is empty.
Enter the value, such as Vegetarian.
Select Add filter.
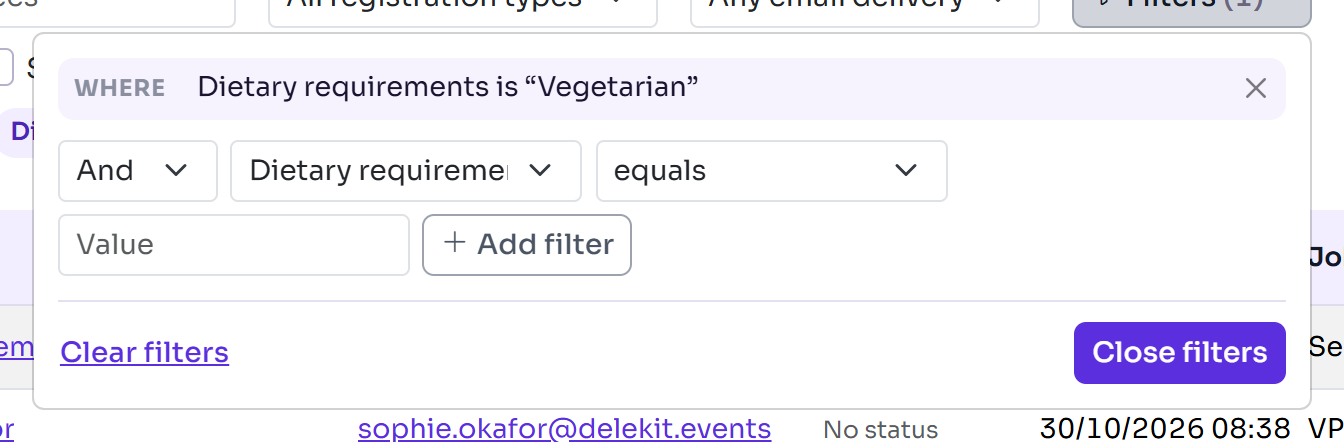
To add another rule, choose And (both must match) or Or (either can match) first, then repeat steps 2 to 5. The list updates as you add each rule, and Filters shows how many rules there are. Select Close filters when you're done; the rules stay on. Clear filters removes them all.
Each filter, search and tile you use appears as a chip next to the number of matching attendees. Select a chip's × to remove it, or Clear all to remove them all.
Choose your columns
On the toolbar, select Columns.
Tick the columns you want to see: your custom fields, and extras such as Registration type, Registered, Invited, Order ref and Ticket value (net).
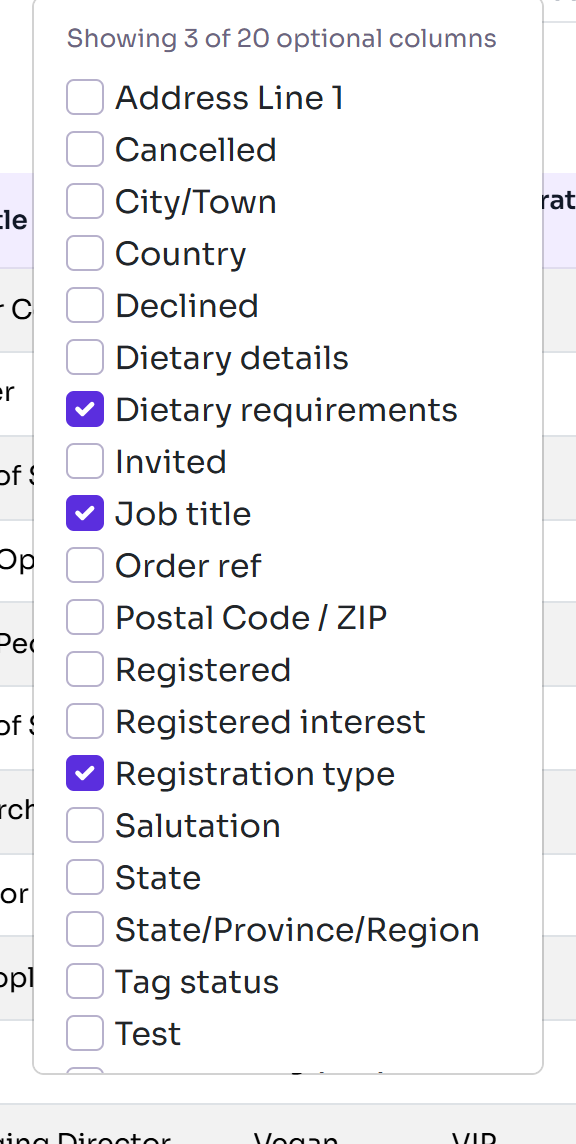
The columns change as you tick them. Delekit remembers your choice for this event in this browser. Hide all optional columns goes back to the name, email, status and date created.
Act on the people you've found
Tick the people you want, or tick the box in the table's heading to tick everyone on the page, then use Actions to change their status or registration type. See Change status or type for many attendees at once.
If something isn't right
- Someone is missing from the list: check the chips for a filter you forgot, then select Clear all. If they're a test registration, tick Show test; if they were deleted, tick Show deleted.
- "No attendees match these filters." Remove filters one chip at a time to see which one leaves nobody.
- A custom field isn't offered in Filters or Columns: it hasn't been added to the event. See Add custom fields to your event.
Related articles
Still stuck? Contact Delekit support.
Was this article helpful?
That’s Great!
Thank you for your feedback
Sorry! We couldn't be helpful
Thank you for your feedback
Feedback sent
We appreciate your effort and will try to fix the article