Audience: event organisers and client administrators. Applies to: all plans.
Tick people in the Attendees list and use Actions to change their status or registration type together, or to delete them. Each action asks first, runs for everyone ticked, and ends with one message saying how many were changed and why any were skipped.
Before you start
- Know what each status means before you change one: see Attendee statuses explained.
- Changing a status can email people. The email option starts ticked. Untick it if you don't want Delekit to email them.
- Inviting a list of people? Use the invite list's send instead: see Send or schedule invitations.
Tick the attendees
In the menu, select Attendees, then View all.
Narrow the list to the people you want, with the tiles, search or Filters (see Find attendees: search, filter and columns).
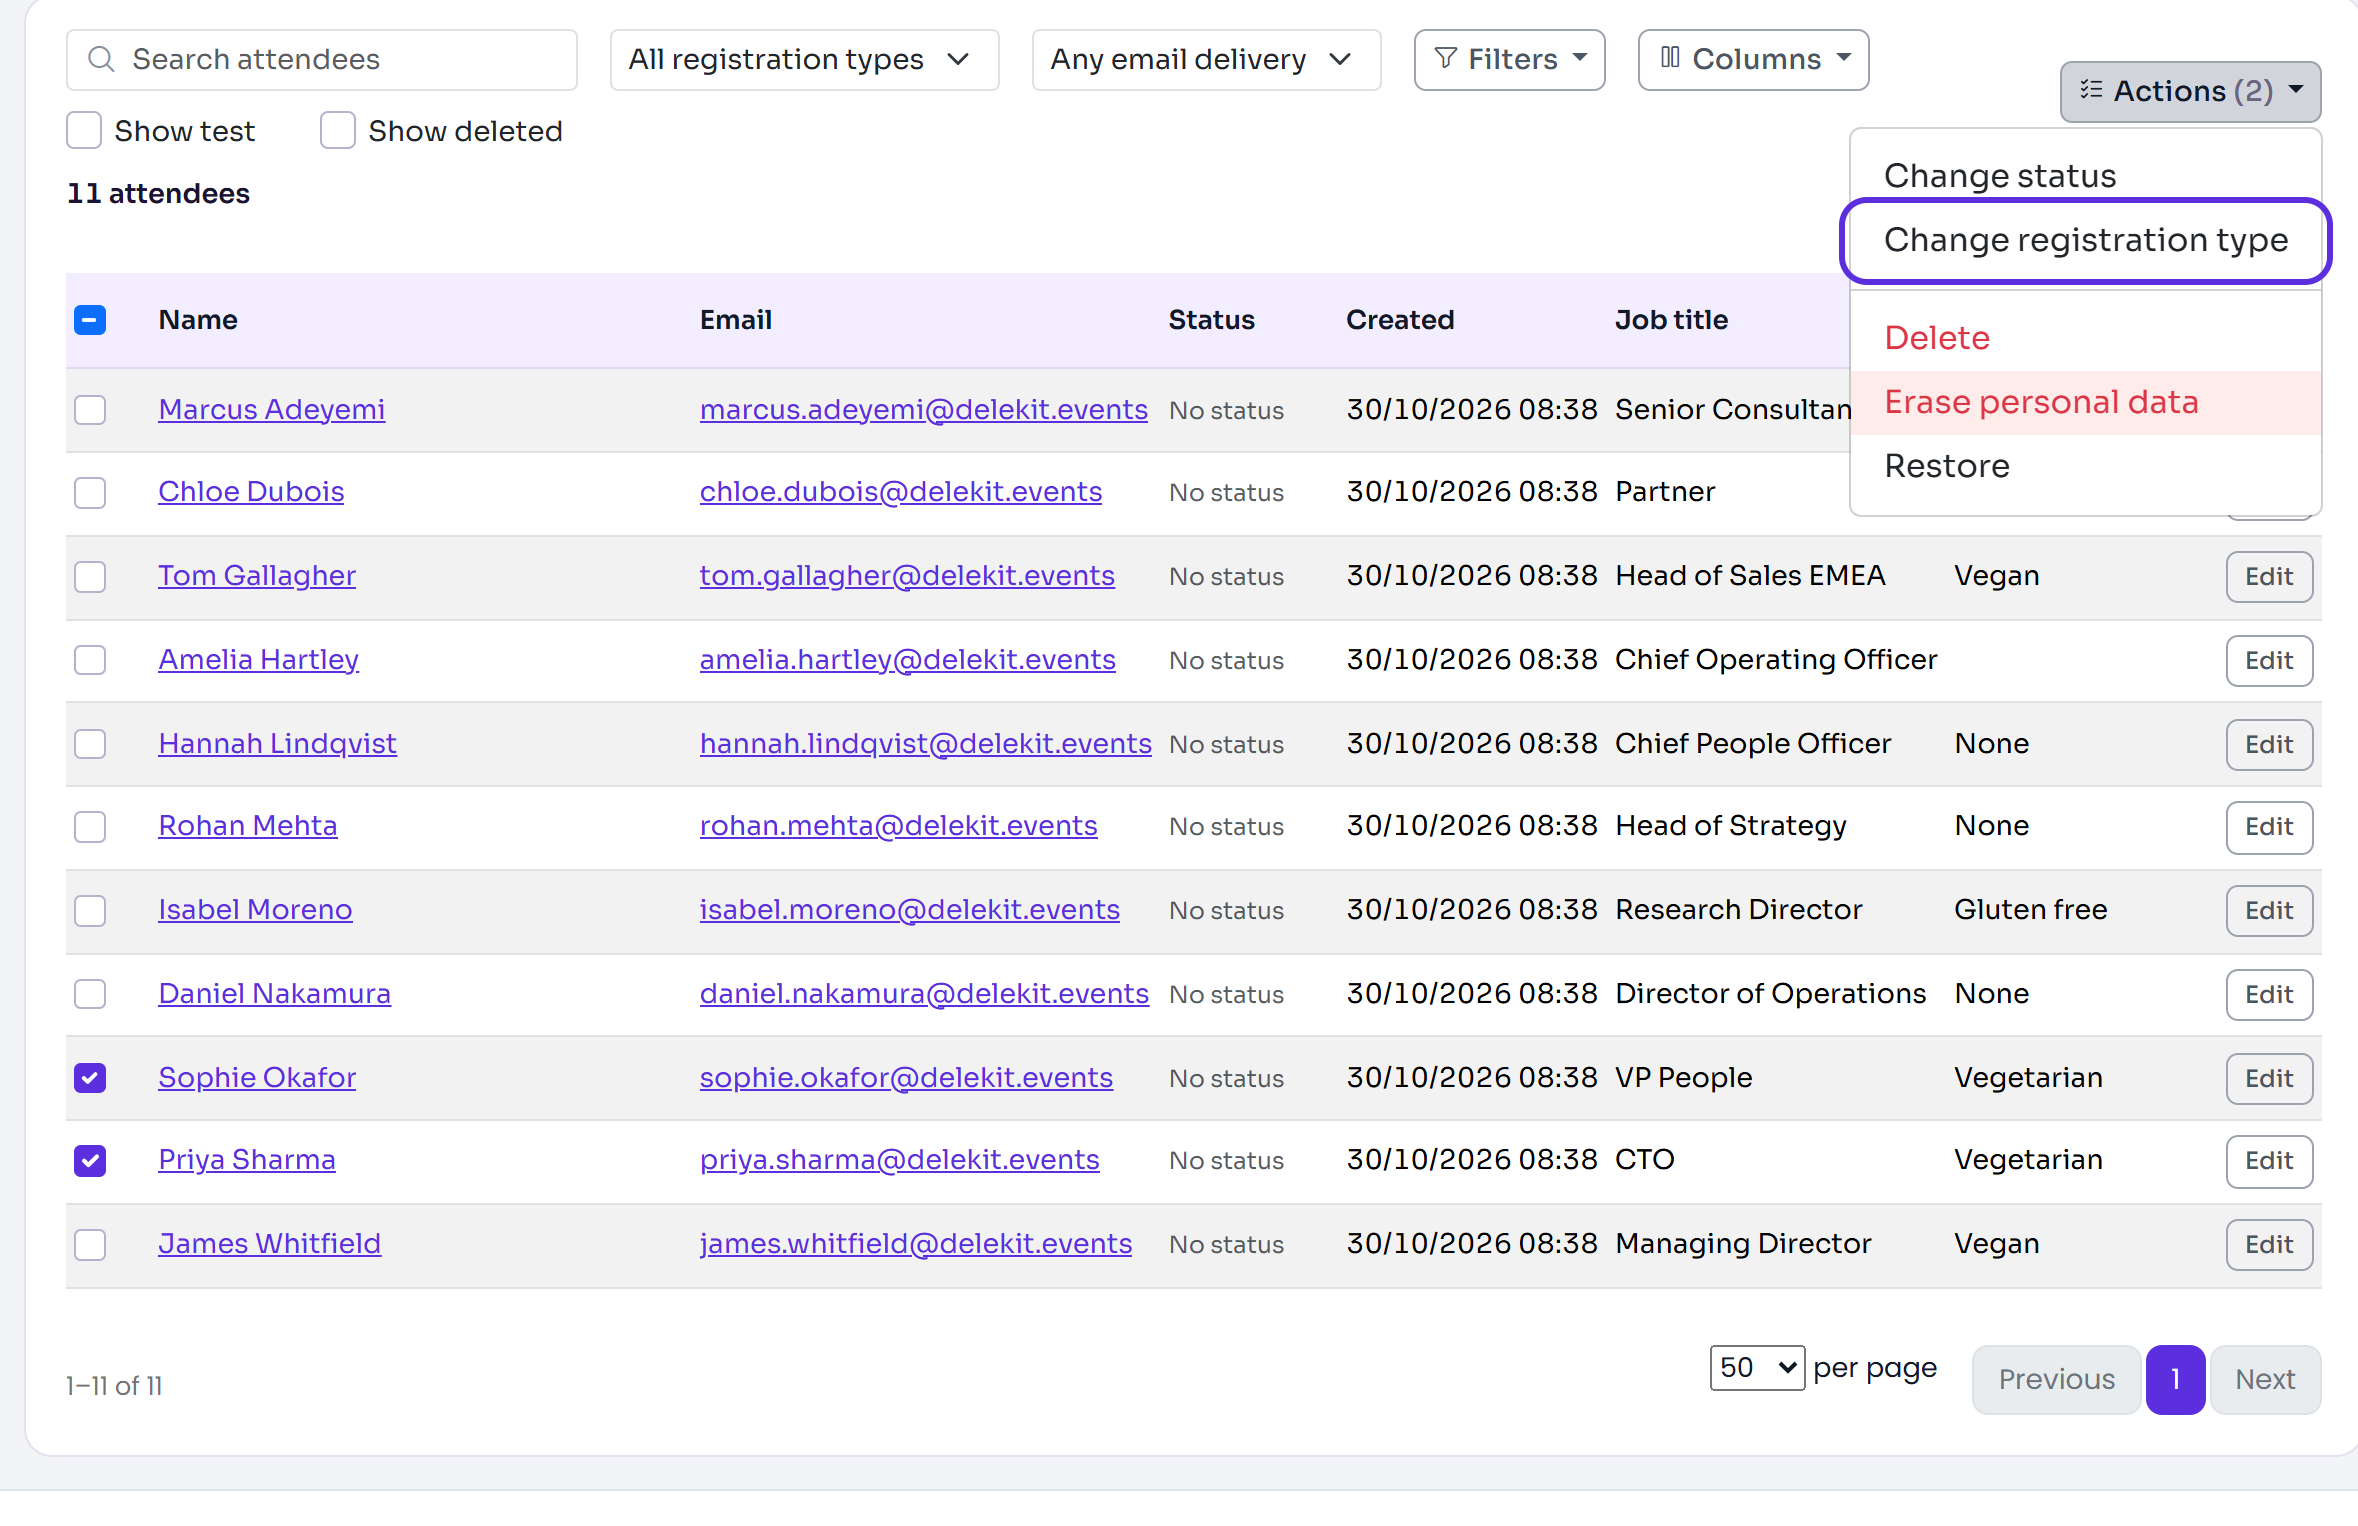
Tick each person, or tick the box in the table's heading to tick everyone on the page. When more people match than the page shows, you can then select Select all with their number (for example Select all 120 matching) to include them all.
Select Actions. It shows how many people are ticked.
Change their status
In Actions, select Change status.
Choose the New status. Only statuses every ticked attendee can move to are listed.
Enter a Reason (optional). It's recorded in each attendee's status history.
Leave Email them about the change ticked to send each person the matching email from their invite list, or untick it to change their status without emailing them.
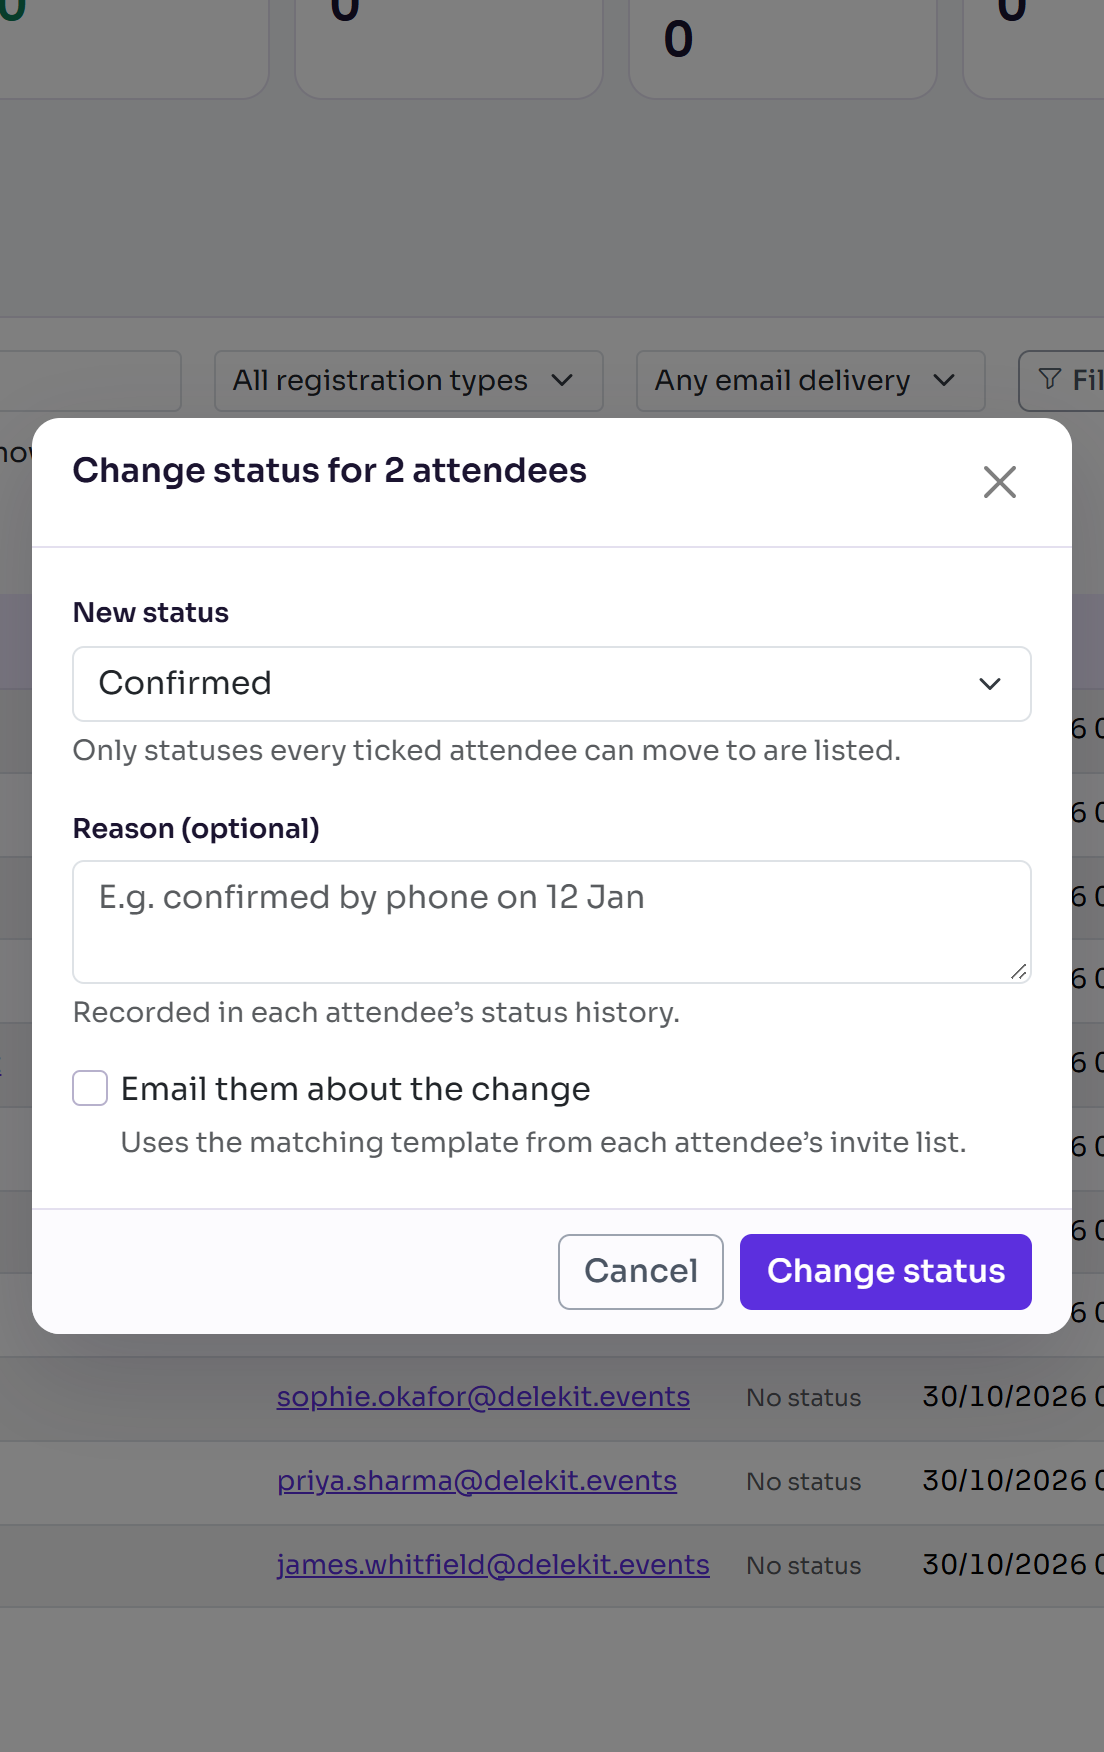
Select Change status.
Choosing Invited with the email ticked sends each person their invitation, and they move to Invited as it's queued. People without a registration type aren't invited.
Cancelling people who are confirmed or waitlisted cancels their registrations in full: their tickets are released and anything paid is refunded, minus the cancellation fee unless you tick Waive the cancellation fee (refund in full). The button then reads Cancel with the number of registrations, and asks once more before it goes ahead. This can't be undone.
Change their registration type
In Actions, select Change registration type.
Choose the New registration type.
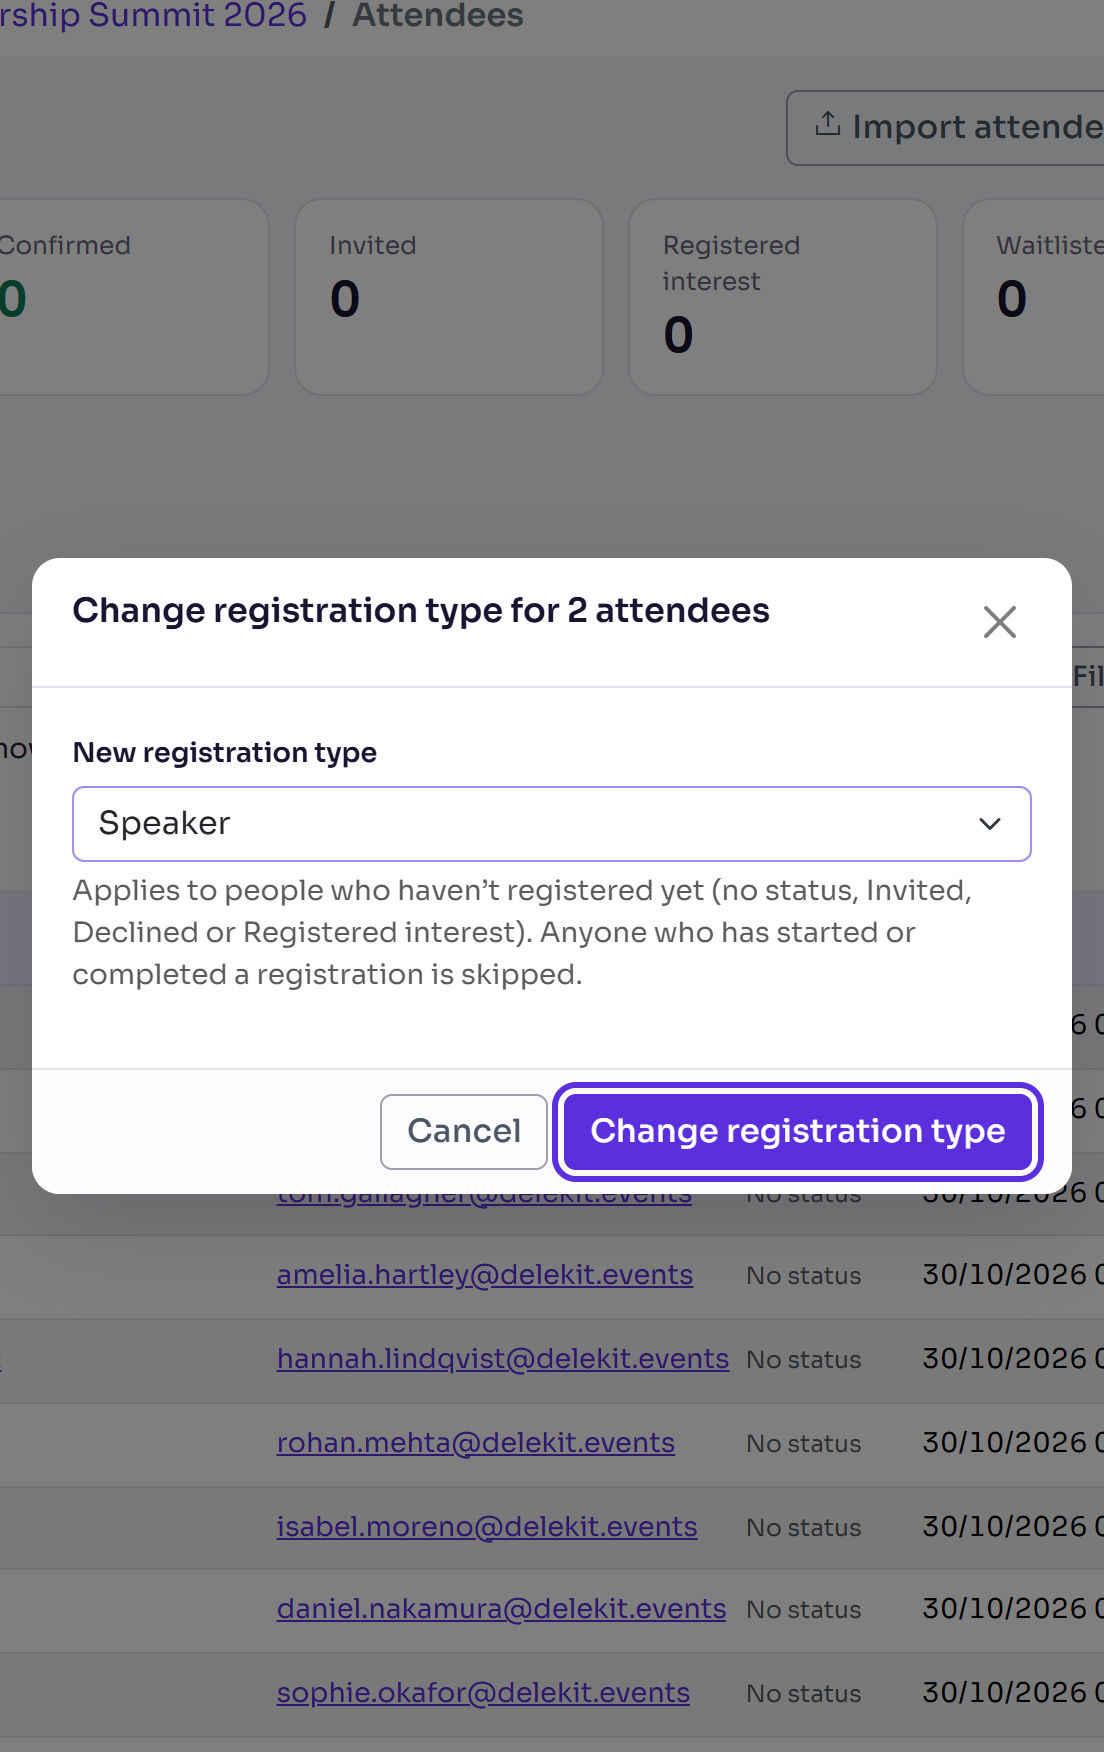
Select Change registration type.
This applies to people who haven't registered yet: no status, Invited, Declined or Registered interest. Anyone who has started or completed a registration is skipped, and keeps their type. Nobody is emailed.
Other actions
- Set language (only on events with more than one language) sets each person's language. Their emails use it when their invite list has a template in that language.
- Delete takes them off your lists, reports and the app, and sets their status to Cancelled without emailing them. If anyone paid, Delekit offers to refund them first. To bring people back, tick Show deleted, tick them, and select Actions, then Restore.
- Erase personal data removes what identifies them, for good. See Delete and erase personal data.
What happens next
The pop-up stays open while the change runs, then closes. One message says what happened, for example 2 attendees updated, with how many were skipped or not emailed, and why. The ticks are cleared and the list shows the new statuses or types.
Check it works
Choose the new type in All registration types, or select the new status's tile: the people you changed are listed. Each person's page shows their new status or type.
If something isn't right
- "There is no status all the ticked attendees can move to. Tick people with the same status." Tick people who have the same status, and change each group separately.
- "The ticked attendees are deleted. Restore them first." Restore them, or untick them.
- Someone was skipped when changing type: they've already registered. Open their page and change their Registration type there.
- "not emailed" in the message: their invite list has no email of that kind chosen, or they have no email address. See Set up your event's email templates.
- Erase personal data says "Set up data retention first": a client administrator needs to choose the wait before Erase personal data. See Set your data retention periods.
Related articles
- Attendee statuses explained
- Find attendees: search, filter and columns
- Import attendees from a spreadsheet
Still stuck? Contact Delekit support.
Was this article helpful?
That’s Great!
Thank you for your feedback
Sorry! We couldn't be helpful
Thank you for your feedback
Feedback sent
We appreciate your effort and will try to fix the article