Audience: event administrators and client administrators. Applies to: plans that include the registration form builder. If Registration form shows a padlock in the menu, it isn't in your plan.
The registration form holds the questions people answer when they register. Add the form and choose its registration types, then build it in the form builder: Step 1: Your details, then your questions, split into pages if you like. Your changes are saved as a draft, which nobody sees until you publish it.
Before you start
- Create your registration types first: see Create a registration type.
- Add the questions as custom fields in Edit event, or create them as you build: see Add custom fields to your event.
- An event has one registration form. A new event starts with none. If one already exists, build that one instead of adding another.
Add the registration form
In the menu, select Registration, then Registration form.
Select Add registration form.
Enter the Form name, such as Delegate registration, and choose Registration as the Purpose.
In Registration types, choose every type that can register with this form. Each one also gets its own link.
Under Public access, turn on Enabled, so the form gets its links when you save it.
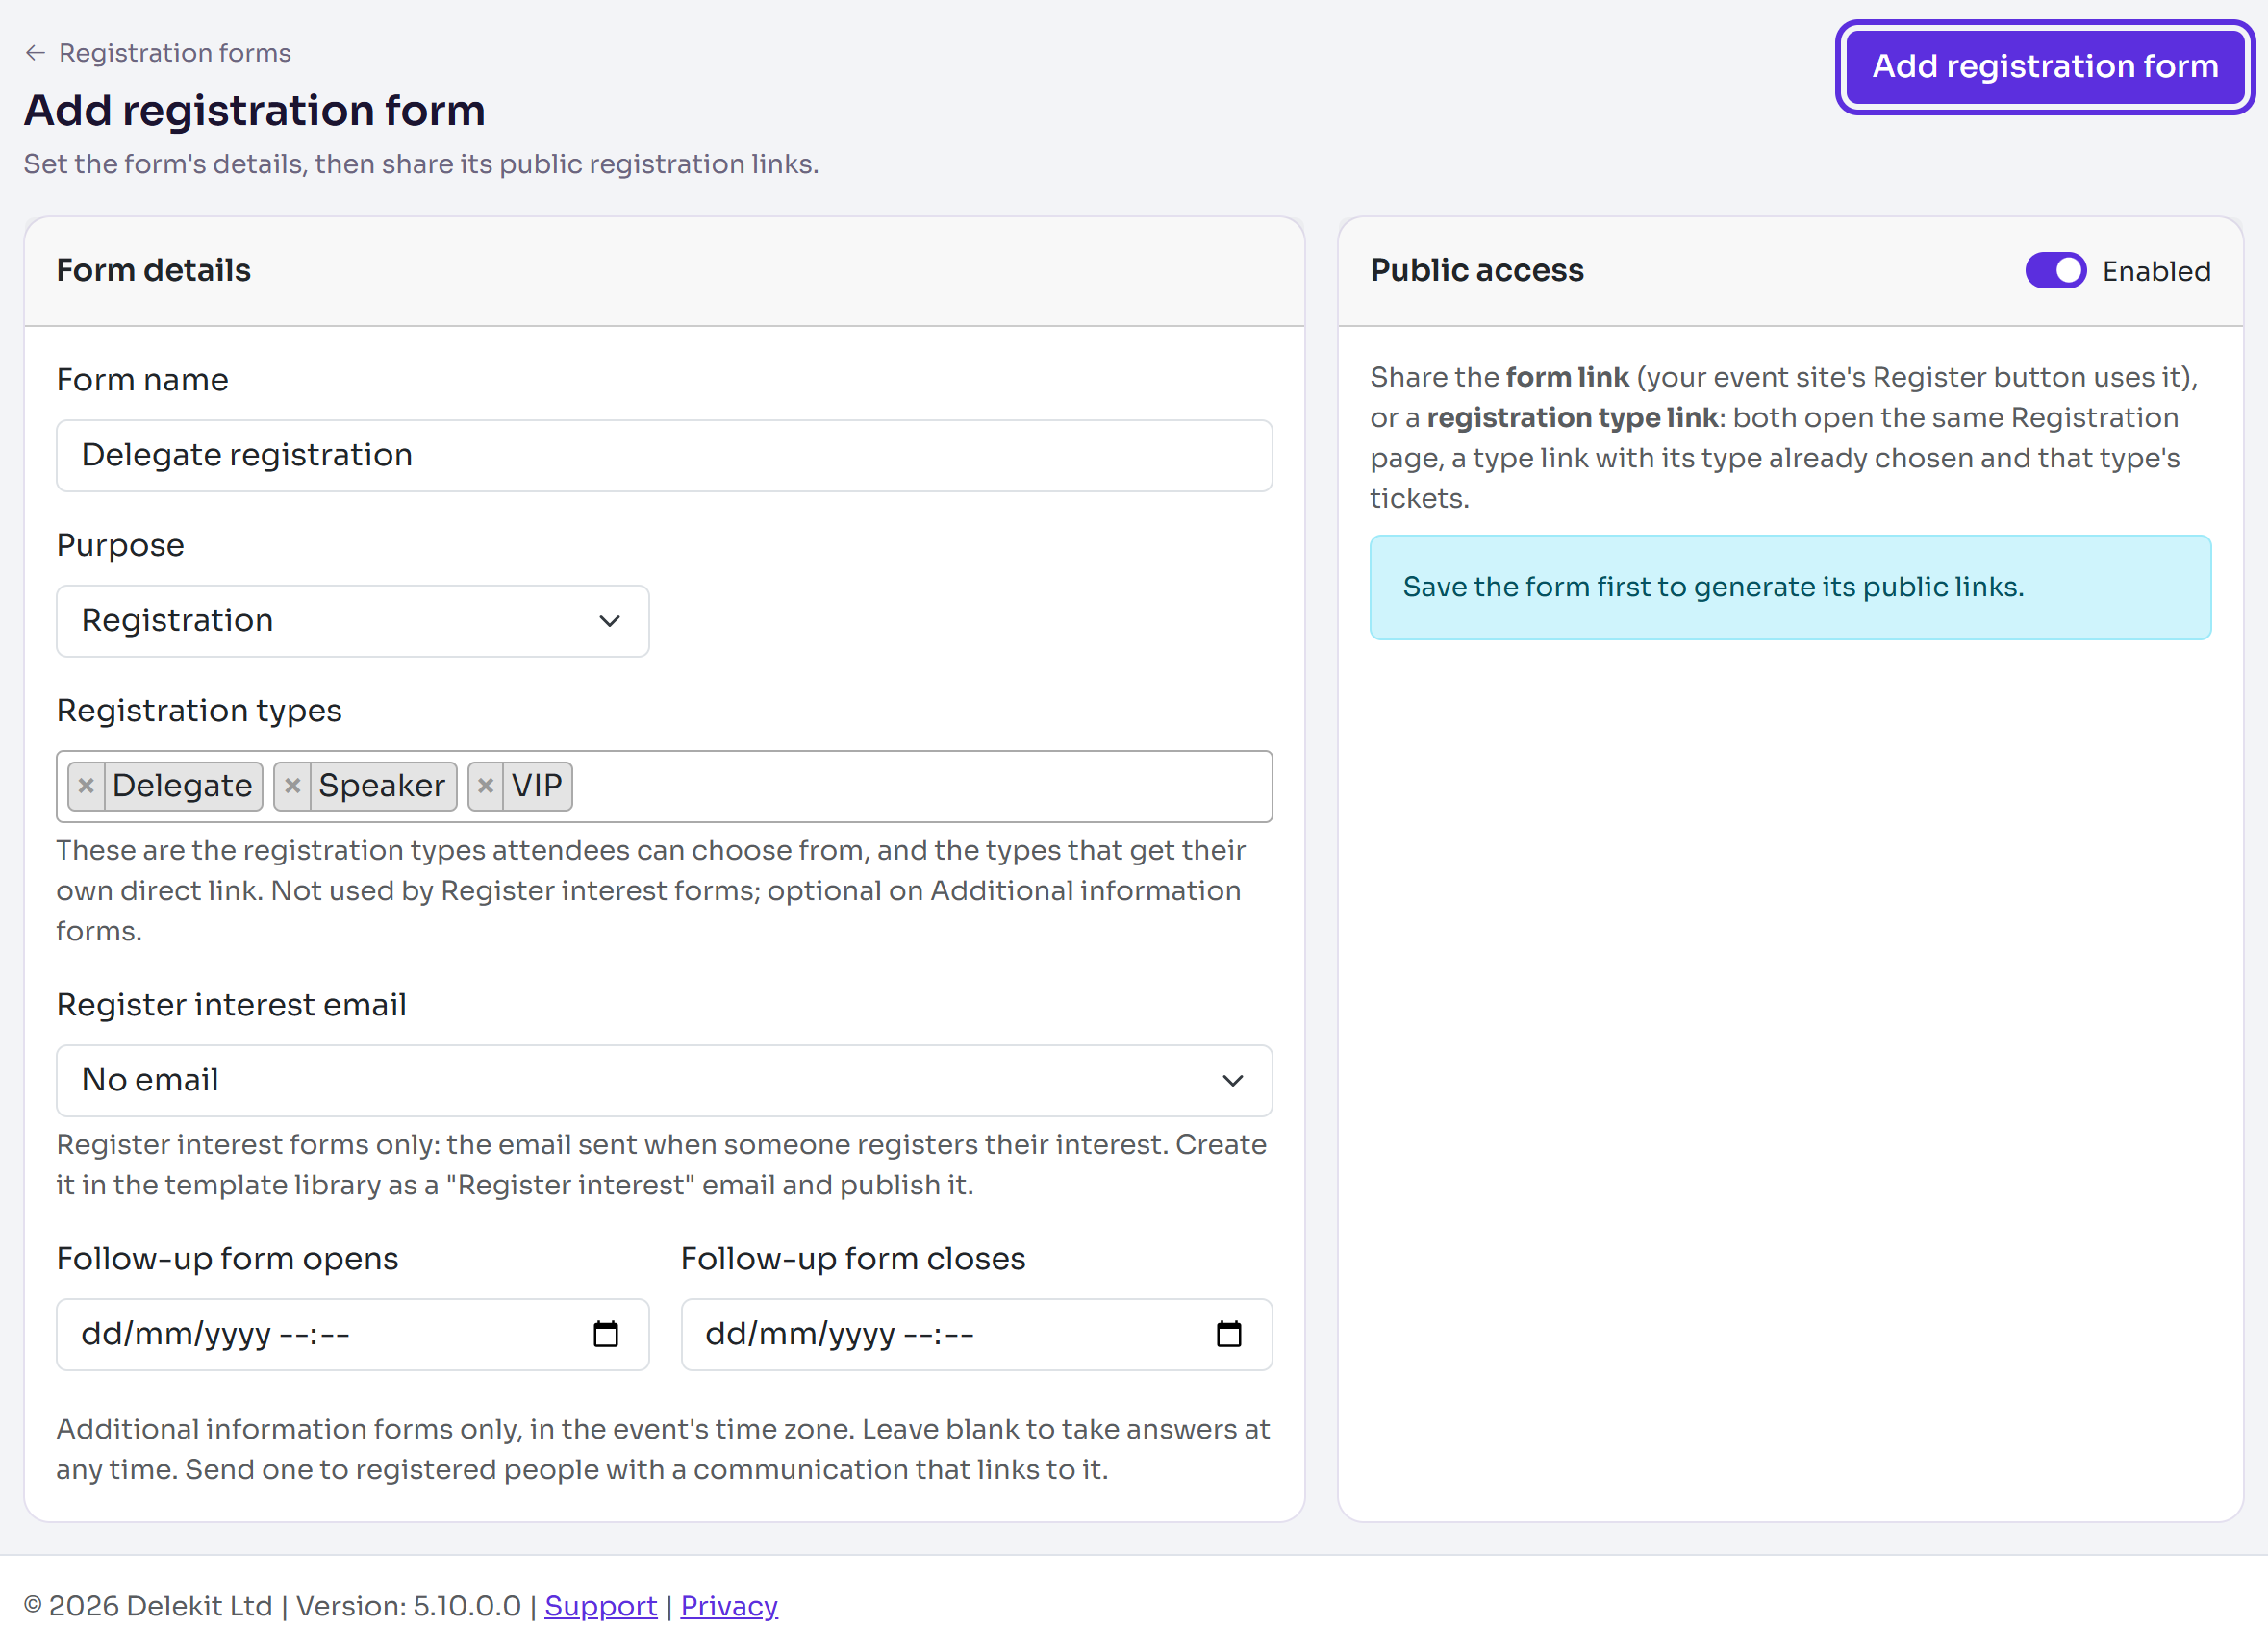
Select Add registration form.
You're back on the Registration forms list, with Changes saved. The form shows Not published.
Build the form
In the list, select Build next to the form. The form builder opens with a Draft: not live badge.
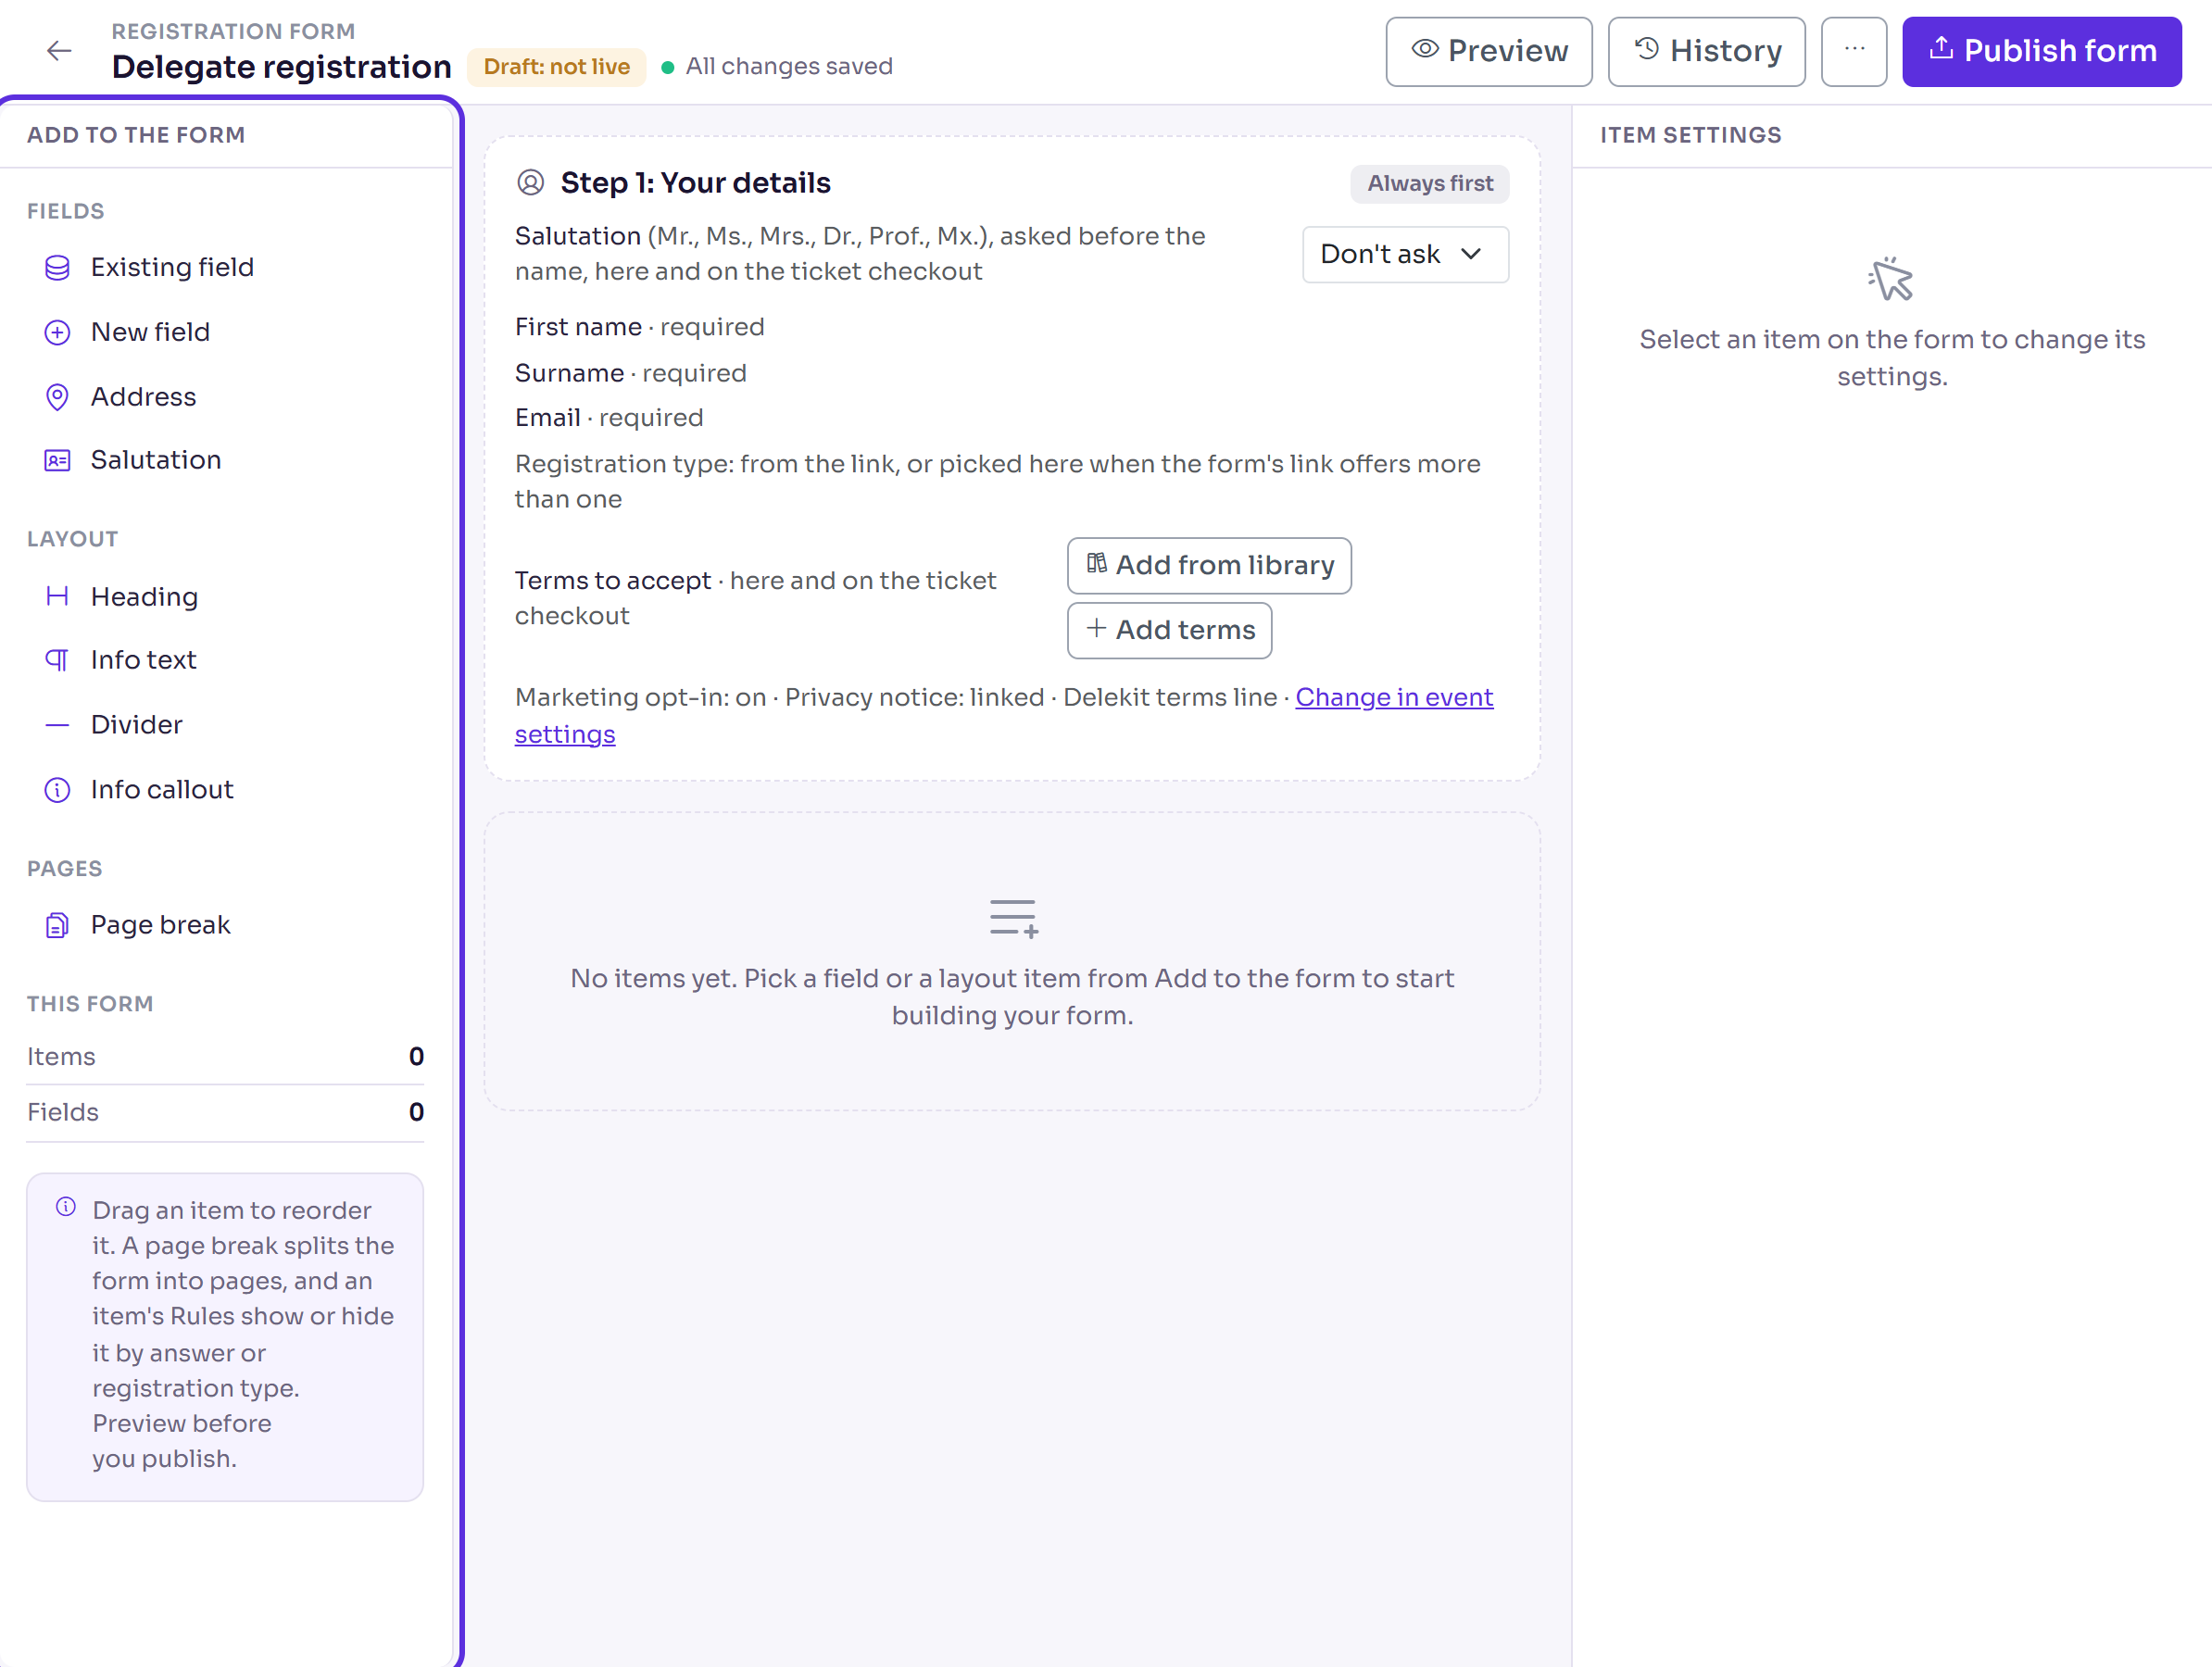
In Step 1: Your details, choose whether to ask for a Salutation: Don't ask, Optional or Required. Step 1 always asks for first name, surname and email.
In Add to the form, select Existing field, type two or more letters of a field's name, and select it. It's added at the end. Repeat for each question.
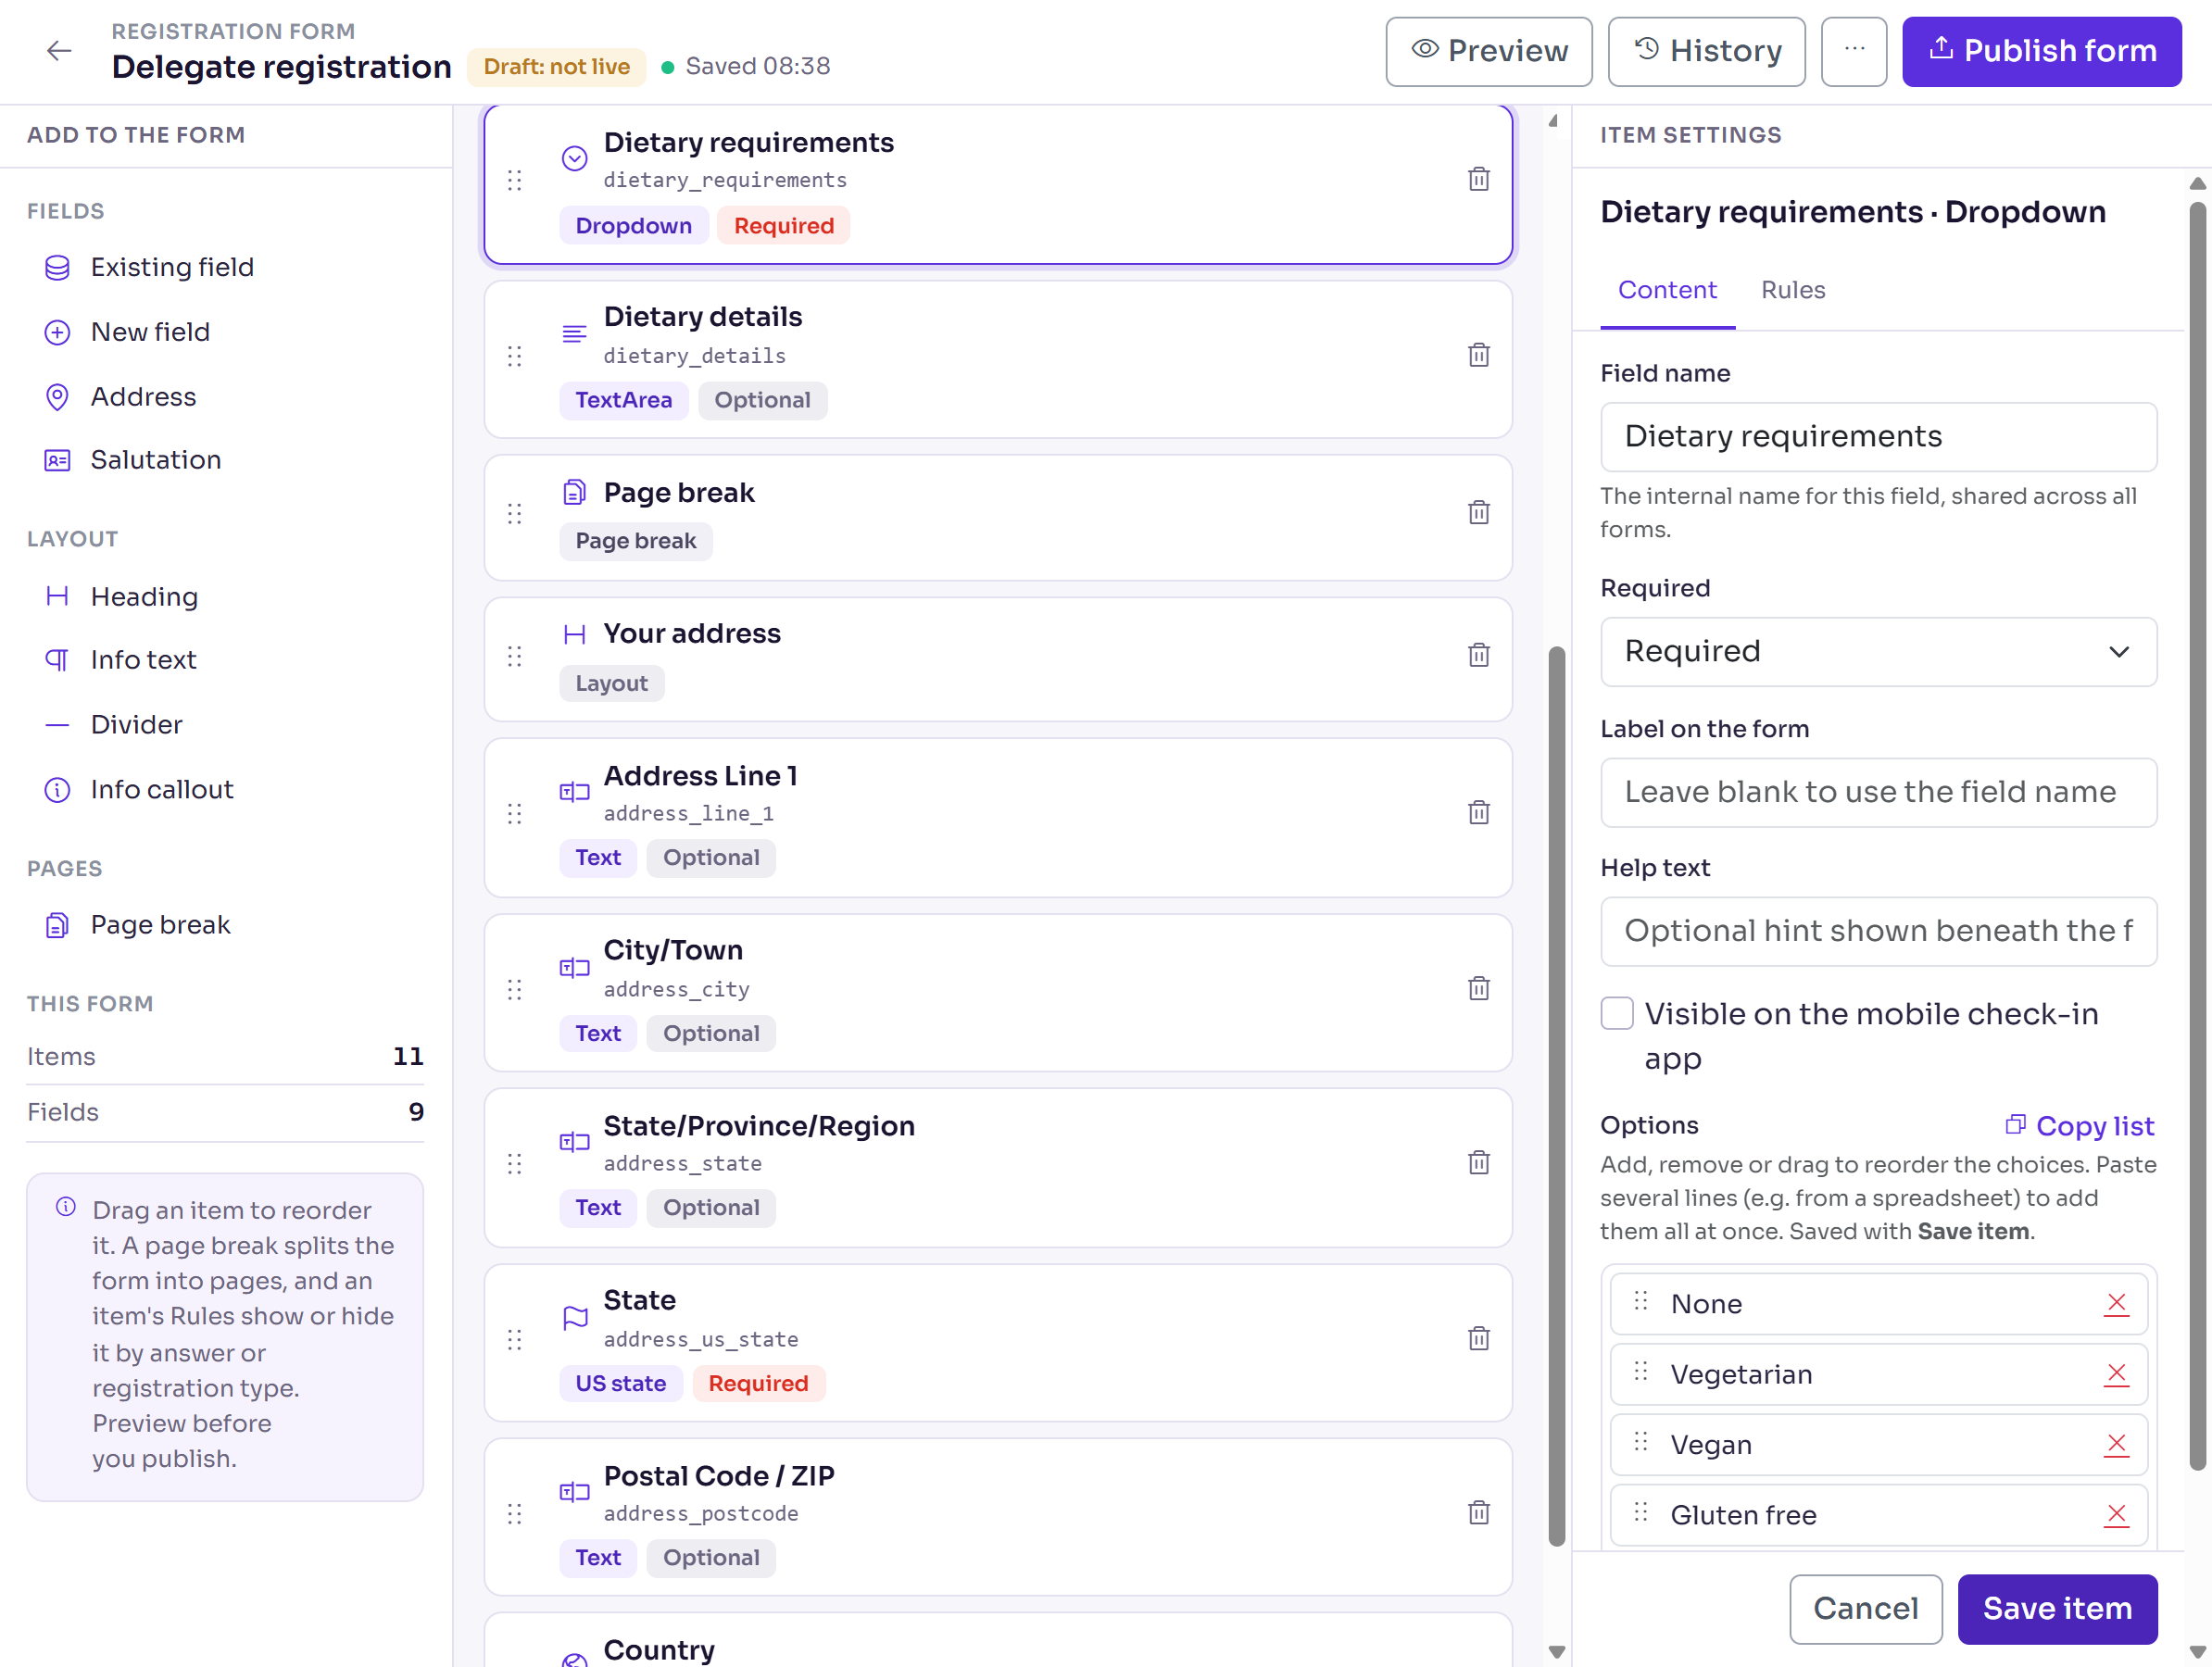
To create a field here instead, select New field, choose its Field type and select Create field. Then name it in Item settings.
To start a new page, select Page break. To add text between questions, select Heading, Info text, Divider or Info callout.
To ask for an address, select Address, choose its parts, then select Add fields.
Drag an item by its handle to change the order.
Set up each question
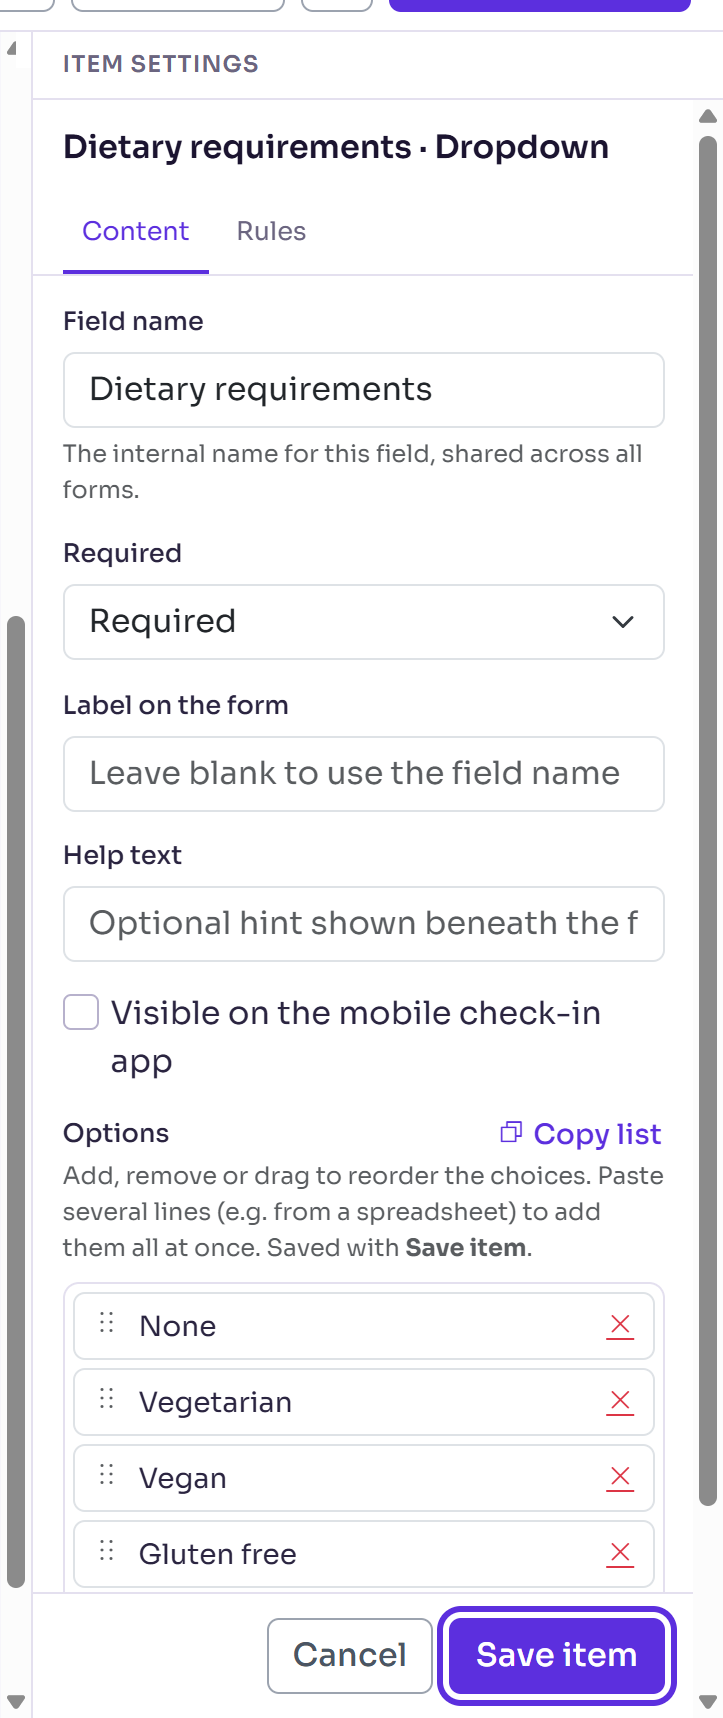
Select an item on the form. Its settings open in Item settings, on the Content tab.
For a field, choose Required or Optional under Required. Every field needs one.
If you like, enter a Label on the form (leave it blank to use the field name) and Help text shown with the question.
For a Dropdown, Radio or Checkbox list, check the Options. Changing them changes the field's choices on every form that uses it.
Select Save item.
For a heading, enter the Heading text. For a page break, you can enter a Step label, shown in the progress bar.
What happens next
- Every change saves to the draft as you make it. The bar shows Saving…, then Saved and the time. Settings in Item settings are saved when you select Save item.
- The draft isn't live. People see the form only once you publish it: see Publish your form and share registration links.
- On the Setup checklist, tick Build your registration form yourself when you're done. Publish registration form is ticked for you once the form is published.
Check it works
Select Preview in the builder's bar to open the draft in a new tab, as one of your registration types sees it.
If something isn't right
- "Choose whether this field is required." Choose Required or Optional, then select Save item again.
- "Enter a name for this field." A new field needs a name before it's saved.
- To take an item off the form, select Delete item (the bin) on its card, then Delete item again to confirm. It comes off the draft; the live form changes when you publish.
- "A registration form for this purpose already exists for the selected event site." The event already has a registration form. Select Build next to it in the list.
Related articles
- Add custom fields to your event
- Show or hide a question based on an answer
- Publish your form and share registration links
Still stuck? Contact Delekit support.
Was this article helpful?
That’s Great!
Thank you for your feedback
Sorry! We couldn't be helpful
Thank you for your feedback
Feedback sent
We appreciate your effort and will try to fix the article