Audience: event administrators and client administrators. Applies to: all plans.
Turn on the sponsor portal or the speaker portal for an event from its Portal settings page. The same page names the portal, holds the welcome message and image guidance sponsors and speakers see, sets when profile editing closes, and manages the tiers you sort them into, such as packages.
Before you start
- Sponsors and speakers each have their own settings. Everything here applies to the portal you opened; only the portal logo is shared by both.
- Turning the portal on emails nobody. Sponsors and speakers only hear about the portal when you invite them.
- Invites need the portal emails. Turning the portal on doesn't, but before you invite anyone the Portal invite, Portal sign-in code and Portal approval outcome emails must be set up. The page says whether they are. See Set up your event's email templates.
Turn on the portal
In the menu, select Sponsors, then Portal settings. For speakers, select Speakers, then Portal settings.
Turn on On for this event. The first time it's switched on, the default tiers and profile fields are added.
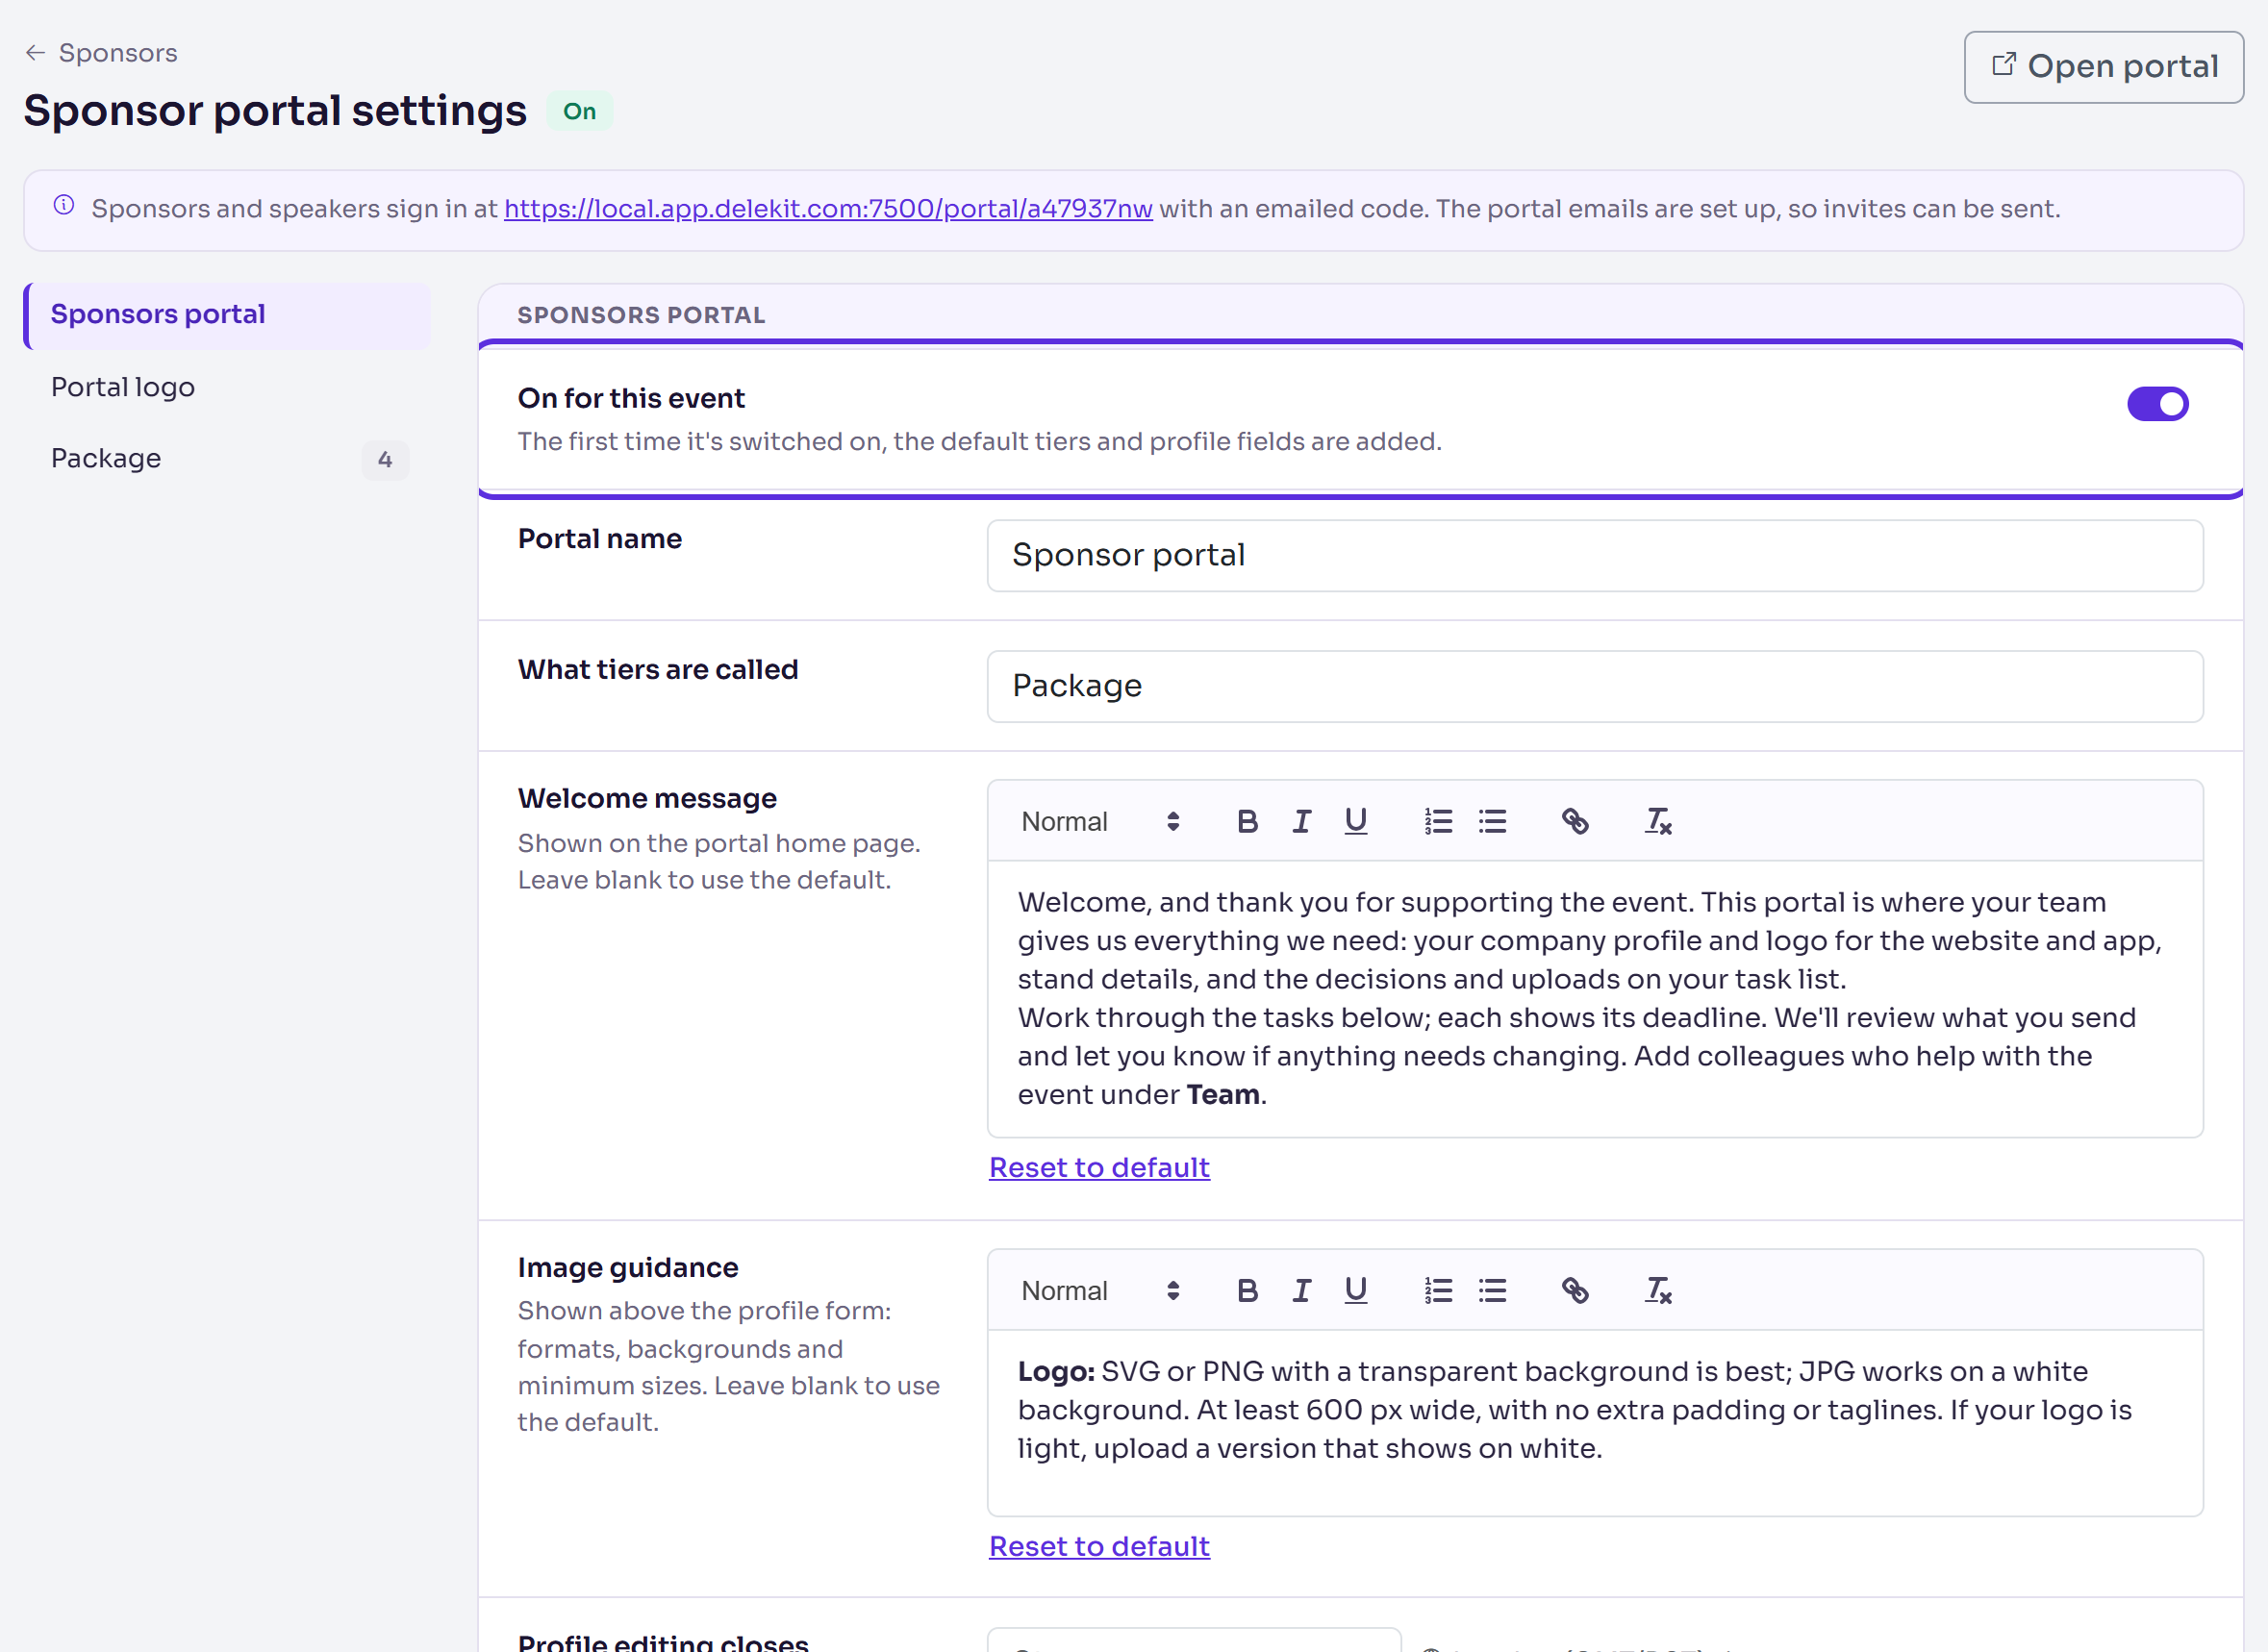
Change the Portal name if you like. It starts as Sponsor portal or Speaker portal and shows on every portal page and in the portal's emails.
In What tiers are called, keep Package (sponsors) or Speaker type (speakers), or enter your own word, such as Level.
Check the Welcome message for the portal's home page, and the Image guidance shown with the profile form. Select Reset to default to go back to Delekit's wording.
To stop sponsors or speakers changing their profiles from a set time, choose a date and time in Profile editing closes. It's in the event's time zone. Leave it empty to keep editing open.
Select Save changes. You'll see, for example, "Sponsors portal settings saved."
Set up the tiers
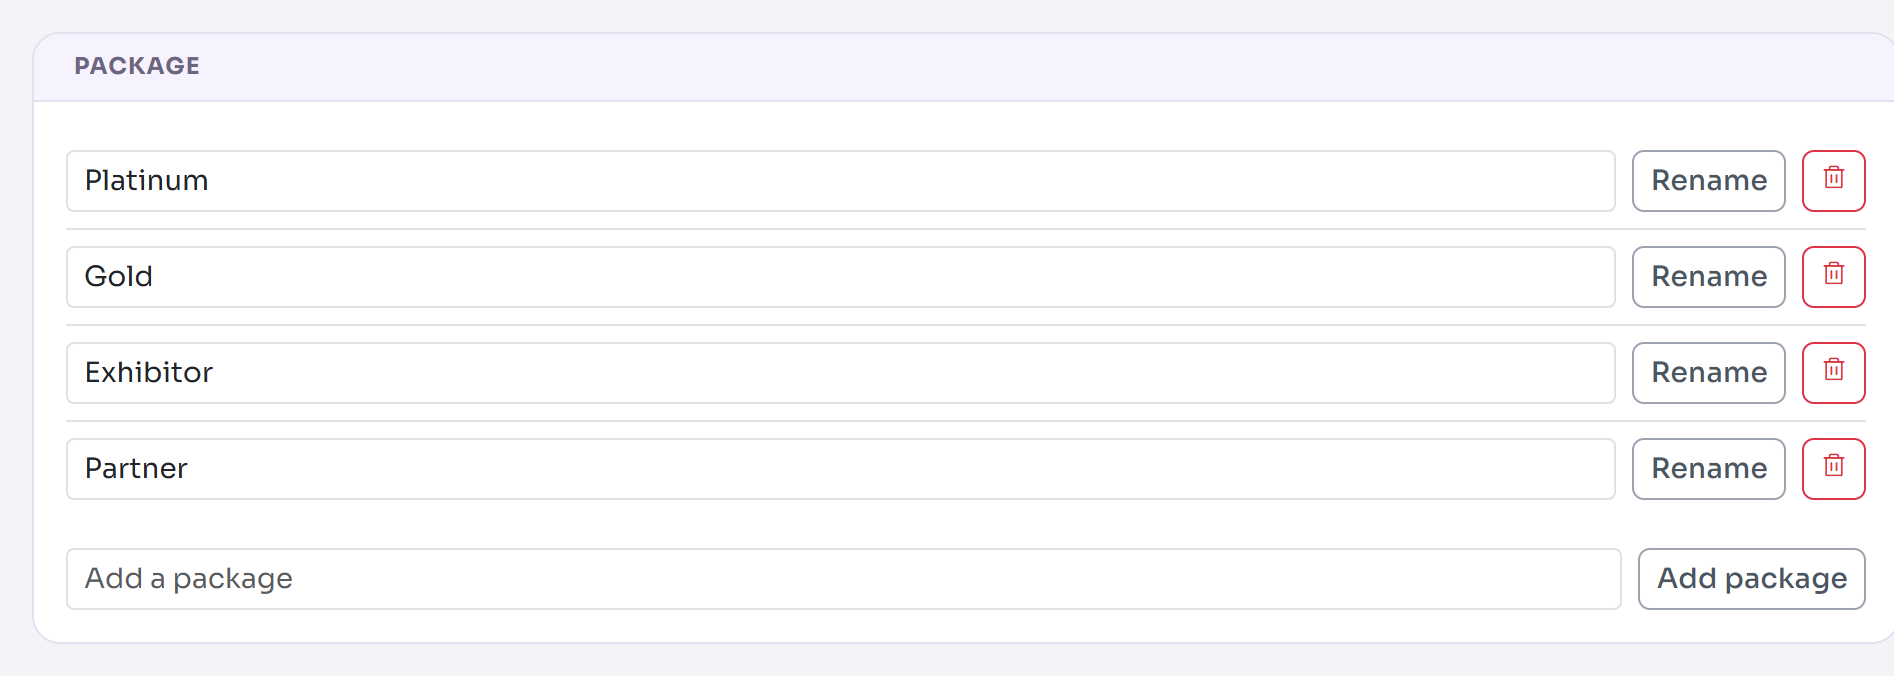
Tiers group sponsors or speakers, so that a field or task can be for some of them only. Sponsors start with Platinum, Gold, Exhibitor and Partner; speakers with Internal, Customer, Partner and Analyst. The section is named after What tiers are called.
- To rename a tier, change its name and select Rename.
- To add one, enter its name in the empty box and select Add package (or the word you chose).
- To remove one, select its bin icon, then confirm. Anyone on it is left with no tier.
Add the portal logo
The logo shows on the sign-in page and in the header of every portal page. Until you upload one, the portal uses the event website's logo, or the event name if there's none.
- In Portal logo, choose a file and select Upload logo.
- Use SVG or PNG with a transparent background, at least 200 px wide and 2 MB at most.
To go back to the website's logo, select Remove logo. The logo is shared by both portals.
What happens next
- The page shows On, and Open portal opens the portal's sign-in page in a new tab.
- The default profile fields and tiers are ready to change: see Set up profile fields.
- Sponsors and speakers sign in at the web address in the page's information box, with a code emailed to them.
- Once Profile editing closes has passed, sponsors and speakers can still see their profile but can't change it. You still can.
Check it works
Select Open portal. The sign-in page shows your event's name, dates, venue and logo.
If something isn't right
- "Invites can't be sent until the portal emails are set up": select set them up in Email templates in the information box and add the missing portal emails.
- You turned the portal off by mistake: turn On for this event back on and save. While it's off, sponsors or speakers can't get into it. Their records and answers are kept.
- "Choose a date and time for when profile editing closes." Pick both a date and a time, or clear the box.
Related articles
Still stuck? Contact Delekit support.
Was this article helpful?
That’s Great!
Thank you for your feedback
Sorry! We couldn't be helpful
Thank you for your feedback
Feedback sent
We appreciate your effort and will try to fix the article