Audience: event administrators and client administrators. Applies to: all plans.
Three sections of Edit event decide how registration works for the whole event: Registration, Payments and cancellations and Privacy and consent. They cover saving answers as people type, booking again, invoices, ticket holds, your privacy notice and a marketing opt-in. Review them before you open registration, then tick the step on your setup checklist.
Before you start
- You need to be an administrator of the event. If you can't see Edit event in the menu, ask a client administrator to give you access.
- Have your privacy notice's web address ready, and any marketing opt-in wording.
- Some options are set on each registration type instead: capacity, registration dates, blocked email domains and booking on behalf of someone else. See Create a registration type.
Choose the registration options
In the menu, select Event, then Edit event, and go to Registration.
Leave Capture partial registrations on to save answers as they're typed, so people can come back and carry on where they stopped. Turn it off to save nothing until people submit each step.
Under Booking again, choose what happens when someone books with an email that already has a booking:
- Take a new, separate booking: no code needed; each purchase is its own booking.
- Add the tickets to their existing booking (the starting choice): after a one-time code emailed to them, the new tickets join their booking.
- Don't allow it: they manage their existing booking: after a one-time code they can view or change their booking, but can't book again.
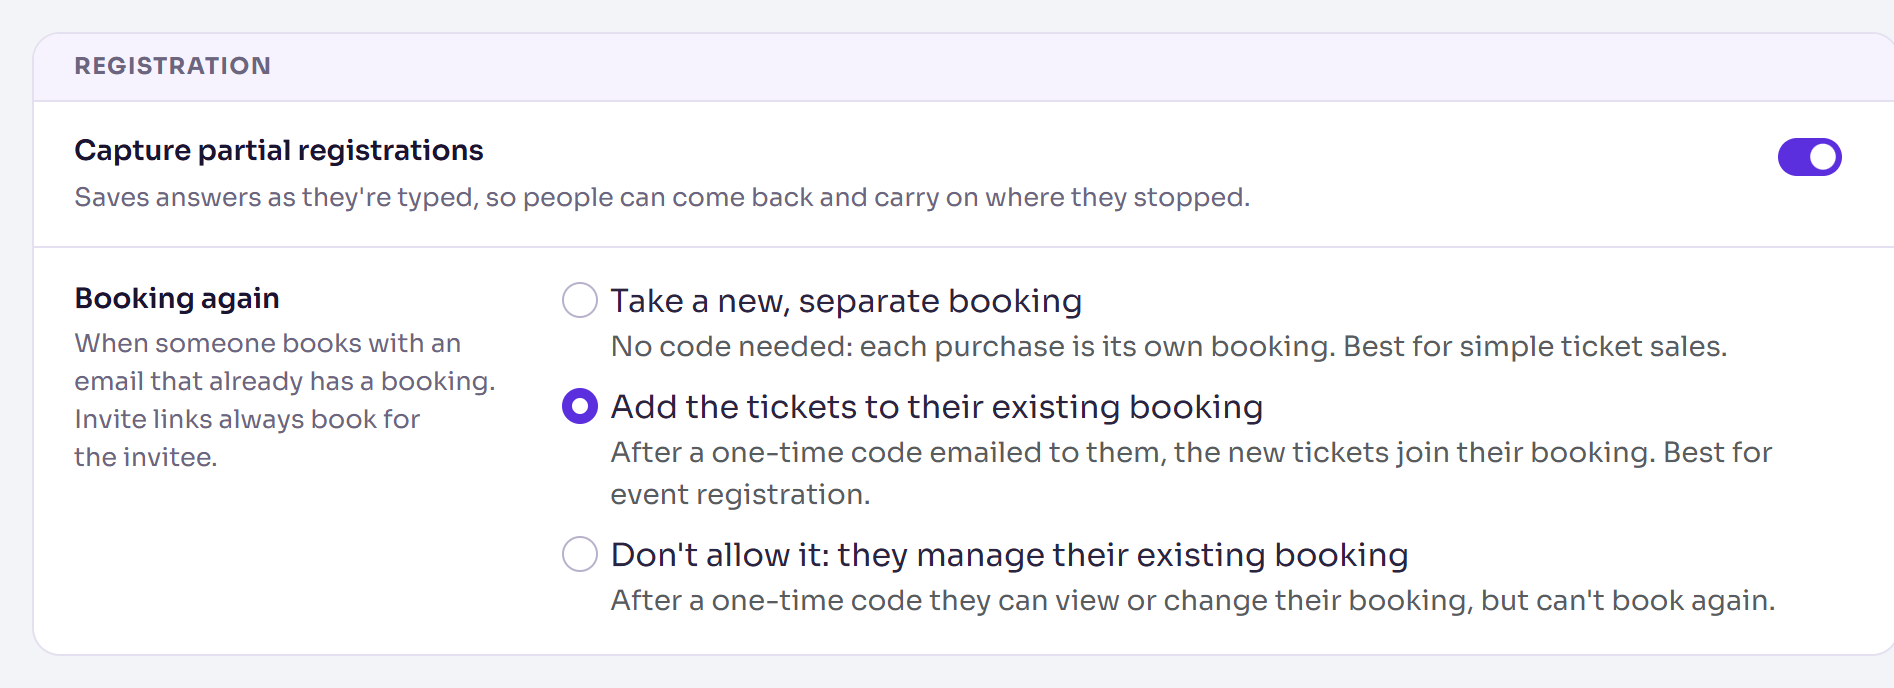
Invite links always book for the invitee's own record, whichever you choose.
Set payments, invoices and ticket holds
These matter only if your event sells tickets.
Go to Payments and cancellations. Leave Payments mode on Test (sandbox — no real money) while you set up. Switch to Live (take real payments) before you sell real tickets.
To let buyers pay by invoice instead of card, turn on Allow paying by invoice. Their registration is confirmed straight away; you invoice them and mark it paid from their Payments tab.
To hold tickets while someone checks out, turn on Hold tickets during checkout and enter Hold for (minutes), from 1 to 120, for example 15. A countdown shows on the details and payment pages. When it runs out, the order is released and the buyer starts again.
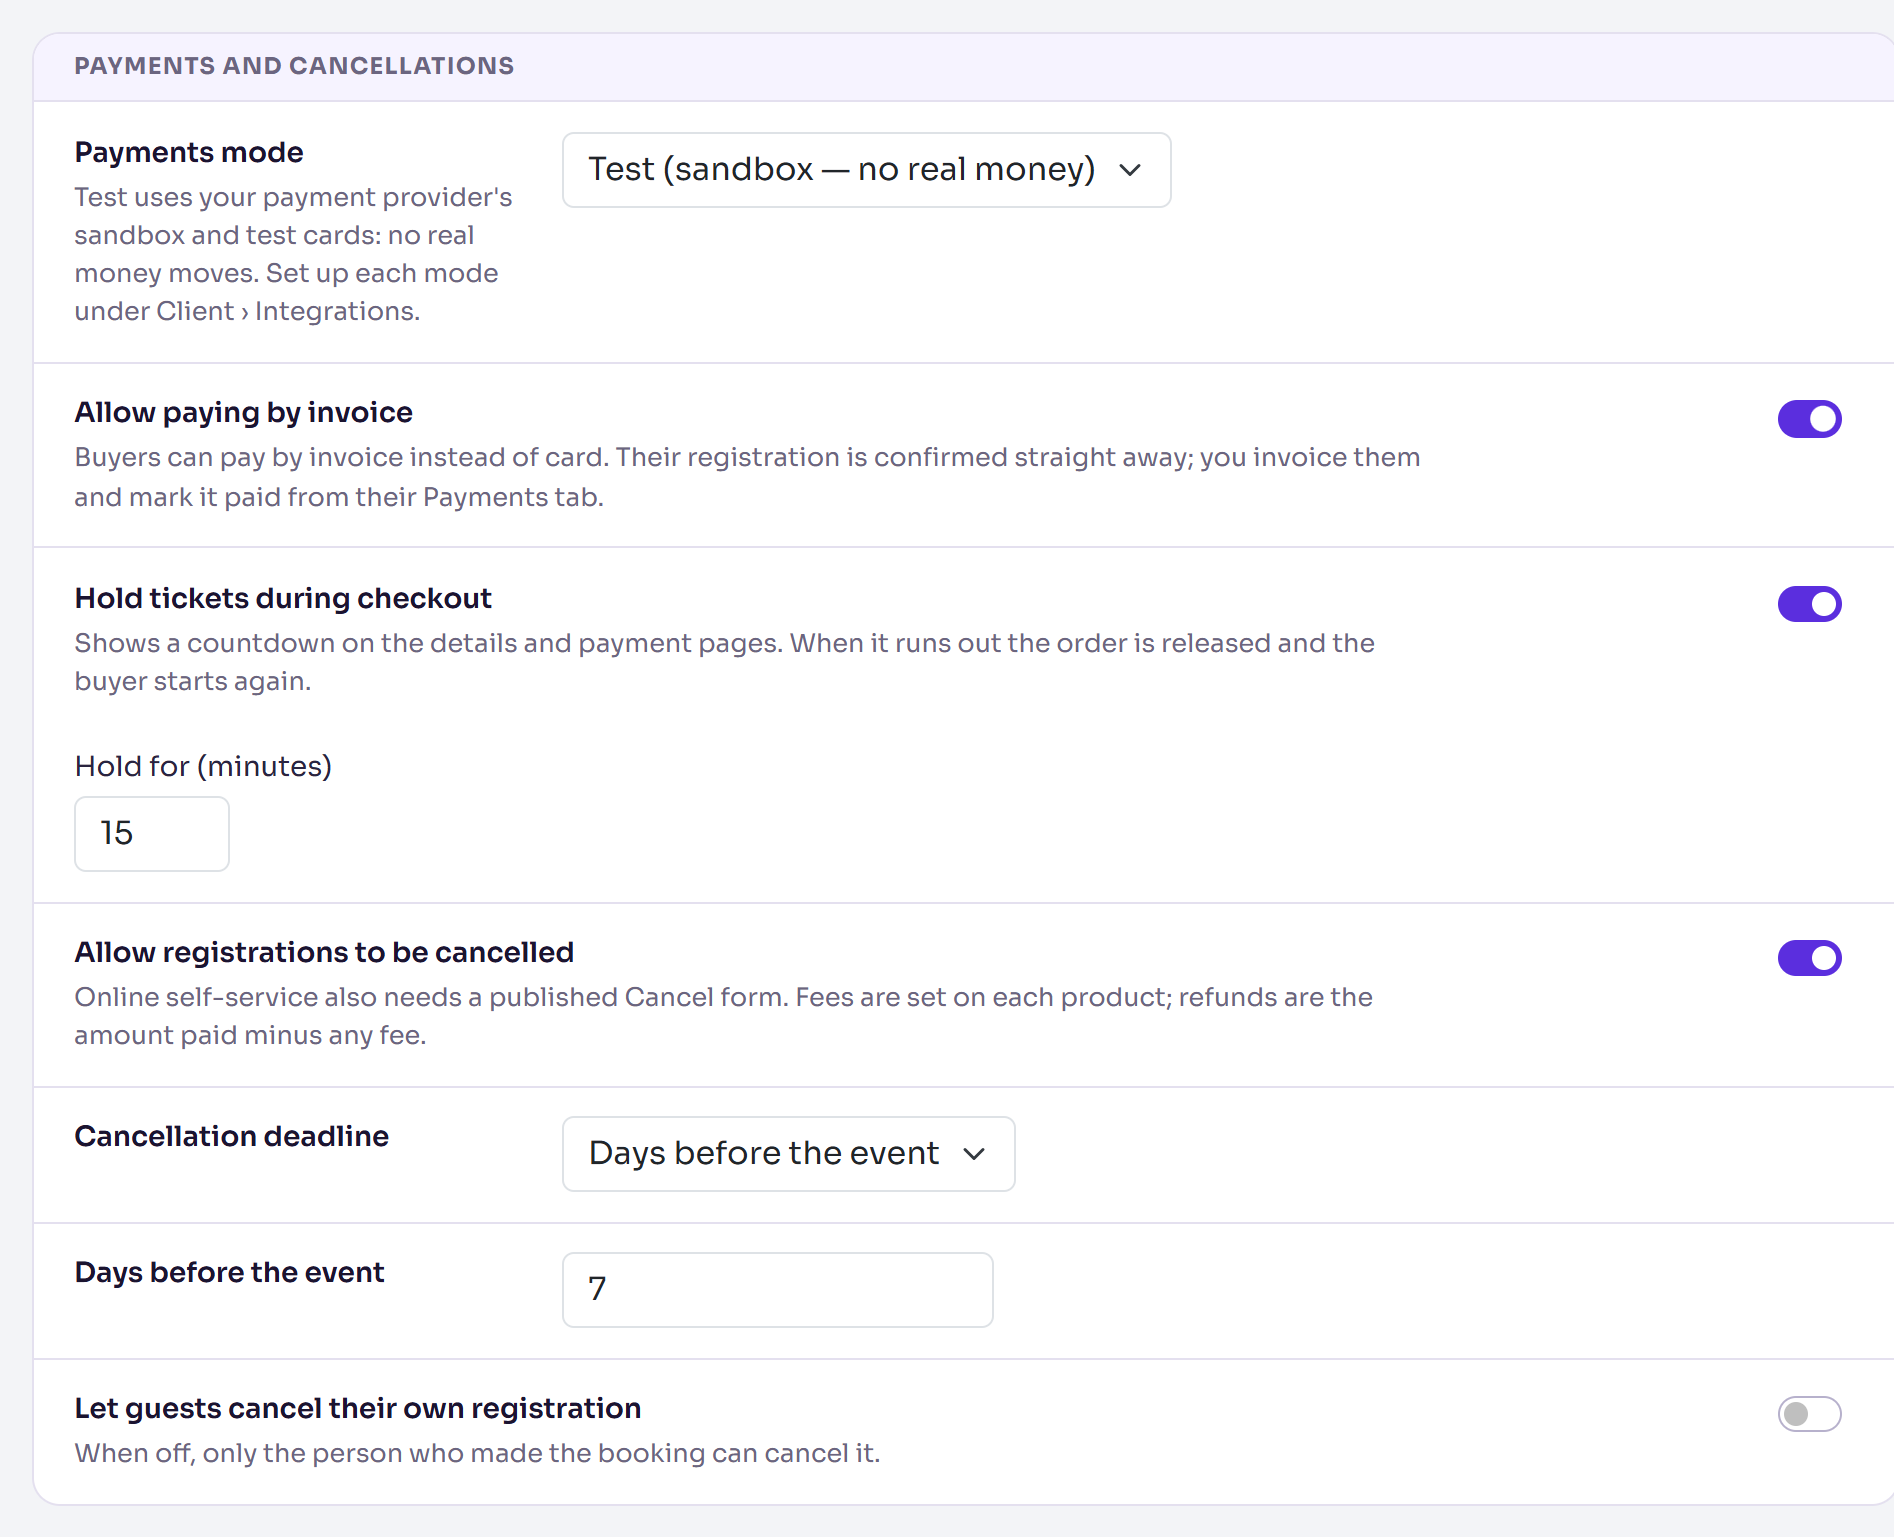
The same section sets whether and until when registrations can be cancelled: see Set a cancellation policy and fees.
Add your privacy notice and a marketing opt-in
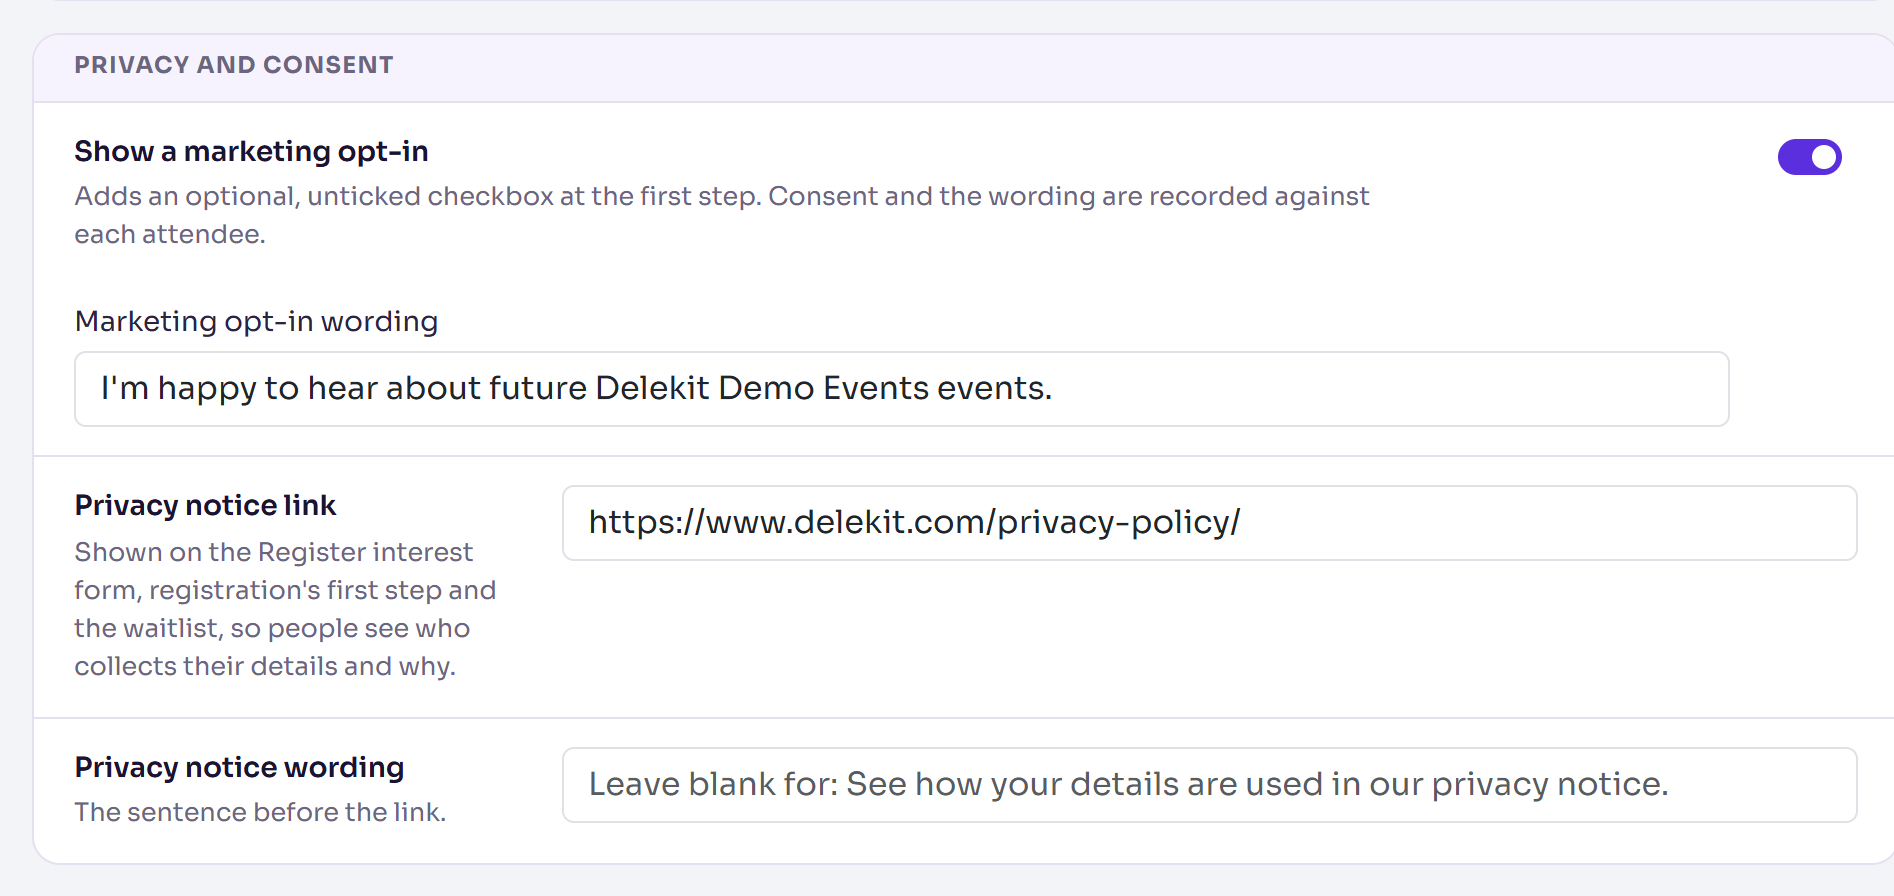
Go to Privacy and consent and enter the Privacy notice link: the full address, starting with https:// or http://. It's shown on the Register interest form, registration's first step and the waitlist.
If you like, enter the Privacy notice wording: the sentence before the link. Leave it blank for "See how your details are used in our privacy notice."
To ask for consent to marketing, turn on Show a marketing opt-in and enter the Marketing opt-in wording. It can't be saved without wording.
Select Save changes, which saves all three sections. It appears once you've changed something.
You'll see Changes saved.
Tick the step on your setup checklist
- In the menu, select Event, then Setup checklist.
- Tick Review registration & privacy options. Delekit can't detect this step for you, so you tick it yourself. It saves as soon as you tick it.
What happens next
- The options apply to the whole event straight away, but nothing is public until your registration form is published.
- The marketing opt-in is an optional, unticked checkbox at the first step. Each attendee's consent, and the wording they saw, is recorded against them.
- Payments mode only chooses test or live. Your payment provider is connected separately: see Take payments with Stripe.
Check it works
Reload Edit event and check your choices are still there. Once your registration form is published, open it: the first step shows your privacy notice link and, if you turned it on, the marketing opt-in.
If something isn't right
- "Enter the full address of your privacy notice, starting with https:// or http://": the link isn't a full web address. Copy it from your browser's address bar.
- "Enter the wording people tick to opt in.": Show a marketing opt-in is on, but Marketing opt-in wording is empty. Enter it, or turn the opt-in off.
- "Enter a hold from 1 to 120 minutes.": Hold for (minutes) is outside that range.
- You're looking for blocked email domains: they're on each registration type, under Who can book. See Accept work email addresses only.
Related articles
Still stuck? Contact Delekit support.
Was this article helpful?
That’s Great!
Thank you for your feedback
Sorry! We couldn't be helpful
Thank you for your feedback
Feedback sent
We appreciate your effort and will try to fix the article