Audience: client administrators and event administrators. Applies to: all plans.
When your event is ready, set its Status to Live in Edit event, switch its Payments mode to Live if you sell tickets, and show it in the Delekit check-in app if your team uses it. Status says where the event is: it doesn't open registration by itself, so check everything people need is published first.
Before you start
Check these, in the event's Setup checklist:
- Your registration form is published, with public access on.
- Your website is published, including its registration page.
- Your confirmation email is set up.
- You've made a test registration and marked it as a test. See Test a registration before you go live.
- If you sell tickets, your live payment account is connected. See Take payments with Stripe or Take payments with CyberSource.
People can register as soon as your form and registration page are published, whatever the event's status.
Set the event live
In the menu, select Event, then Edit event.
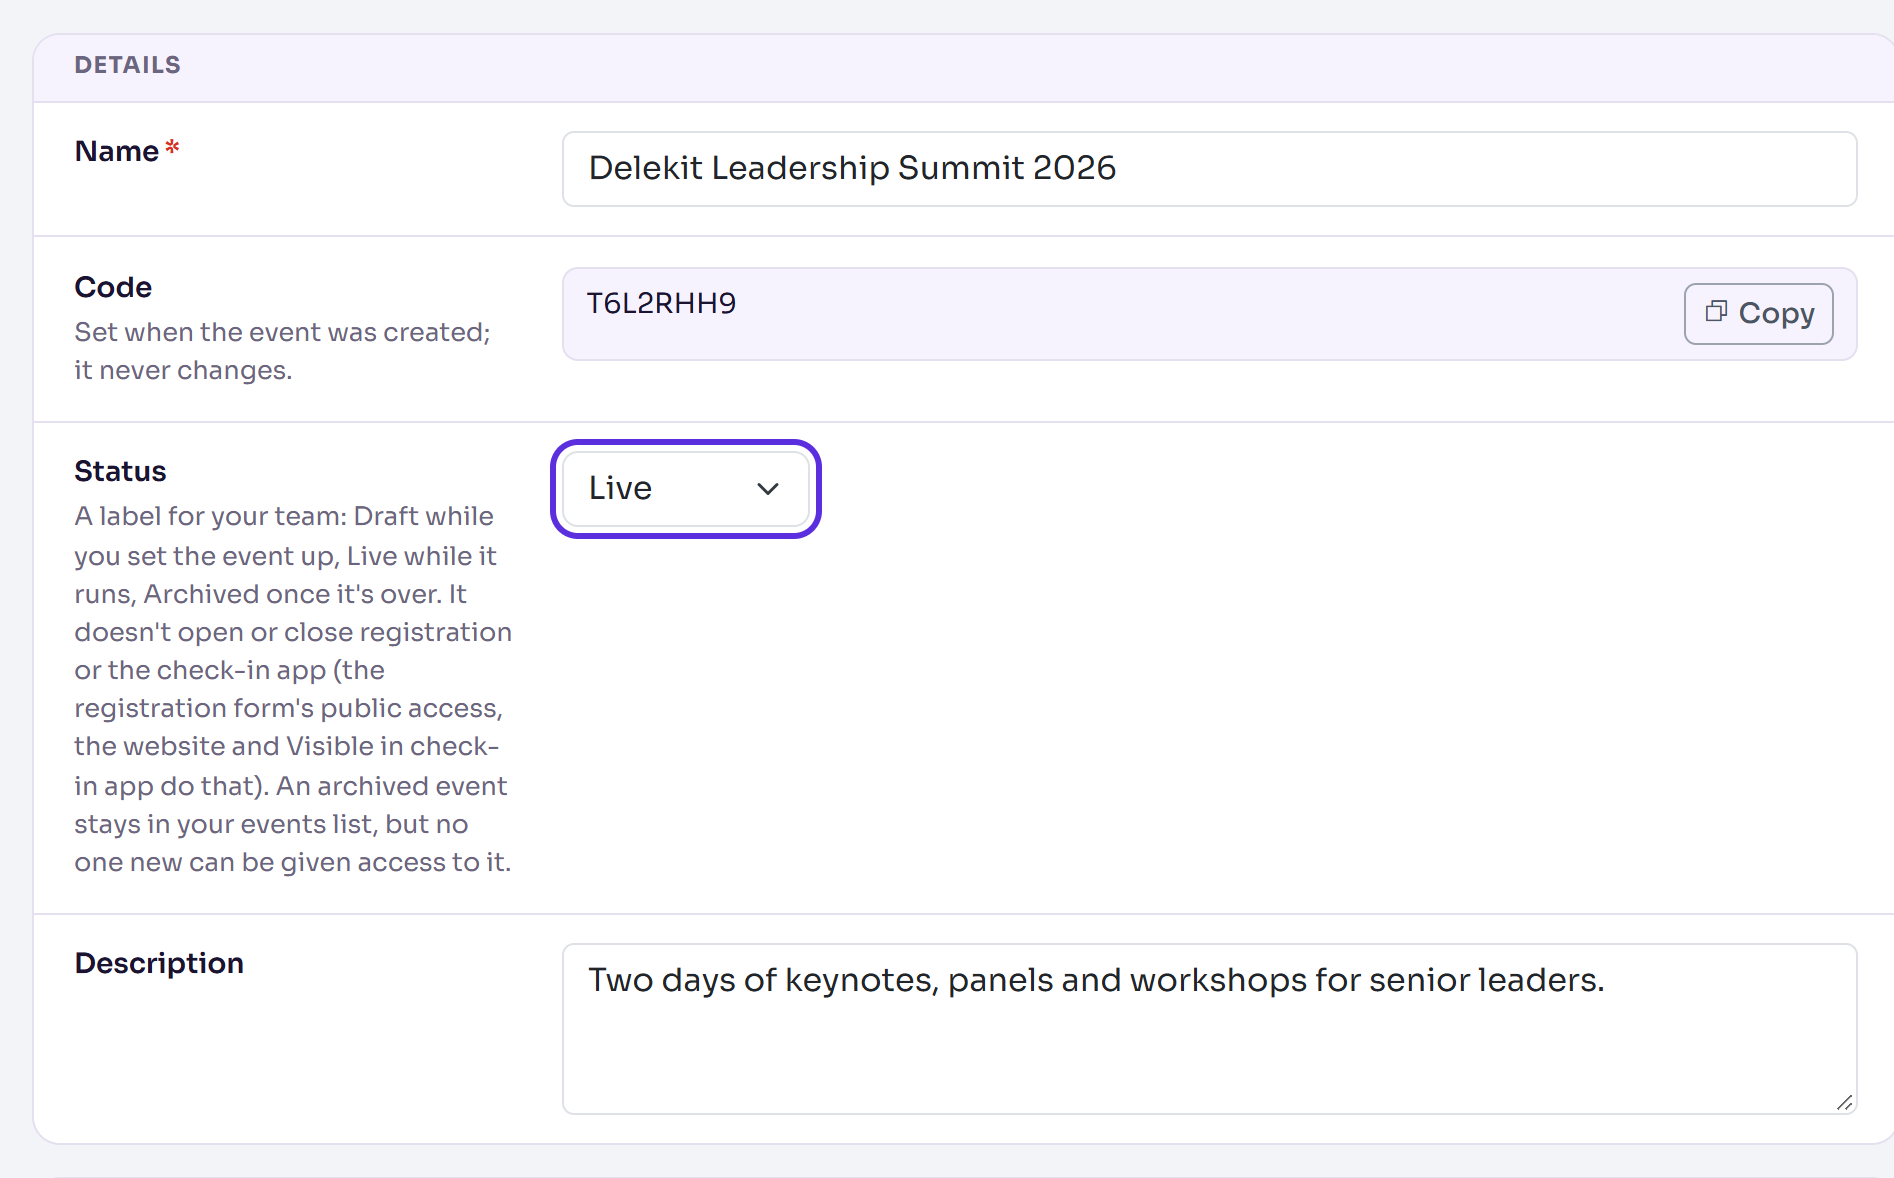
In Details, set Status to Live.
If you sell tickets, go to Payments and cancellations and set Payments mode to Live (take real payments).
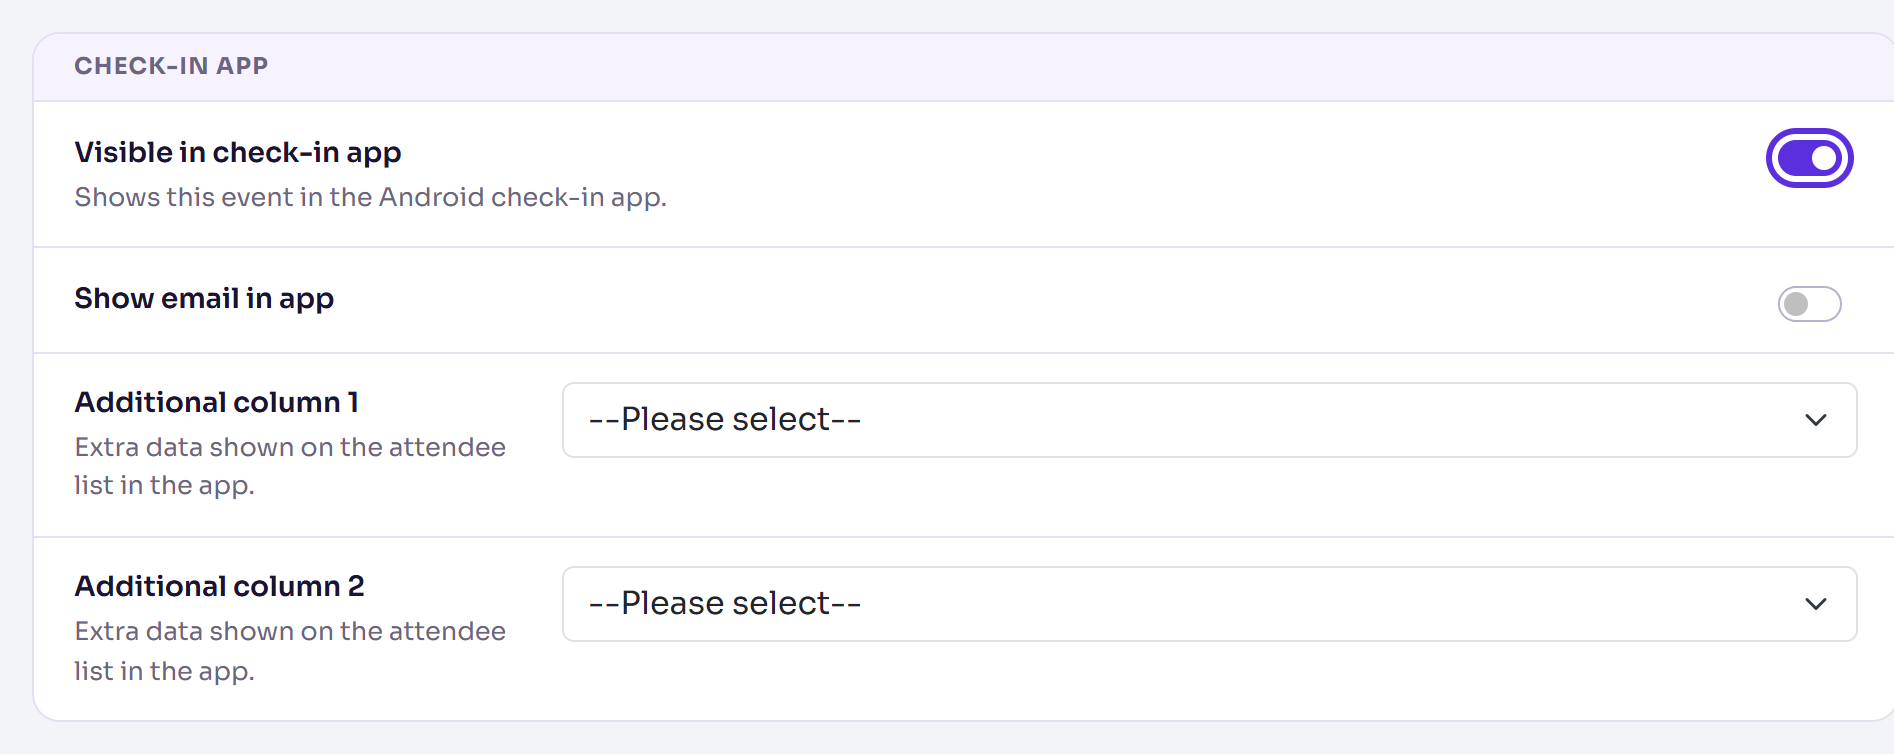
If you use the Delekit check-in app, go to Check-in app and turn on Visible in check-in app.
Select Save changes.
The three statuses
| Status | Use it when |
|---|---|
| Draft | You're setting the event up. New events start as Draft. |
| Live | The event is in use: taking registrations or running. |
| Archived | The event is over. It stays in your events list, but no one new can be given access to it. |
The status shows on the event's Overview and in Edit event, and you can filter All events by it. It doesn't show or hide the event in the check-in app: Visible in check-in app does that.
What happens next
The Overview shows Live, next to the number of days to go.

The setup checklist's Publish / go live step is ticked once the status is Live, and Show the event in the check-in app once Visible in check-in app is on.
With Payments mode on Live, buyers pay real money, and the payment page no longer shows the Test mode notice. See Switch between test and live payments.
With Visible in check-in app on, the event shows in the Android check-in app for the people who have access to it.
Nothing is emailed when you change the status.
Check it works
On the Overview, select View website, go to your registration page and start a booking. Check the tickets and prices, and that the payment page shows no Test mode notice. Leave before paying unless you want a real booking.
If something isn't right
- People can't register: the status isn't the cause. Check the form's Public access is on and its registration page is published; the setup checklist shows both.
- The Overview says payments can't be taken: your live payment account isn't connected or ready. Select Open Stripe settings, or ask a client administrator.
- Publish / go live isn't ticked: check Status is Live in Edit event › Details, and that you selected Save changes.
- You need to close public registration: turn off Public access in the form's settings. Setting the status back to Draft doesn't close it.
Related articles
- Use the setup checklist to launch your event
- Test a registration before you go live
- Switch between test and live payments
Still stuck? Contact Delekit support.
Was this article helpful?
That’s Great!
Thank you for your feedback
Sorry! We couldn't be helpful
Thank you for your feedback
Feedback sent
We appreciate your effort and will try to fix the article