Audience: client administrators and event administrators. Applies to: all plans.
The Overview is the first page you see when you open an event. It shows where the event is (its status and how many days are left), the figures that matter most (confirmed attendees, orders, revenue), anything that needs your attention, and the way into the setup checklist and the event's settings.
To open it, select the event in All events, or in the menu select Event, then Overview. See Find your events.
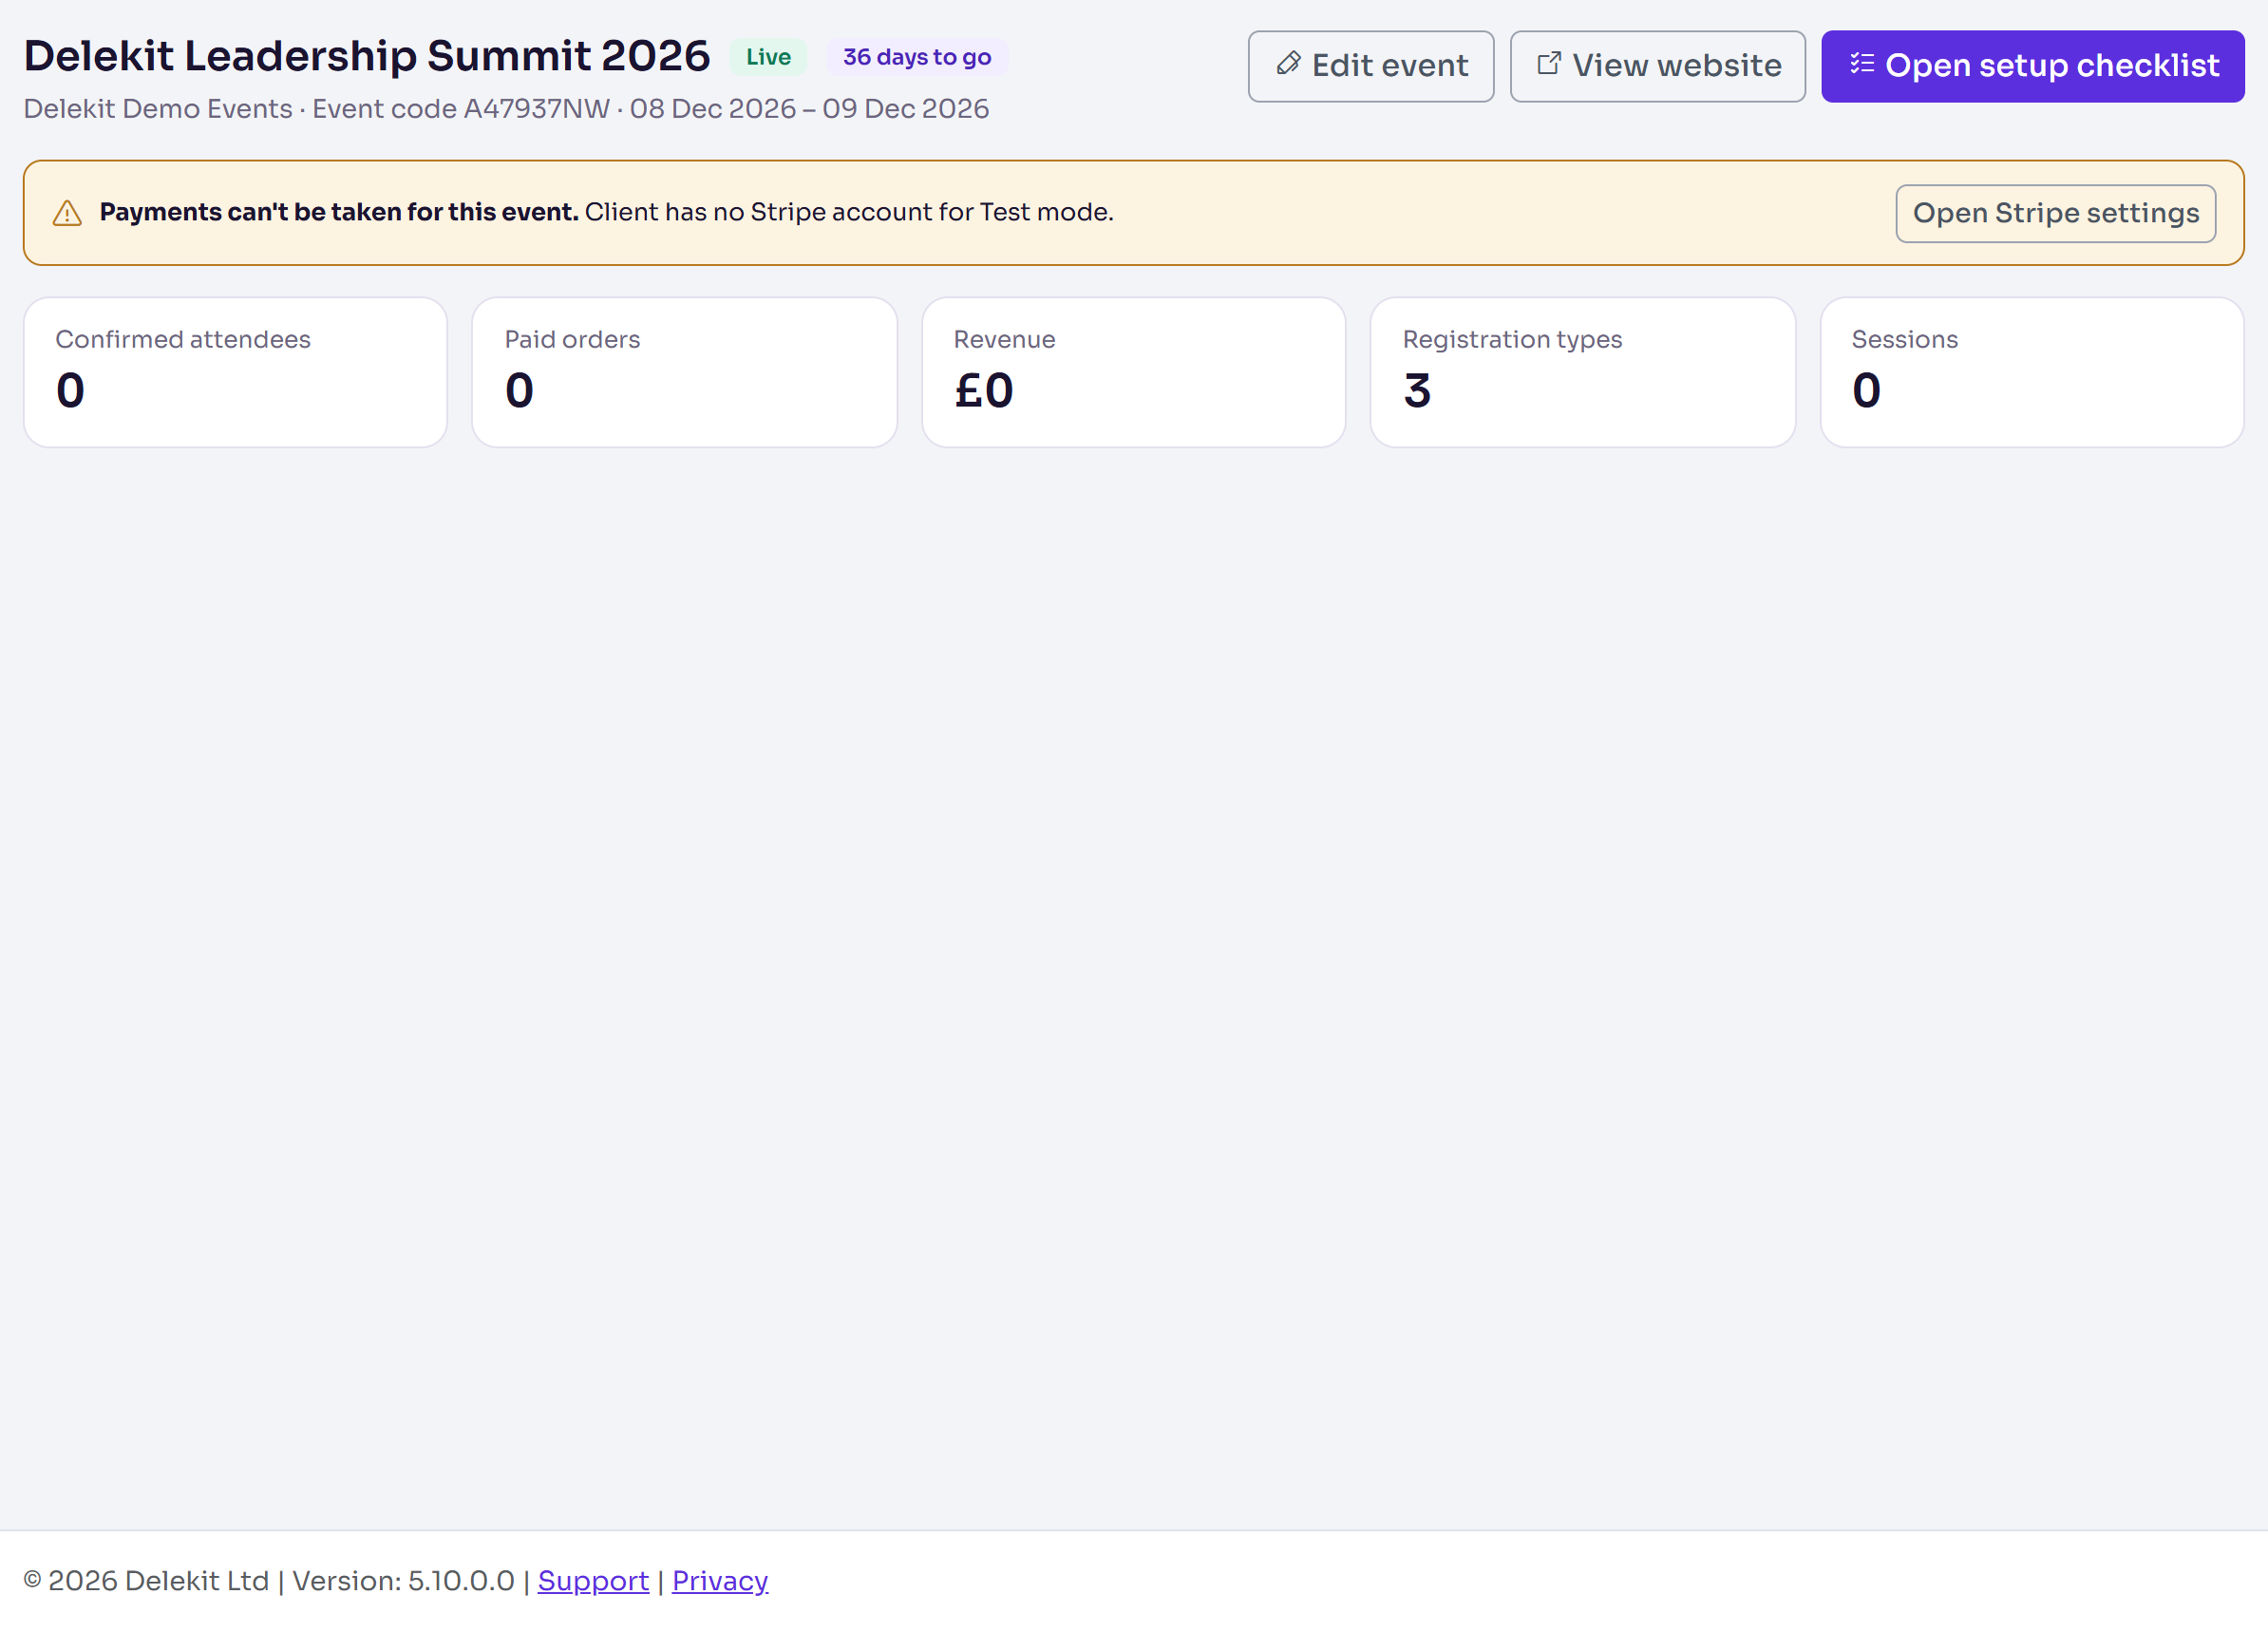
The title
The event's name, then your organisation's name, Event code with the event's code, and its dates.
- Status: Draft, Live or Archived, as set in Edit event. See Go live with your event.
- Days to go: counts down to the first day, in the event's time zone. While the event is on it reads On today for a one-day event, or Day 2 of 3 and so on for a longer one. After the last day it reads Event has taken place.
- Open setup checklist: the steps to launch registration, in order. See Use the setup checklist to launch your event.
- Edit event: the event's details and settings. See Edit an event's details.
- View website: opens your event website in a new tab. It only shows once the website is published. See Preview and publish your website.
If the event sells paid tickets through Stripe and can't take card payments, Payments can't be taken for this event. shows under the title with the reason, and Open Stripe settings opens your organisation's Stripe settings, which a client administrator manages. Fix this before people try to pay: see Take payments with Stripe.
The figures
Each tile opens the list behind it.

| Tile | What it counts | Opens |
|---|---|---|
| Confirmed attendees | Attendees whose status is Confirmed. | Attendees |
| Paid orders | Orders that have been paid. | Attendees |
| Revenue | The total of those paid orders, in whole units of each currency your tickets use (for example £4,740). | Attendees |
| Registration types | The event's registration types. | Registration types |
| Sessions | The event's sessions. | Sessions |
| Hard bounces | People whose email address doesn't exist or refuses email for good, or whose emails soft-bounced twice in a row. Correct the address or remove it. | Attendees, showing only them |
| Soft bounces | People with an email that wasn't delivered this time, for example because their mailbox was full. Two in a row count as a hard bounce. | Attendees, showing only them |
| Spam complaints | People who reported one of your emails as spam. Stop emailing them. | Attendees, showing only them |
The figures leave out test attendees and deleted attendees, so rehearsal bookings don't count. Orders booked by a test or deleted attendee are left out too. See Test a registration before you go live.
The last three tiles only appear when there's someone to review, marked To review. An order waiting for its invoice to be paid isn't a paid order until it's marked paid.
A dashboard on the overview
You can show one dashboard on the overview as well, under the figures: a set of charts and tables from your saved reports. Open the dashboard in Insights › Dashboards, then in its More actions menu select Show on event overview. Only a shared dashboard (one everyone on the event can see) with at least one widget can be shown. Open dashboard opens it in full.
Related articles
- Find your events
- Use the setup checklist to launch your event
- Edit an event's details
- Find attendees: search, filter and columns
Still stuck? Contact Delekit support.
Was this article helpful?
That’s Great!
Thank you for your feedback
Sorry! We couldn't be helpful
Thank you for your feedback
Feedback sent
We appreciate your effort and will try to fix the article